• DSC_8159

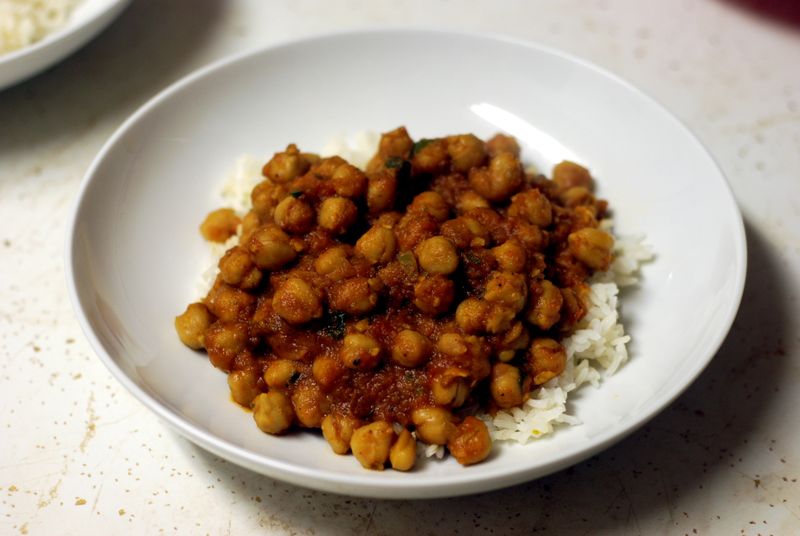
    I have been rendered mute by a chickpea. (Can you say mute when you mean your ability to type?) To be more specific, a jumbo can of chickpeas simmered for close to an hour in a thick, spicy tomato sauce spiked with jalapeño and lemon juice and finished with fresh cilantro (two nights in a row, people – can you believe it?). Mute, I tell you. All I can think to tell you is that I loved this dish, I loved it, and I will make it again and again until the end of time. Who cares that the only Indian take-out place near us stinks? I will never need them again. Who cares that times are tough and money is short? This recipe costs barely anything to make. Who cares that the world has too many people that eat too much meat? I would gladly never eat meat again.

    Chana punjabi, I think I love you.

    This recipe comes from Heather Carlucci-Rodriguez, who runs darling little Lassi in the West Village and has a way with Indian food that makes me weak in the knees. It is simple: you make a quick tomato sauce, with ginger and garlic and jalapeño and warm spices (garam masala, you make my heart sing), then puree it into a creamy mass. Into that go the drained, rinsed chickpeas (canned! hurrah!) which stew and stew in their sticky, gorgeous sauce while you do other things, like daydream about moving to India. In the last 20 minutes of cooking, bang a pot of rice on the stove and you're pretty much set for the best dinner you'll have all week. (Aren't I presumptuous? What do I know about what you've been eating?)

    Apparently, this is meant to serve four people. I answer that by dissolving into bright peals of laughter. Four? Are you serious? Barely even two. We had to settle for a salad after we scraped the pot clean like a pair of Dickensian orphans, and let me tell you that never has a salad been so resented. Next time I'm doubling this recipe. In fact, you should go ahead right now and double the ingredients you'll need to buy to make this yourself – don't even bother making just one batch.

    Chana Punjabi
    Serves 2

    1 tablespoon canola oil or other vegetable oil
    1 medium onion, chopped
    2 teaspoons minced garlic
    1 teaspoon minced ginger
    1 small Thai bird chili, chopped or 1 jalapeño, seeded and chopped
    2 large tomatoes, chopped or a 14-ounce can of diced tomatoes, drained
    1 1/2 teaspoons paprika
    1 teaspoon salt, or as needed
    1 teaspoon ground coriander
    1/2 teaspoon garam masala
    1/4 teaspoon turmeric
    1 teaspoon freshly squeezed lemon juice
    2 15-ounce cans chickpeas, drained
    2 tablespoons minced cilantro
    Cooked rice for serving (optional)

    1. In a medium saucepan over medium-low heat, heat oil and add onion. Sauté until translucent and soft, about 5 minutes. Add garlic, ginger and chili, and sauté until soft and fragrant, about 3 minutes. Add tomatoes and 1/4 cup water. Cover and cook until tomatoes are very soft, about 5 minutes, then remove from heat.

    2. Purée mixture in blender or food processor until smooth. Return to pan and place over medium heat. Add paprika, 1 teaspoon salt, coriander, the garam masala, turmeric and lemon juice. Add chickpeas and bring to a boil, then reduce heat to low.

    3. Cover and simmer until sauce is thick and chickpeas are soft, 45 minutes to 1 hour. Stir pan about every 10 minutes, adding water as needed (up to 1 1/2 cups) to prevent burning. When ready to serve, sauce should be thick. If necessary, uncover pan and allow sauce to reduce for a few minutes, stirring frequently, until desired consistency. Stir in cilantro, adjust salt as needed and serve with cooked rice, if desired.
  • DSC_8136

    I don't know what it was like where you were on Saturday, but here – just a week after a snowstorm closed schools and streets, and dumped close to a foot of snow on some parts of the (sub)urban area – the sun came out, the snow melted, and my heart bloomed in the warmth of the air.

    How is it that every spring, like clockwork, seems to surprise us all, captivate us with its newness and glory? How do we manage not to lose that reliable sense of wonder at the first shoots we spy pushing through the crumbly earth? The first real rays that warm our bones as we stroll down streets, pushing scarves once-essential off our suddenly sticky-hot necks? The relief we feel each year that the cold and the snow is just a passing thing, something to endure; that we'll be rewarded in the end for our patience with a rebirth of ourselves, our parks, our neighbors, our world?

    Spring, oh, spring.

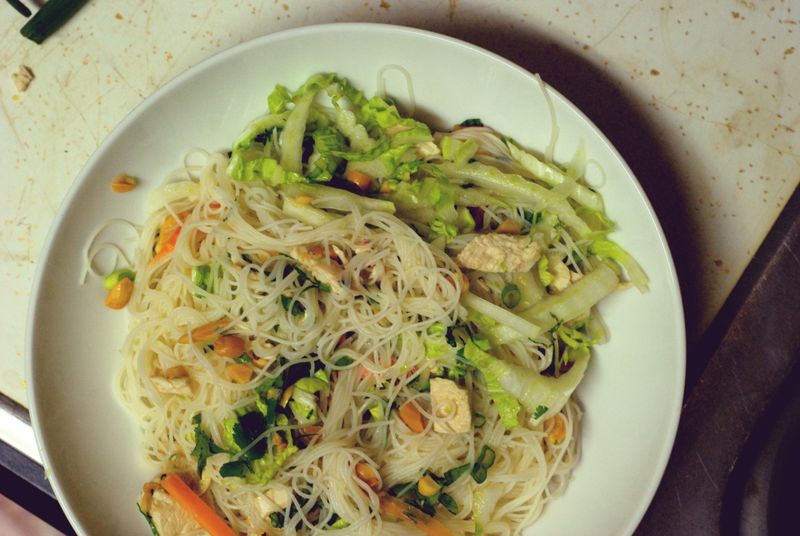
    In honor of its valiant efforts to blow the cobwebs out of my head, I made a springy, herbal Vietnamese rice noodle salad for dinner, first spied here, and originally from here. I have a severe weakness for Vietnamese rice noodles and fish sauce. When I first moved to New York, I lived near a wonderful little Vietnamese restaurant on the Upper West Side and although I'd had my fair share of pho in college and of nem in Paris, I dare say that I didn't really fall in love until I was able to eat a plate of bun every week, the cold, silky noodles slipping gently down my throat, the heady mixture of fish sauce and lime and palm sugar making the juices run together in my mouth.

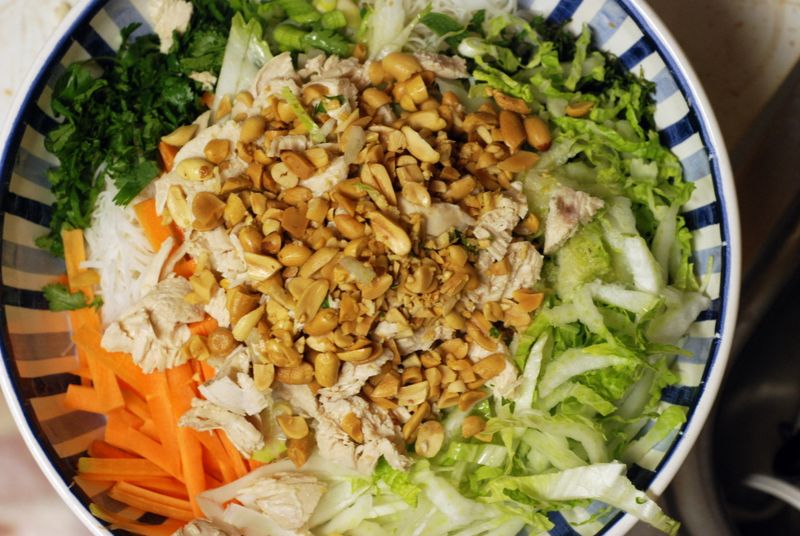
    This salad is a spring-addled cook's dream. All you have to do is spend some time at your cutting board, deftly slicing cabbage and peeled carrots and washed scallions into neat little strips. In the meantime, you can poach a chicken breast or two. (So much easier than roasting or grilling – just bring a pot of water to boil, add some salt, a garlic clove, and a slice or two of fresh ginger, then slip in the chicken breasts and let cook, at a bare simmer, for about 15 minutes. Drain, cool, shred, eat.) In a moment or two, you can whizz together the dressing (so good that I briefly contemplated bottling the leftovers to swig surreptitiously, like a good bourbon from a flask) and "cook" the noodles. The rest is just a matter of assembly. Do you make neat little piles of the vegetables and herbs and toppings? Do you bang everything all together, willy nilly? It's up to you.

    You know it doesn't really matter, of course. What matters is what happens when you put that first forkful in your mouth: sweet, spicy, sour, slithery, crunchy, this salad is a joy to eat. It's fresh and cooling and the herbs play off each other just so, the fish sauce giving the salad this lovely, moody depth. I added mint to the original recipe, because mint simply seemed to belong there and wouldn't you know, we polished off the whole thing – leftovers meant for lunch this week! – in one go. Sigh. I don't blame us. It was just so good.

    DSC_8141

    Molly renamed this Almost-Summer Rice Noodle Salad and so it's only natural that in my mind, now, it will always be called Almost-Spring Rice Noodle Salad. Because, of course, this weekend ended and a rather nasty cold rain moved in and I spent the day drinking hot tea and shivering in my inexplicably cold office, my toes cramped in their wet shoes. What I'm trying to say is, we're not quite there yet. But the other night, with the windows open and the loamy scent of new earth in the air and a salad fit for warm evenings and balcony dinners, I let myself believe that spring was right around the corner.

    Rice Noodle Salad
    Serves 4

    1 pound thin rice noodles
    3 large cloves garlic, peeled
    ½ cup Thai or Vietnamese fish sauce
    2/3 cup water
    ½ cup fresh lime juice
    ½ cup rice vinegar
    ¼ to ½ cup brown sugar, to taste
    1 to 2 hot chilies (red bird, jalapeño, or serrano), seeded and minced, or to taste
    6 to 8 leaves Napa cabbage, thinly sliced
    8 scallions, thinly sliced
    1 large carrot, peeled and shredded or julienned
    1/4 cup mint leaves, sliced
    1/4 cup tightly packed cilantro leaves, coarsely chopped
    2 grilled or roasted chicken breasts, shredded
    1 cup roasted peanuts, coarsely chopped

    1. Bring a large pot of water to a boil. Add the rice noodles, stir gently, then turn off the heat, cover and let sit for 3 to 4 minutes. Drain the noodles in a colander, rinse with cold water, and place them in a large bowl.

    2. Place the garlic cloves in the bowl of a food processor, and pulse to mince. Add the fish sauce, water, lime juice, rice wine vinegar, brown sugar, and chilies, and purée them together. (The mixture will get quite frothy.) Taste, and if necessary, add more chile and adjust the sweet/tart balance.

    3. Toss the vegetables, herbs, chicken and peanuts with the noodles, and pour dressing to taste over the salad. Toss well and serve. (Save any remaining dressing in the fridge – I used the leftovers plus a bit of olive oil to dress a big bowl of baby arugula mixed with a diced avocado and some cold poached chicken breast for dinner the next night.)

  • DSC_7915

    I was a dud, an absolute dud, at math and science in school. I can remember just a few things, the way my 6th grade math teacher's nicotine-stained teeth looked, the way my chemistry teacher in 9th grade tried to teach us about electrical currents by sticking two razor blades connected to a generator into a raw hot dog, the shiny red sports car that my 12th grade physics teacher drove to school every day, so incongruously matched to his balding head and waddling gait. I was much better in English class, in French, in theater practice and in the library, with words and books and song. So the amount of pleasure I get from the simple forms of chemistry I practice today, armed with packets of yeast, sprinklings of sugar, and lashings of warm water is always and again a bit of a mystery.

    But, truly, there is little as satisfying in the kitchen as a well-risen yeast dough. It can be topped only by the glory of a burnished loaf emerging from the oven, I think. And perhaps topping that is the first slice after the loaf has cooled. Yes, all in all, I'd say, bread baking is one of the most rewarding kitchen acts.

    And as nice as no-knead bread may be, there is nothing like spending time at the kitchen counter kneading bread, slapping it down, feeling it swell and grow smooth. You can be in a trance, thinking about everything else going on in your life, or focused simply on the act of kneading and it will, just like a boxing class or a very good yoga session, release some of that nasty tension that always ends up building right between your shoulder blades.

    DSC_7922

    I found this recipe from an article Florence Fabricant wrote all the way back in 1987 about maple syrup. I'd recently received a package of maple syrup products (including, oh my goodness, creamed maple syrup which looks like honey and is divine and a bag of maple sugar that is a pale, creamy brown and smells just exactly what I imagine a sylvan field in heaven to smell like, which is to say, sweet and toasty and totally bewitching) and was wondering how to use them up. I would have nearly skipped over the recipe for maple bread, if my eye hadn't been caught by Florence's description of what to do with it, once baked.

    Let's see if you're able to resist this: cut thick slices of freshly baked maple white bread, sprinkle each slice heavily with that miraculous maple sugar, then cover the slices with a heady mixture of whipped cream and sour cream. Oh, and then call that baby tartine au sucre.

    Thud.

    I mean, seriously? Are any of you still standing? I just fell down all over again. All I remember from my trip to Quebec 15 years ago, foodwise, was the gravy-soaked poutine. No offense to any poutine fans, but I think I'd prefer tartine au sucre over poutine Any. Day. Of. The. Week. (Note to self: Book travel to Montréal, stat.)

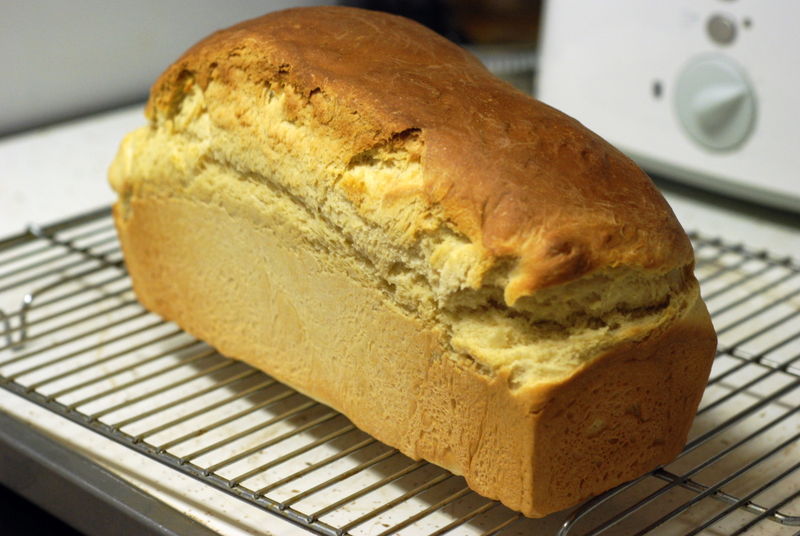
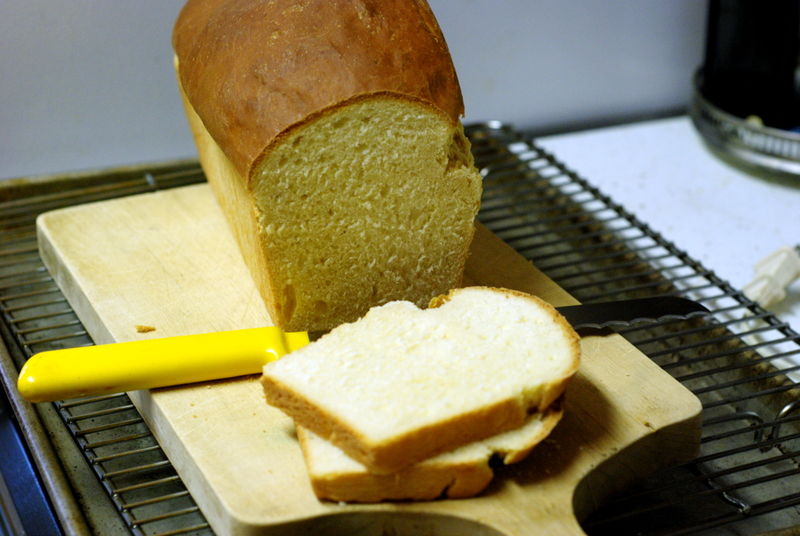
    The nice thing is that this bread is wonderful even without all that glorious whipped cream-maple sugar business (although, seriously, I might need to start a Maple Sugar Appreciation Society. Any takers? Also, any suggestions for other things to make with my precious sack of the stuff?). It is a joy to bake, the yeast proofing happily in its sweet water bath, the dough puffing up agreeably, both in the proofing process and in the oven, its browned and fragrant top literally towering over the top of the bread tin. It makes your house smell like the most archetypically cozy home ever and if you bake it just before bedtime, you'll have fresh bread to wake up to, the only problem being that the anticipation for breakfast is then so great it might mess with your sleep quality.

    The bread toasts up beautifully and is delicious buttered and honeyed, which is good, because tartine au sucre does seem like a rather indulgent way to eat the whole loaf, though goodness knows I wouldn't judge you if that's how you decided to work through it. In fact, I'd rather expect you to call me up and invite me over so you could at least have a companion in your gluttony. One really shouldn't to suffer this kind of thing alone. I'd be doing you a favor, really. That's it, a favor. Okay? Pretty please?

    Maple White Bread
    Makes 1 large loaf

    1 cup milk
    1/4 cup maple syrup
    4 tablespoons sweet butter
    1 teaspoon salt
    1 package active dry yeast
    1/4 cup warm water (about 110 degrees)
    1 teaspoon sugar or maple sugar
    1 egg beaten
    4 cups (approximately) unbleached all-purpose flour

    1. Place milk, maple syrup, butter and salt in a saucepan and scald. Allow to cool to lukewarm.

    2. Dissolve yeast in warm water along with the sugar. Set aside for five minutes until the mixture becomes frothy. Transfer the milk mixture to a large bowl, stir in the yeast mixture and then stir in the egg.

    3. Stir in two cups of the flour. Then add more flour about one-half cup at a time until a ball of dough forms. Turn the dough out onto a floured board and knead for about eight minutes until the dough is smooth and elastic, adding more flour as necessary to keep the dough from sticking. Place dough in an oiled bowl, turn the dough to oil on all sides, cover lightly and set aside to rise until doubled, about an hour.

    4. Punch down dough, turn onto a lightly floured board and knead for another minute or so. Roll dough into a rectangle about nine by 12 inches, then roll tightly, jellyroll fashion, starting from the narrow side. Pinch the seam and ends closed. Fit the dough seam side down into a greased 9-by-5-by-3-inch baking pan.

    5. Cover and set in a warm place to rise until doubled, about 45 minutes.

    6. Preheat oven to 350 degrees. Place bread in the oven and bake about 45 minutes, until well browned. Remove from pan and allow to cool freely on a rack before slicing.

  • DSC_7820

    I think it's time to admit a simple truth to myself. I'm just not that into pecan pie. Either that, or I keep picking the wrong recipes. Sigh.

    Okay, I went the lazy route. I chose a recipe in which you don't even need to dirty a bowl. Come on! Wouldn't you have done the same? Plus it had apple cider and brandy in it, two things that always make my ears perk up.

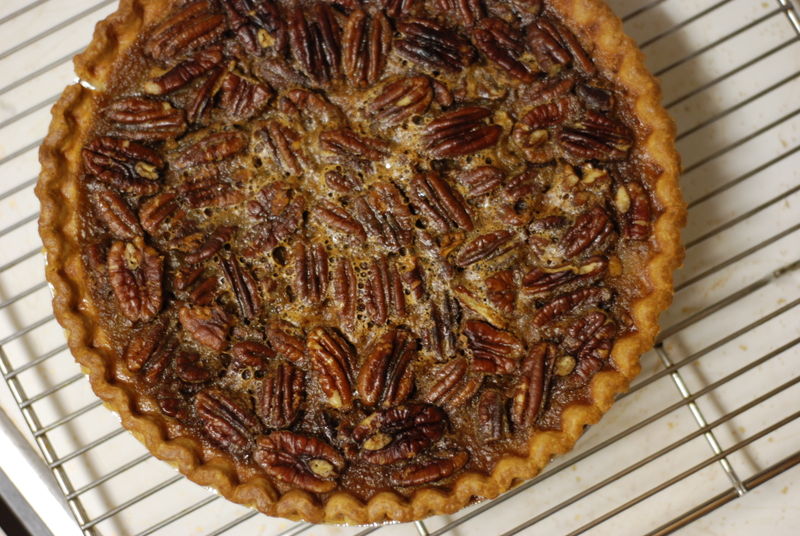
    It looked quite pretty and the people eating it were polite enough – no leftovers, you know – but I couldn't help but find it too squishy, too sweet and altogether rather insipid. You know something isn't right when you'd rather just eat a plate of whipped cream. Mmmm.

    Cider Pecan Tart
    Serves 8

    2 1/2 cups fresh apple cider
    4 tablespoons soft butter
    2/3 cup light brown sugar
    1 teaspoon vanilla extract
    2 tablespoons Calvados, bourbon or brandy
    1/4 teaspoon ground nutmeg
    3 eggs, lightly beaten
    Pastry for 8- or 9-inch tart or pie
    1 1/2 cups pecan halves, lightly toasted
    1 cup heavy cream, whipped (optional)

    1. Preheat oven to 350 degrees. Place the cider in a saucepan and cook over high heat until reduced to 1 cup. Remove from heat and stir in butter and brown sugar until dissolved. Then stir in spirits, vanilla, nutmeg and eggs.

    2. Roll out pastry and line straight-sided tart pan with it. Pie pan can be used, too. Spread pecans over pastry.

    3. Pour in cider mixture. Bake 35 to 40 minutes, until surface is fairly firm and pastry is golden. Allow to cool to room temperature. Serve with whipped cream, if desired.

  • DSC_7585

    Last weekend:

    I ate my first guanabana (finally I know what a soursop is) and it was glorious;

    Saw Orion's scabbard for the first time and the Southern Cross;

    Heard my first screech owl (more of a cooer than a screecher, it turns out);

    Picked a grapefruit off a tree for the first time, and had it for breakfast;

    And finally tried requesón, something Joanie had promised to teach me to make for ages.

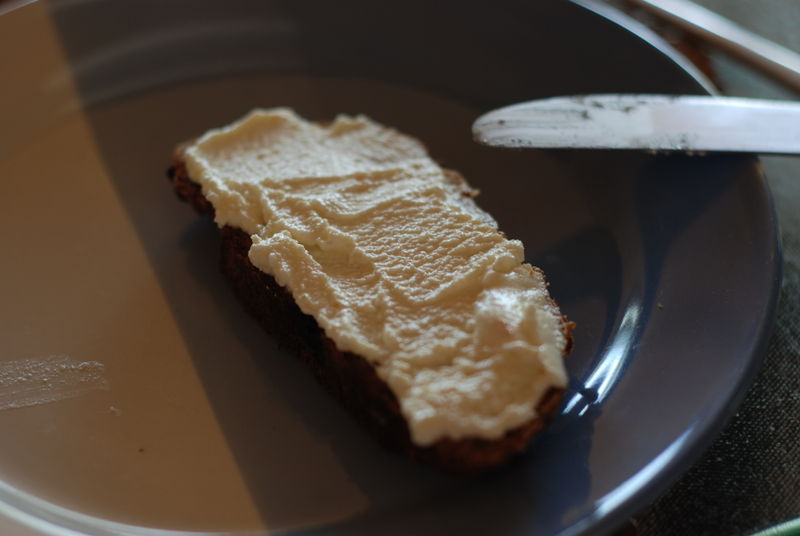
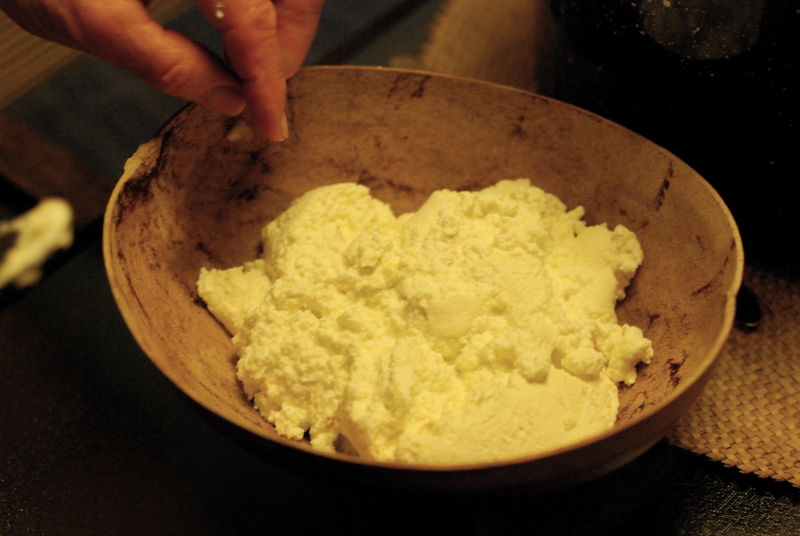
    Those of you who think etymologically probably have already guessed that requesón is a kissing cousin of ricotta. And I suppose you could say that both are fresh cheeses made of milk. But requesón has a tropical character, curdled with Seville orange juice (also known as bitter or sour orange) and speckled with orange peel, its curds loose and creamy. Puerto Ricans eat requesón on crackers with guava paste, which is delicious, but I liked it even better spread on hearty whole-grain bread, topped with orange marmalade, the chunks of orange peel glistening in the faintly bitter jelly.

    DSC_7521

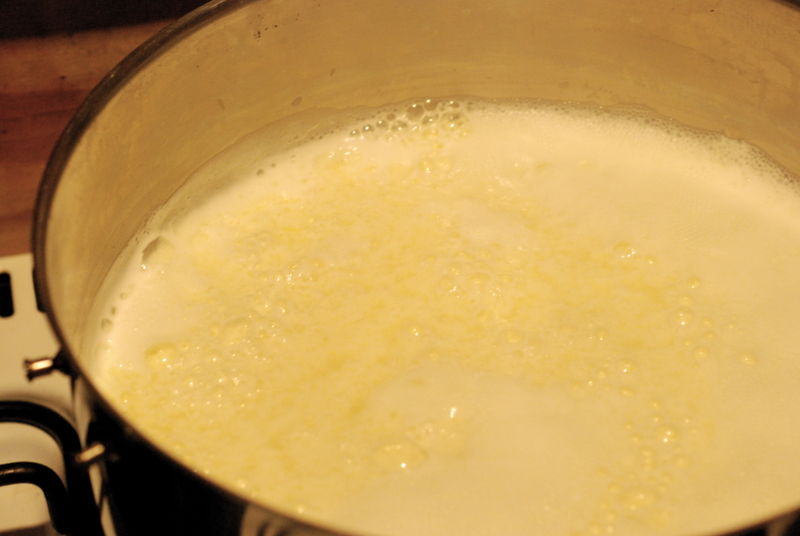
    It's easy as can be – the hardest part is sourcing Seville oranges for juicing. (Alejandra says to look in Latin markets and grocers for them, under naranja agria, and if you're not able to find them, to use a mixture of lemon and orange juice – grapefruit is too floral.) You simply scald whole milk in a pot, then turn off the heat and add a cup of Seville orange juice and the grated peel of a regular orange (this can be to taste, you could just do the peel of half an orange). Then you pour the curdling, hot milk through a cheesecloth draped over an empty pot. The whey drains off while the requesón slowly appears, firming up as more and more liquid drips off.

    DSC_7528

    Some people like their requesón moist and loose, and some like it dryer and firm – simply remove the cheese from the cheesecloth when you think it's the consistency that appeals to you. The cheese will continue to firm up in the fridge and over time, but you can always keep a bit of the whey on hand to mix into the cheese to moisten it. (Also, turns out leftover requesón whey is wonderful when baked into bread.)

    When your requesón is ready, turn it into a serving bowl and salt it – just a bit – to taste. You need the salt to balance the flavors. Then refrigerate it until you're ready to eat it, most likely the next morning for breakfast.

    DSC_7549

    Creamy and citrusy, but in the faintest, most agreeable way, it makes a gorgeous breakfast, as I said, spread on nice bread and topped with orange marmalade, if you're really digging the citrus, or with guava paste, if you'd prefer a smoother, sweeter counterbalance. It makes a very nice afternoon snack, too, and people lacking sweet teeth would probably enjoy this even without the jammy accompaniment. I know I did.

    DSC_7589

    ***

    I was all blue after leaving Puerto Rico, its balmy 89 degrees, and my lovely friends to return to a freezing cold New York, but nothing could have cheered me up quicker than being listed in the Times of London's round-up of the world's best food blogs and featured in this companion article. I'm in some pretty inspiring company. Have a read!

    Requesón

    1/2 gallon whole milk
    1 cup sour orange juice, freshly squeezed
    Grated peel from 1 regular orange
    Salt to taste

    1. Scald the milk in a heavy pot over medium heat. While the milk is heating, lay a cheesecloth over an empty pot for draining.

    2. When the milk is about to boil, turn off the heat and add the orange juice and peel. Mix briefly. The milk will immediately start to curdle. Slowly pour the milk into the cheesecloth. Drain the requeson for about half an hour, or longer, depending on the desired consistency of the cheese.

    3. Scoop the requeson into a container, season with salt to taste, let cool if not yet at room temperature, and refrigerate.

  • I am running running running out the door right now, because oh me oh my I have a flight to catch, a little flight, comparatively speaking, but still a flight, down to Ponce, Puerto Rico where my family friends from Berlin are picking me up while the moon is still out and driving me up to their house in the jungle and I can't wait wait wait, it's been 29 years since the last time I was there and I have to see if things are as I remember them, the watering hole and the chair made of rope and the sunlight filtering down through the leaves, glinting like the flanks of a dappled foal.

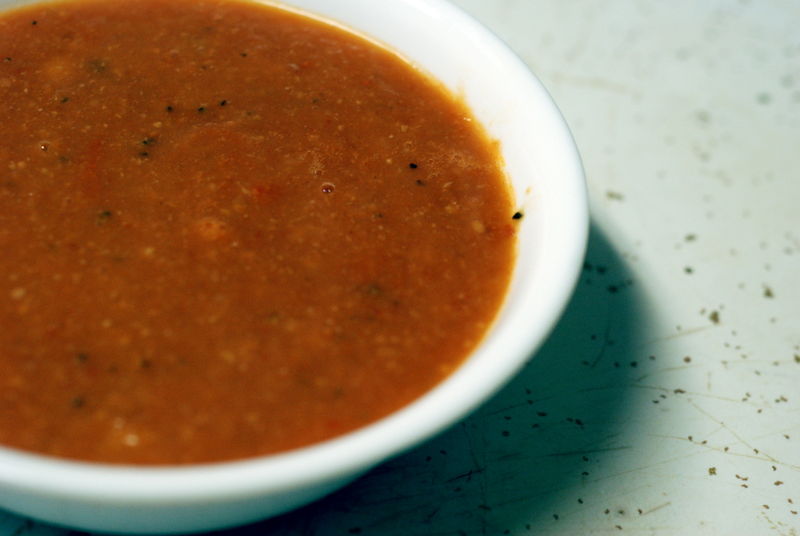
    If it's cold where you are, then make this, this deeply satisfying, rust-colored soup that was meant to last us all week and that we scooped up in two days flat instead.

    DSC_7289

    If it's warm where you are, then check out my post on Jeremiah Tower's fresh, herbal mushroom salad over at The Mushroom Channel.

    Have a lovely couple of days, everyone. I'll see you next week.

  • DSC_7349

    I had a cavity filled today and, let me tell you, sporting a Novocaine-numbed mouth is no way to go about writing a blog post. Contemplating food when you can't feel your lower lip or cheek or gums for that matter, is rather frightening. The lack of control over your own muscles, so blithely taken for granted before, is just…well, I don't like it. Who does?

    So let me keep this brief. A few weeks ago, the most charming newsletter that I get (I get many and they are mostly a bother) zipped a lovely little missive into my inbox: Jim Lahey's (the bread wizard and proprietor of Co, which I plan to visit later this month) famous no-knead bread recipe rejiggered as pizza dough!

    And, lo, an obsession was born. I spent the next 10 days trying to find the right night to start the dough. Because even though the active work time for no-knead dough – as you all probably know – is but a few minutes, you kind of need to plan when you're actually going to bake and eat the bread, right? Finally – finally! – this weekend presented itself. I had time on Saturday afternoon to start the dough and with pizza on Sunday night to look forward to, we would even have something to ward off those inevitable Sunday night blues. Perfect.

    DSC_7328

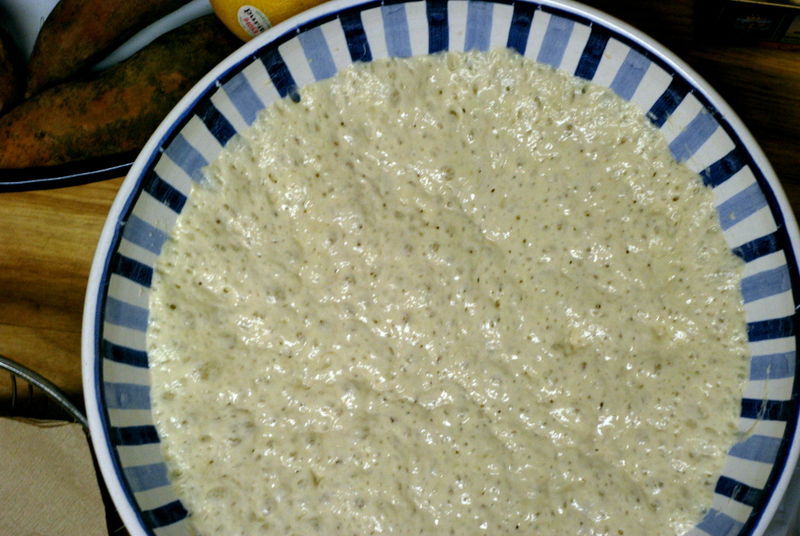
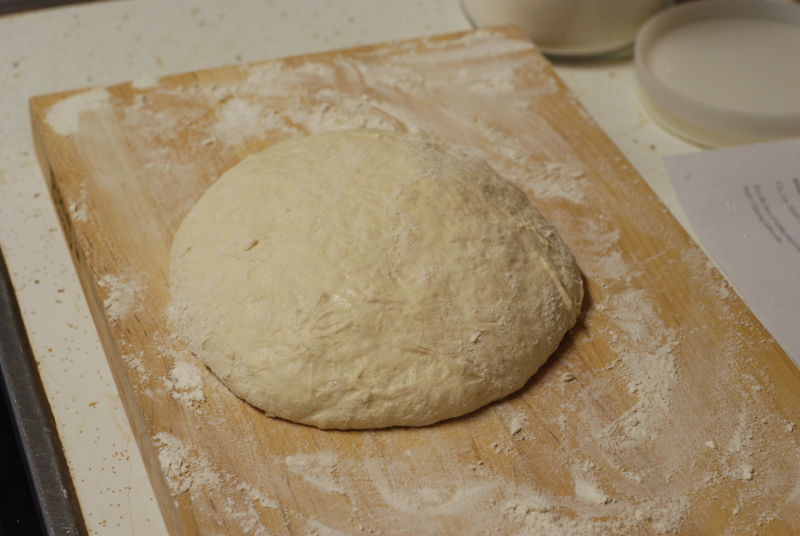
    The simple mixture of instant yeast, flour, salt and water proofed for 24 hours, until it rose and bubbled and smelled yeasty and sour and wonderful. I dumped it out onto a floured surface, folded it over onto itself a few times and let it rest a few hours longer.

    DSC_7333

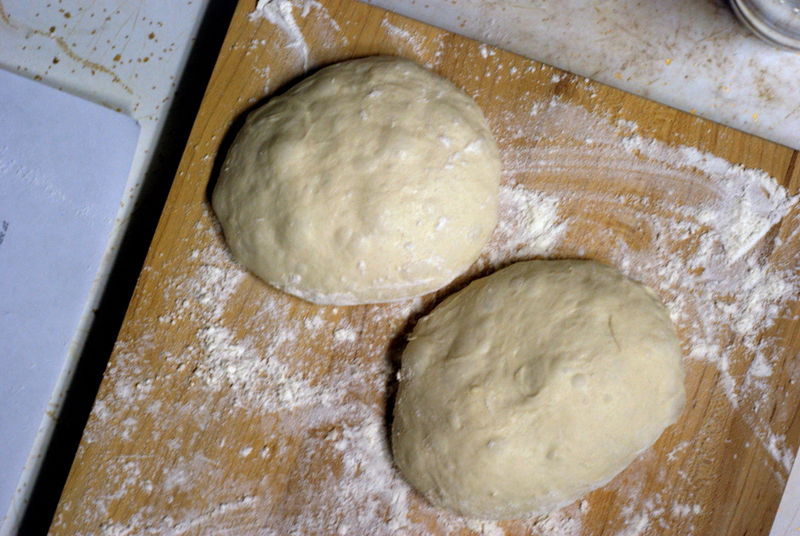
    Then that mound of dough was divided into four equal pieces and that's sort of where everything fell apart. I suppose I shouldn't be so dramatic. I mean, we ended up with pizza after all, but that's where the ease of the recipe stopped short. Because, just as Jim warned in the newsletter, making the dough may be a cinch, but working with it, forming it is Difficult with a Capital D.

    DSC_7339

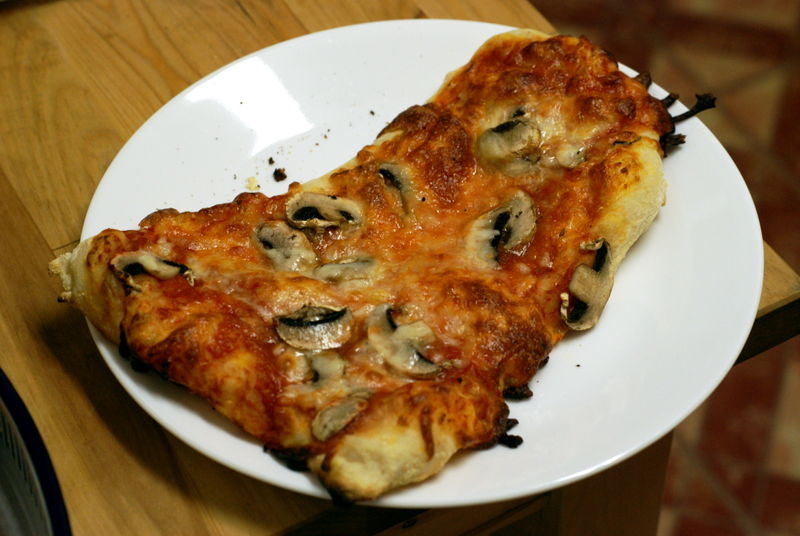
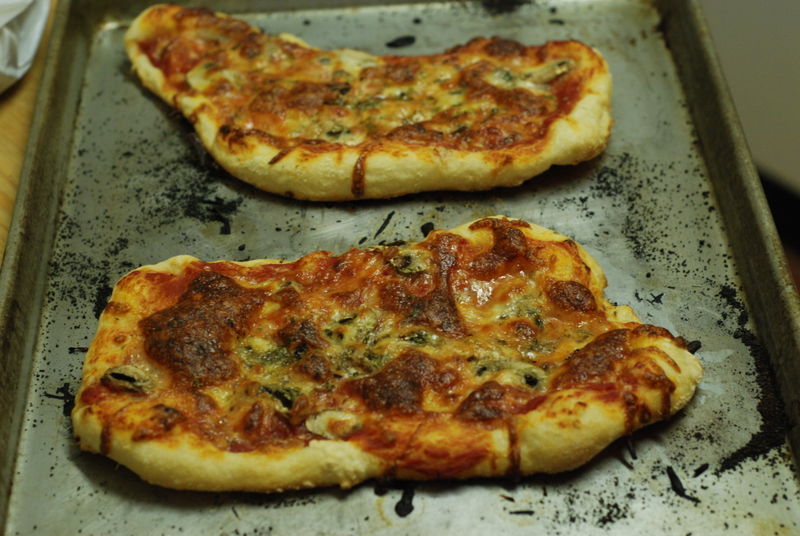
    In fact, I think I failed miserably. 12-inch pizza rounds? More like 9-inch slipper-shaped oblongs. Pizza naan, if you will. The dough was sticky and floppy and entirely unmanageable. I tried rolling it with a pin, I tried stretching it with my hands, I tried letting it rest and going back to it 15 minutes later, and still, all I ended up with were these rather thickish, oddly shaped pizzas.

    Of course it doesn't really matter what they looked like, as long as they tasted good. But I quite like a thin crust pizza and try as I might, our pizzas ended up with thickish crusts. The crust was delicious, but it was too bready for my taste. Plus, I'll be honest, wrangling with my dinner to the point that it makes me break out in a sweat is a surefire way to help me lose my appetite.

    DSC_7362

    What a primadonna, right? I totally admit it. You might love this pizza dough! Especially if you like a challenge. Me, I'm going to revel in the fact that I live in New York and can visit Jim's pizza place any time I like and have him make me a pizza. Mmm, doesn't that sound nice?

    No-Knead Pizza
    Makes 4 individual pizzas

    3 cups all-purpose or bread flour, more for dusting
    ¼ teaspoon instant yeast (such as SAF brand)
    1½ teaspoons salt
    1½ cups water

    1. In a large bowl, mix the flour with the yeast and salt. Add the water and stir until blended (the dough will be very sticky). Cover the bowl with plastic wrap and let rest for 12 to 24 hours in a warm spot, about 70 degrees Fahrenheit.

    2. Place the dough on a lightly floured work surface and lightly sprinkle the top with flour. Fold the dough over on itself once or twice, cover loosely with plastic wrap and let rest for 15 minutes.

    3. Divide the dough into 4 pieces and shape each piece into a ball. Generously sprinkle a clean cotton towel with flour and cover the dough balls with it. Let the dough rise for 2 hours.

    4. Stretch or toss the dough into the desired shape, cover with toppings and bake on top of a very hot pizza stone.

  • DSC_7049

    I don't know about your pantry, but mine is stuffed to the gills with root vegetables these days. Turnips and rutabagas and celery root and, most of all, sweet potatoes. Sweet potatoes upon sweet potatoes upon sweet potatoes. My farm is churning them out at an alarming rate. And while I'm grateful for my winter CSA, I find myself quite daunted at sheer number of knobbly roots knocking around my crisper drawer, my butcher block, my waking hours. Coming up with ways to get rid of them has become my winter sport.

    But I don't have the stomach for complicated recipes these days, for exotic ingredients, or a lot of new bottles to crowd my cupboards. I'm in the mood to use what I've got, to be resourceful and sparing, to purchase little that I don't truly need (pomegranate molasses, I'm looking at you). So when the NY Times published a recipe for a sweet potato soup a few weeks back for which I needed to purchase only one extra ingredient, a jalapeño, I felt like it was divine providence.

    And wouldn't you know, I made this recipe not once but twice in one week. It may be hard to believe, but that's the first time in the history of this website that I've ever done such a thing. This soup is good. Not only good, but cheap. Not only cheap, but fast. Not only fast, but healthy. Okay, I'll stop now. But I like it; I really, really like it.

    Imagine, sauteed onions and a pile of cubed sweet potatoes, cooked until soft in some stock. Then a quick blitz with an immersion blender and the pot fills with a swirling, creamy, orange puree. In goes a shake of cinnamon, a glug of inky molasses, a spoonful of rusty cayenne, a shower of minced jalapeño and the rat-tat-tat of frozen corn hitting hot liquid. The flame heats the soup pot for a few minutes longer while you salt and pepper to taste. Pull out the soup bowls, the silver spoons, a few slices of bread. Slice a quick handful of green onions or parsley, as I did, for a grassy bite, and drop them into the soup. Dinner is ready.

    And what a revelation it is. The first spoonful of soup is sweet and mellow and then comes the heat, just the right amount, from the jalapeño and the cayenne. Warming and bright, it provides a little spot of sunshine in a run of cold months. It takes less than half an hour to make from start to finish and makes me feel endlessly resourceful as I eye my dwindling stash of sweet potatoes. I wish satisfaction always came this easily.

    Sweet Potato, Corn and Jalapeño Bisque
    Serves 2 if that's all there is for dinner, or 4 as a first course

    1 tablespoon peanut oil
    1/2 cup chopped onions
    2 teaspoons minced garlic
    3 medium sweet potatoes (about 2 1/2 pounds total), peeled and cut into 1-inch cubes
    4 cups vegetable or chicken stock
    1 medium jalapeño, seeded and finely chopped
    1 cup fresh or frozen corn kernels
    2 tablespoons molasses
    1/2 tablespoon kosher salt
    1/4 teaspoon ground cayenne
    1/4 teaspoon black pepper
    Scant pinch ground cinnamon
    Finely chopped scallions, green parts only, or minced parsley

    1. In a large saucepan or soup pot, heat oil over medium heat. Add onions and garlic and sauté until just soft, 2 to 3 minutes. Add sweet potatoes and stock and bring to a boil.

    2. Reduce heat and simmer until potatoes are soft, about 10 minutes. Remove from heat. Using an immersion blender or a food processor, purée contents of pot, in batches if necessary, until smooth.

    3. Reheat soup, stirring in jalapeño, corn, molasses, salt, cayenne, black pepper and cinnamon. Taste, adjust seasonings and serve, topped with scallions or parsley.

  • DSC_6905

    Ooh, it's a crummy one here today. Cold and wet and biting and the sleet's been coming down since the early morning hours. It's simply not the kind of day that should be spent anywhere but on the couch, with a cup of tea, a stack of good books, and preferably a small, domesticated animal of some kind acting as a foot warmer. But here we are, so let's make the most of it, shall we? I know! I'll tell you all about the most thrilling discovery I made this past weekend: store-bought pie crusts. Not the evil I thought they were! And just the ticket when running (very, very, very) behind on dinner party menu-planning.

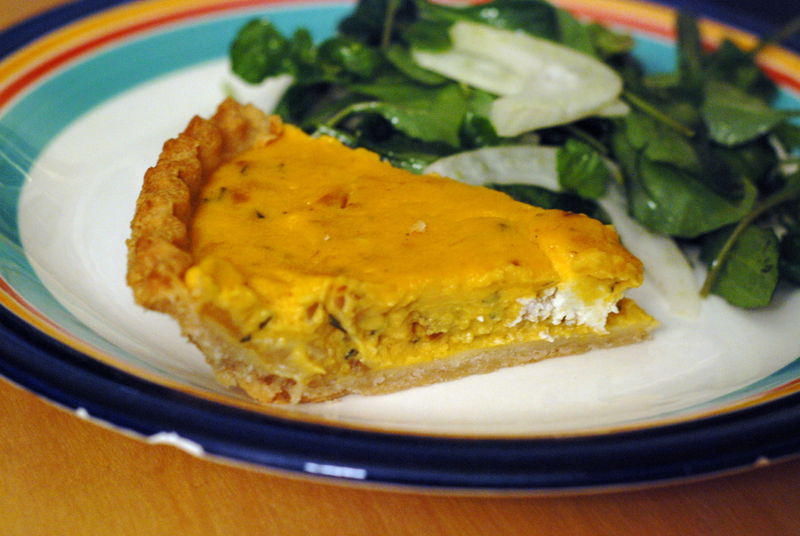
    Now where were we? We left off at dessert. Right, a nice polenta cake with syruped cherries. Delicious! (And surprisingly good three days later, cold from the fridge, eaten whilst watching Out of Africa. Ben said I'd love it, I doubted him, he was right, the end.) Once I'd decided on that cake, I worked backwards. Some kind of good salad, like baby arugula mixed with thinly sliced fennel, dressed with olive oil, flaky salt and a champagne vinegar. Then something warm and rich and comforting to balance that. Marian Burros's cheese and squash pie seemed to fill all those criteria, plus it'd help use up the monster butternut squash I'd gotten from our CSA's winter share. (I am literally drowning in rutabaga and turnips, though. Send Help Please.)

    The pie was quick enough to fit my schedule. The only problem? It required a pie crust. And I didn't exactly have any of those just hanging around the house. A better woman would, I'm sure! But I didn't. So I sent Ben at the grocery store and made him call me from the frozen foods aisle. "This one has trans fats!" … "This one has 900 grams of sodium!" …

    He came home with a three-pack of Oronoque Orchards pie crusts, which seemed harmless enough despite my secret shame. But honestly, I was so pleased with how the pie turned out. The crust was tasty and flaky and fast. I quite like making my own pie dough, so it's not like I'm going to stop anytime soon, but it is nice to know that good alternatives really do exist. Are you all rolling your eyes at me now? It's okay, I can take it.

    DSC_6898

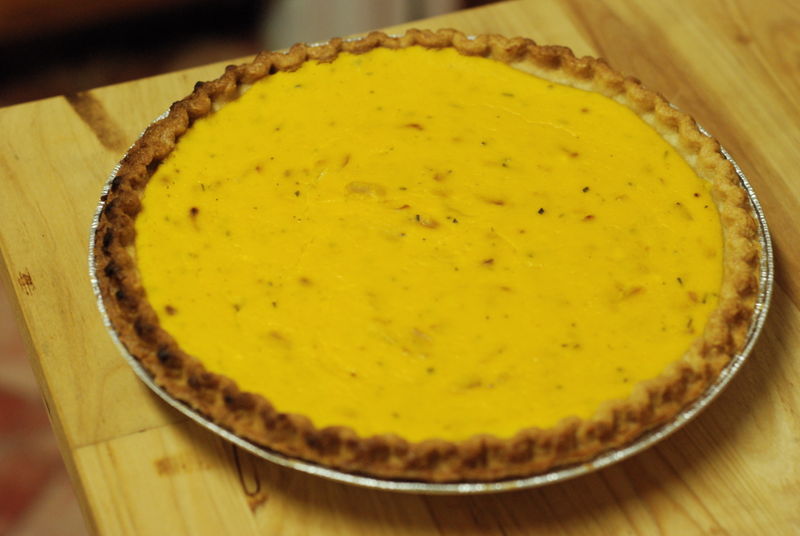
    Now, because my scale is missing its batteries and I therefore am blind in my kitchen (is what it feels like), I couldn't weigh my squash. I eyeballed it and roasted the part that seemed to be around 1 1.5 to 2 pounds. But that resulted in so much filling that I ended up with two squash-and-cheese pies. (Thank goodness for three-packs of frozen pie crusts! And thank goodness that I ended up with two pies, because my guests devoured every last crumb.) Maybe I am just awful at estimating weight. Or maybe this recipe yield is way off. But if you make this, make sure you've got a second pie crust on hand, just in case.

    What's that? You want to know about the pie itself? Oh, right! Of course. The pie itself was lovely, too. You roast a squash until it's all melting and soft. You puree it with eggs and a bit of cream and then mix that up with browned onions and chopped rosemary and a big pile of grated cheeses. You pour that into a baked pastry shell and bake it in the oven until it's set. It's savory and herbal, creamy and warming, hearty and satisfying, but it doesn't hit you in the belly with richness or heft. The combination of rosemary and fried onions and the funk of three kinds of cheeses with all that sweet, roasty squash was just right. Between seven people, these two pies were polished off in no time at all.

    A decided success, I'd say.

    Squash and Cheese Pie
    Yields 10 to 12 servings as side dish or first course

    Notes on the recipe: I ended up grating close to a whole cup of the Cheddar because of the massive amount of filling. So make sure you dip your pinky finger in the puree to taste before pouring it into the pie shell. You'll know then if you need to add more cheese or adjust the salt. Don't worry about the raw eggs; if you're using fresh ones from the market you'll be fine with a tiny fingertip's taste.

    1 1.5 to 2-pound butternut squash
    2 tablespoons olive oil
    1 large onion, chopped
    2/3 cup grated aged sharp Cheddar cheese (1 to 1 1/4 ounces)
    2/3 cup grated nutty, earthy semisoft cheese, like Thistle Hill Tarentaise or Cowgirl Creamery Red Hawk (1 to 1 1/4 ounces) (I used Gruyere)
    1/2 cup fresh goat cheese (2 to 3 ounces)
    1 tablespoon finely chopped fresh rosemary
    2 eggs
    2 egg yolks
    2/3 cup heavy cream
    Salt and freshly ground black pepper to taste
    1 9-inch pie crust, plain or whole wheat, baked

    1. Preheat oven to 400 degrees. Scrub squash and cut in half lengthwise. Rub cut side with a little oil and place on a baking sheet cut side down. Roast 40 to 50 minutes, until flesh is soft.

    2. Meanwhile, sauté onion in remaining oil until onion browns. In a bowl, combine onion with cheeses and rosemary; set aside.

    3. When squash is cooked, cool slightly and remove flesh. Place in food processor with eggs, yolks and cream; purée. Pour into bowl with cheeses and whisk to mix. Season with salt and pepper, and spoon into cooled pie shell. Bake for 30 to 40 minutes, until center is set. Cool on rack and serve warm or at room temperature.

  • DSC_6910

    We had friends over for dinner on Saturday, dinner and game night. Menu planning for dinner parties is always my job, while Ben's is to vacuum and reach pans in high-up cupboards while I point imperiously from several feet below. Seems fair enough, the division of labor, especially because figuring out what to make for dinner rarely feels like a chore to me. It's rather fun to curl up on the couch in the early morning, surrounded by my clippings and papers and books, and cobble together a meal.

    This Saturday, though, the day just got away with me. At 4:30 pm I still didn't know what on earth to make. And my guests were arriving in three short hours. I had to choose a few dishes, go shopping, and cook. Ben was nowhere to be found and a slight cloud of panic fogged my glasses. What was I thinking, with my nonchalance and my sudden creative inspiration that had me writing a short story at 2:00 in the afternoon instead of menu-planning, like a proper hostess? I wanted to stamp my foot.

    Flicking through my clippings like a bank teller gone wild, I came across a recipe for polenta cake, meant to be served with roasted cherries, that came from an LA Times article published a few years back. Polenta, of course, is just a fancy word for cornmeal, and as I scanned the ingredient list quickly, I realized I already had everything in the pantry to make it. In fact, you probably have everything for this cake in your pantry, too. Therein lies this cake's genius, I would say.

    It's just the thing for a last-minute dinner party, because not only do you most likely not have to make an extra trip to the grocery store, but it dirties just one bowl and bakes in less than half an hour. Because it's relatively small, it cools off quickly, too. No hot cake for dessert!

    DSC_6888

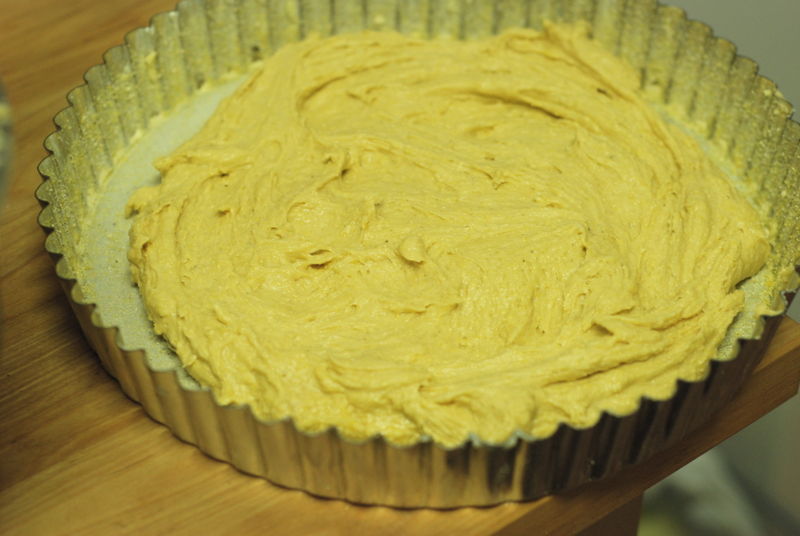
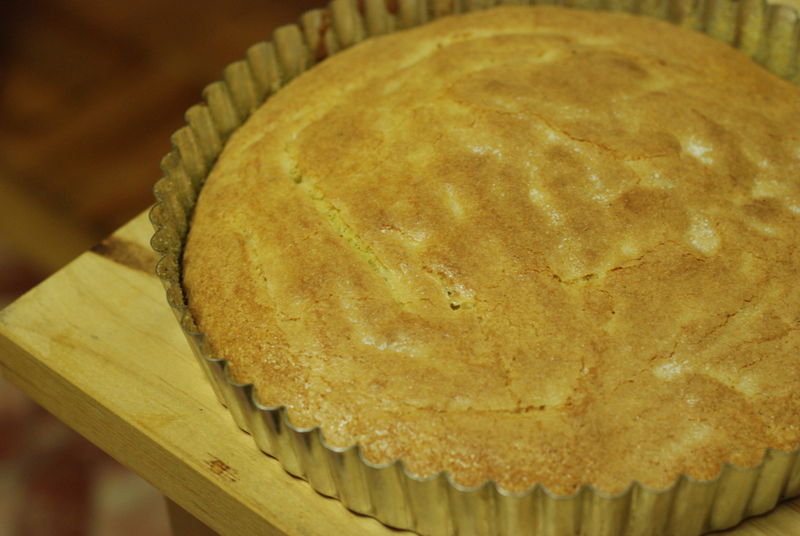
    The batter is rather stiff and seems far too little for the pan. I did my best to spread it out, but it didn't reach the edges. At this point, my guests were 20 minutes from arriving and I hadn't showered yet, so to say that I was frantic would be somewhat understating the truth. I might have yelled at the tart pan or at the batter, I can't quite recall. Finally, because I realized that I could not will that batter to the edges without losing some very important self-respect, I put the pan in the oven and left the kitchen. Because it's that kind of a recipe, one that will save you a pinch, it worked out just fine. See? Browned and lovely and agreeably spread out. I can't believe I doubted it.

    DSC_6900

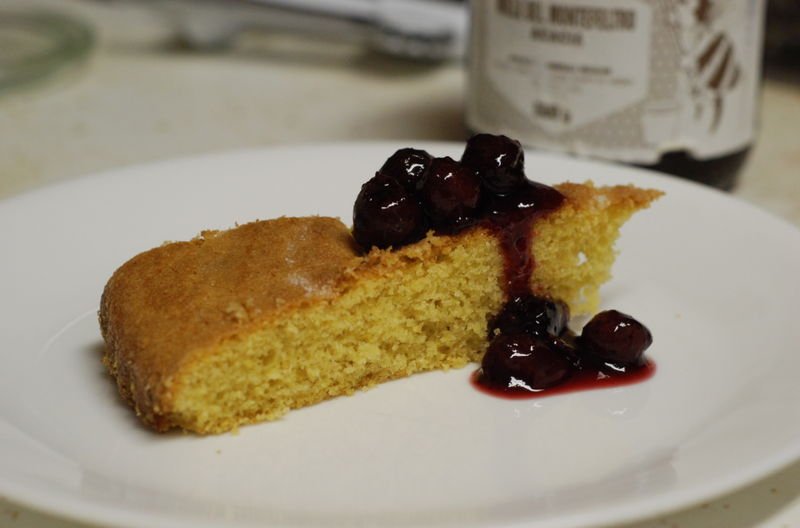
    Now, Kimberly Sklar tells you serve this with roasted cherries when they're in season. The link above has that recipe for you to bookmark when the summer rolls around. I, and this is partially why I chose the recipe, had a jar of cherries in syrup that my mother put up last summer in Italy and that had been gathering dust in my cupboard ever since. Easy peasy! We sliced that cake into dainty slivers, each guest got to top their slice with a spoonful of cherries (sweet, tart, tiny, heavenly – sei bravissima, mammina!) and dessert was rescued.

    The cake is rustic and not-too-sweet-but-just-right – a homey, countrified cake that you can't help but feel affection for. It's got an adorably crunchy cap and a barely coarse crumb and is a shining example of the pleasures of plainness. The cake definitely needs the moisture and tang from the saucy fruit, but if you don't have a jar of homemade Italian cherries in syrup lying about, you could just as well stew some frozen blueberries or blackberries with a bit of sugar and some lemon peel and spoon that vibrant compote over each slice.

    Is this the best cake ever? No, but that's not the point. It's a problem-solver, a pinch-hitter, and just the kind of recipe every cook should have on hand, just in case. You never know.

    Polenta Cake
    Serves 8

    1/2 cup (1 stick) butter, room temperature, plus 1 tablespoon for pan
    1/4 cup plus 2 tablespoons fine to medium grind cornmeal plus 2 teaspoons for dusting pan
    1/2 cup brown sugar, not packed
    2 eggs, room temperature
    3 egg yolks, room temperature
    1/8 teaspoon almond extract
    1/2 cup plus 2 tablespoons flour
    1 1/4 teaspoons baking powder
    1/4 teaspoon salt
    2 teaspoons granulated sugar for dusting

    1. Heat the oven to 375 degrees. Use 1 tablespoon butter to grease a 9-inch removable bottom tart pan; dust with 2 teaspoons cornmeal.

    2. Using an electric mixer, cream the butter and brown sugar until light in color and fluffy, 1 1/2 to 2 minutes. Scrape the bowl and add the eggs and egg yolks, one at a time, beating thoroughly after each addition. Stir in the almond extract.

    3. Sift the flour, remaining corn meal, baking powder and salt together and fold into the mixture.

    4. Spread the batter evenly into the prepared pan. Sprinkle the sugar evenly on top. Bake for 20 to 24 minutes. Remove from the oven and set aside to cool. Serve with fruit compote.