• DSC_0581

    Are you ever gripped with the urge to suddenly clean out your freezer, your cupboards, your crisping drawers? To use up those last nuts knocking around in an empty plastic bag, finally finish off that half-portion of arborio rice driving you batty since 2007, and at last get around to cooking the untouched box of chow mein noodles you'd completely forgotten about since it went and hid behind the Creole mustard, the organic millet and the half-eaten bar of dark chocolate in the bottom cupboard?

    I'm on that kick right now and I've got it bad. I made Brandon's citrus-soy noodles the other night (and lo, they were delicious – more on that next time), deftly using up some old Chinese noodles and the last dregs of a jar of chile-garlic paste. I've had a stockpile of French sardines for host(ess) gifts cluttering the kitchen and I've been making good on giving them away. (Do you know a sardine lover? Buy them Connétable sardines the next time you're in Paris or if you were at Balducci's during its final days when they were practically giving away food. This is a good present, I promise.) I've thrown those final aforementioned rice grains in soups, am scheming for ways to get rid of some frozen pork neck bones from Connecticut, and cannot wait for a week's worth of morning blueberry-buttermilk smoothies, so I can finally throw out the darn Wyman's bag mocking me every time I open the freezer.

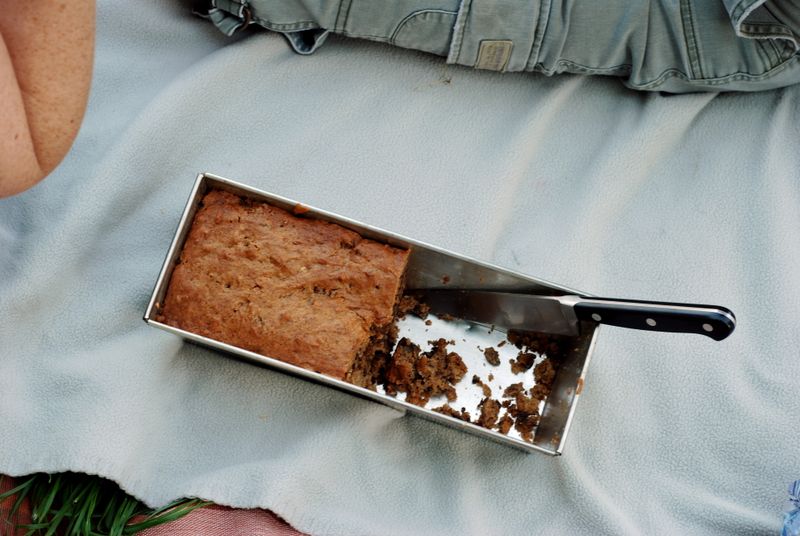
    Luckily for you, the nicest thing about this weird mania is the recipe I made using up the last two cups of pecans I'd been hoarding for what was probably far too much time. It comes from Donna Deane when she was still at the LA Times, and is the loveliest, subtlest tea cake I've had in a while. Elegant and demure and delicious to boot, it features browned butter and toasted pecans suspended in a tender, sour cream-enriched cake.

    I brought it to a Memorial Day picnic yesterday where it was eaten with gusto (at one point, two attendees were actually simply forking pieces of it out of the tin), praised by a chef, and then taken home by a friend who wanted to serve the leftovers as dessert at the end of a business meal last night. Great success! I'd say.

    DSC_0544

    The most complicated thing about the recipe is making brown butter. And that's really not too hard. That is, cooking it isn't hard, it's knowing when to stop that's tricky. Kind of like caramel, only it moves faster. What you do is put a stick of butter in a small, heavy pan and set it over medium heat. When the butter melts, start whisking it and keep it over that same steady heat. Don't move away from the stove. After a few minutes, the molten butter will start to change color. It will foam and you might have a hard time seeing the liquid beneath. Just keep whisking. Pretty quickly thereafter, the butter will go from foamy and bright yellow to tan and then brown. You'll see little spots, which are the milk solids that have browned, and your kitchen will smell rather rich and toasty. Turn the heat off and try to get a good look at the butter. What you want is for it to be nicely browned and smelling delicious. You don't want blackened butter. And it's kind of a fine line between the two. So, if you feel like your browned butter is still cooking in that hot, heavy pot, even with the heat turned off, simply pour it into a heat-proof mixing bowl. That'll pretty much stop the cooking process.

    The recipe has you chill that molten brown butter and then whip it with brown sugar until "light and fluffy". But that didn't happen at all for me. The brown butter and sugar just kept going around and around in the bowl, dark and granular. The minute I added the eggs, however, things got gorgeously light and fluffy. So keep that in mind when you make this. Oh, another thing: my compulsion to use things up apparently also means that I'm loathe to replace a thing when I'm done with it. Which would be fine if we were talking about something exotic, like black quinoa, but is sort of silly when it comes to a kitchen staple like vanilla extract. So, since I didn't have any vanilla extract in the house, I substituted almond extract and though I worried that mixing the nut flavors would be rather strange, I loved it. It's very subtle – there's only 1/2 teaspoon in the recipe.

    What you end up with is this gorgeous, fluffy batter and a knobby pile of pecan-brown sugar streusel, which you basically layer in a loaf pan. The bread rises nicely in the oven, though it doesn't ever dome and crack. After it's been taken out and cooled and sliced up, what you have is a finely-crumbed cake shot through with nubby pecans and delicate brown-butter flavor. It really is rather refined, this loaf, and is the kind of thing you could easily serve to your future mother-in-law at your first tea together, or at a rowdy Brooklyn picnic with 11-month-olds doing their best to grab ahold of it while you shriek rather ineffectually that they should keep away from the tree nuts, for crying out loud.

    Pecan Brown-Butter Bread
    Makes 1 9-inch loaf

    1/2 cup (1 stick) plus 2 tablespoons (1/4 stick) unsalted butter, divided
    2 cups shelled pecans, divided
    2 cups flour plus 1 1/2 teaspoons, divided
    1 1/3 cups packed brown sugar, divided
    2 large eggs
    1/2 teaspoon almond or vanilla extract
    1 teaspoon baking powder
    1 teaspoon baking soda
    1/2 teaspoon salt
    1 cup sour cream

    1. Heat the oven to 325 degrees. Melt one-half cup butter in a heavy skillet over medium heat. After it melts, continue to cook, whisking until it turns nut brown, about 8 minutes. Remove the browned butter from the heat and cool, then refrigerate until it solidifies, about 30 to 40 minutes.

    2. While the browned butter is chilling, put the pecans on a jellyroll pan in a single layer and toast them in the oven 15 to 20 minutes. Remove the nuts from the oven and cool in the pan, then roughly chop them so the pieces are no larger than one-fourth inch.

    3. For the pecan streusel filling, combine one-half cup chopped toasted pecans, 1 1/2 teaspoons flour, and one-third cup brown sugar. Work the remaining 2 tablespoons butter into the sugar mixture until it is crumbly; do not over mix.

    4. Cream together the chilled browned butter and the remaining 1 cup brown sugar until light and fluffy, 2 to 3 minutes. Beat in the eggs, one at a time. Scrape down the sides of the bowl, then beat in the almond or vanilla extract.

    5. Sift together the flour, baking powder, baking soda and salt. Add the dry ingredients to the brown butter mixture alternately with the sour cream, folding each addition in gently by hand. Stir in the remaining 1 1/2 cups chopped toasted pecans, just until ingredients are mixed.

    6. Spoon half the batter into the bottom of a well-buttered 9-inch loaf pan. Sprinkle the streusel filling evenly over the batter. Spoon the remaining batter over the filling and spread evenly. Bake 55 to 60 minutes or until the bread tests done in the center; note that the streusel filling will remain moist throughout the baking process. Remove to a wire rack and let cool to warm. Serve warm or at room temperature.

  • DSC_0196

    It is 80 degrees in New York City today (that's 26 degrees Celsius – one degree warmer than would be required to close school in Berlin!) and I'm spooning up pork ragout like it's the first day of winter and I've just settled in for the long haul. Strange? Perhaps. But awfully tasty.

    I'll blame the fact that I have this wintry stew in my house in the first place on the fact that spring has taken its sweet old time getting here this year. You know the global weather's out of whack when Berliners are in shorts in April and we're still pulling out our wool coats well into May.

    Last week, when this recipe flitted across my radar (from an old Pairings column from, you guessed it, the ever-reliable Florence Fabricant), it was just the right time for pork-and-beans – cold, windy, rather gray. Though I'm realizing that apparently warm, sunny and rather bright is also a good time for pork-and-beans. In fact, shall we just put it this way? When is it ever not a good time for pork-and-beans? Okay, maybe a July weekend at the beach. Maybe then.

    I made a few tweaks to the recipe – using half the amount of pork and orange, and a little less smoked paprika than called for. Instead of cannellini beans, I used Rancho Gordo's Yellow Indian Woman beans because I am in love and you cannot mess with a woman in love. With beans. What resulted was a warm, smoky, fragrant stew that got better and better and better with each passing day. The pork became fork-tender and delicious, the beans held their shape beautifully, the wine and the orange juice and the rosemary and spices melded into a rich, sticky stew that goes very well over rice or mopped up with crusty bread, or simply spooned up out of the plate, too.

    And with that, I'm closing down the department of stews, ragouts and braises for the season. Bring on the salads, the cold soups, and the fresh fruit of summer!

    Orange Pork Ragout with Beans
    Yields 4 servings

    1 cup Yellow Indian Woman beans, rinsed
    2 tablespoons extra virgin olive oil
    1 pound boneless pork shoulder, in 2-inch chunks
    1 medium-size onion, finely chopped
    3 cloves garlic, minced
    1 red bell pepper, cored, seeded and finely chopped
    1 teaspoon smoked Spanish paprika
    1/4 teaspoon ground cloves
    Grated zest and juice of 1 orange
    1 1/2 cups dry red wine
    3 branches fresh rosemary
    Salt and freshly ground black pepper
    Small pinch red chili flakes
    2 tablespoons finely chopped flat-leaf parsley

    1. Place beans in a saucepan, cover with water by 2 inches, bring to a boil, cook 2 minutes, cover and set aside to soak 1 hour.

    2. Meanwhile, heat 2 tablespoons oil in a 4-quart casserole and brown pork without crowding over medium-high heat. Remove. Add onion, garlic and bell pepper. Sauté over low heat until soft. Stir in paprika, cloves and zest. Stir in orange juice and wine, scraping bottom of pan. Return pork to pan. Set aside until beans have finished soaking, then drain beans and add. Add rosemary, black pepper and chili. Bring to a simmer.

    3. Cover and simmer 2 to 3 hours, until beans are tender. Add water occasionally, if needed. Season with salt. Leave in casserole for serving or transfer to a serving dish. Scatter parsley on top before serving.

  • DSC_0143

    I know, I know, I just got back from Paris. The traveling itch should be scratched. But I can't help it. I'm already thinking about the next thing I'd like to do, which is go to Morocco. Morocco! Land of couscous and camels and souks and deserts. I have sand in my shoes, I guess. But it's not my fault. I'm blaming it all on this soup.

    This soup! So unassuming. So simple. And yet. With just one spoonful, something steals over you. A strange and piercing Wanderlust, almost impossible to battle with. You close your eyes and as you eat, you feel yourself transported to a cool, tiled courtyard, with a tiny fountain babbling quietly and the scent of rose petals in the air. It was all I could do, once my spoon scraped the bottom of my bowl, to keep myself from booking a flight, right then and there, to Morocco.

    I don't know about you, but I find this happens often with Moroccan food. Good Moroccan food, I guess I should say. There's something transporting about it. It's familiar, in a way: the ingredients seem regular enough. But there's always something a little exotic about the combination of spices or flavorings that makes me feel like I'm having the most special meal. I can't really explain it any better than that. Call me bewitched.

    The recipe comes from Florence Fabricant's Pairings column (which I'm having success after success with, deliciously) and is as close to fast food as fine home cooking gets. Cheap? Check. Speedy? Check. Delicious? Oh, ho ho ho. Check.

    All you have to is whip up a simple soup (fry an onion and cumin in olive oil, add a bunch of peeled, chunked carrots, boil, puree, done). Then you purée that into a smooth soup, and add fresh lemon juice. The lemon juice truly is an Oscar-winning supporting actor here. Without its bright acidity, the soup would meander off into rather boring territory. If you wanted to stop cooking here, you could. All you'd need to do is fold in the chopped cilantro, drizzle over a bit of olive oil and you'd be done. Served hot or cold, the soup is a minimalist triumph.

    DSC_0130

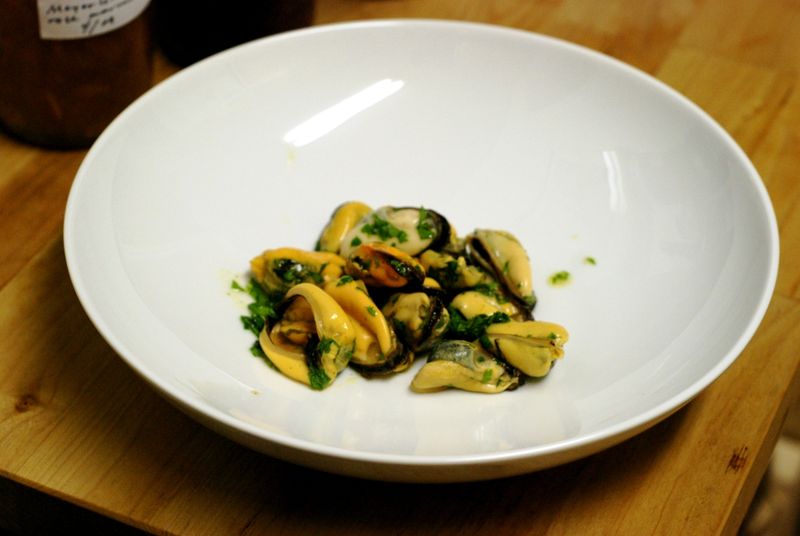
    If you find you need a little something something in your soups in order to be happy, quickly steam some mussels. Strain their fragrant juice into the soup, and mix the shucked mussels – plump and sweet and only $5.99 for 2 whole pounds at Whole Foods right now – with the cilantro and olive oil. A spoonful of these at the bottom of each soup plate, surrounded then by the carrot soup, is quite something.

    I can already tell that the carrot soup (without the mussels) is going to be a regular in my kitchen. Which makes me wonder at how far I've come. Just a few years ago this post would have been filled with whinging about how the cilantro was a nightmare and how I simply had to replace it with flat-leaf parsley. Not anymore. Florence is right: you can make this soup without the mussels, but you cannot make it without the cilantro. The alchemy of the sweet carrots, bright lemon juice, cumin and cilantro is truly magical: as you eat, you taste all these things and more: flowers, earth, cross my heart.

    Cilantro-haters, don't fear. If I could become a convert, I who used to compare that green stuff to rat poison, so can you. All it took for me was one trip to Mexico. Maybe all you need is a trip to Morocco. If so, can you let me know? I want to come, too.

    Moroccan Carrot Soup with Mussels
    Serves 6 as a first course

    2 tablespoons extra virgin olive oil
    1 medium onion, coarsely chopped
    2 teaspoons ground cumin
    2 bunches carrots, peeled, in 1-inch pieces
    Salt and freshly ground black pepper
    Juice of 1 lemon
    1 pound mussels, scrubbed
    1/2 cup finely chopped cilantro leaves

    1. Heat 1/2 tablespoon oil in a 3-quart saucepan. Add onion. Cook over low heat until starting to soften. Stir in cumin, cook briefly, stirring. Add carrots and 6 cups water. Bring to a boil, lower heat and simmer, covered, until carrots are very tender, about 20 minutes. Cool briefly. Purée in a blender in two batches. Return soup to saucepan, season with salt and pepper and add lemon juice. Set aside until shortly before serving.

    2. Place mussels in a shallow 2-quart saucepan or sauté pan. Add 1/2 tablespoon oil, toss over high heat about a minute, reduce heat to low, cover and cook until mussels open, 7 to 8 minutes. Remove mussels, draining well so juices stay in pan. Discard any that do not open. When mussels are cool enough to handle, shuck them into a bowl, discard shells and toss mussels with remaining oil and the cilantro. Strain mussel broth and add to soup.

    3. Reheat soup. To serve, place a few mussels in each of 6 warm soup plates. Serve plates to guests. Ladle soup over mussels at the table. If not using mussels, fold cilantro into soup, ladle soup into bowls and drizzle each portion with remaining oil.

  • DSC_9188

    The magic started right away, on the RER train to Paris from the airport, when two men carrying huge bunches of lilacs got on and sat next to us, their fingernails rough and grimy, chapped hands clutching the ragged ends of the lilac branches. They let us smell the flowers, us lilac-deprived New Yorkers, groggy from the flight.

    DSC_9198

    It continued when we got to our hotel on the rue de Verneuil, just steps from where I used to live, and it turned out that the hôtel particulier across the street used to be Serge Gainsbourg's. The wall encircling the private garden was covered with graffiti and stencils of Serge, Jane, Charlotte, and others. I had to rub my eyes.

    DSC_9864

    I finally saw rascasses in the flesh, on ice, at a little market just behind the Place de la Madeleine. You can't find them in the United States, but I always read about them in recipes for bouillabaisse, that spicy, rusty fish soup from Marseille. The market also sold olives so pungent I smelled them from four stands away, great big rounds of brie de Meaux, faintly pocked, handfuls of bright yellow ranunculus for just three euros, and roasted beets, cooled and waiting in their jackets for shoppers to take them home.

    DSC_9204

    Everywhere we went, I saw people holding small bouquets of lilies-of-the-valley, just in time for the sudden advent of spring, or May Day, I suppose. They were even affixed under a plaque of a police station in the sixième. An efficient little police bike stood under the bouquet at attention, while sharply-dressed policemen milled about inside the station, cooling their heels.

    DSC_9298

    Oh Paris, with your darling streets named after grammarians and revolutionaries and mathematicians. I spent the entire first day agog, head turned upwards in wonder, mouth agape. I lived there for a year; I mean, I know that city, and still it left me speechless.

    DSC_9401

    We had hot chocolate at Angelina, and watched little girls and boys stand in front of the pastry case in wonder. The chocolate came in a sweet little jug along with a pot of thick cream to dollop on top. We had to split it four ways, of course. It was too rich otherwise. But it was delicious.

    DSC_9613

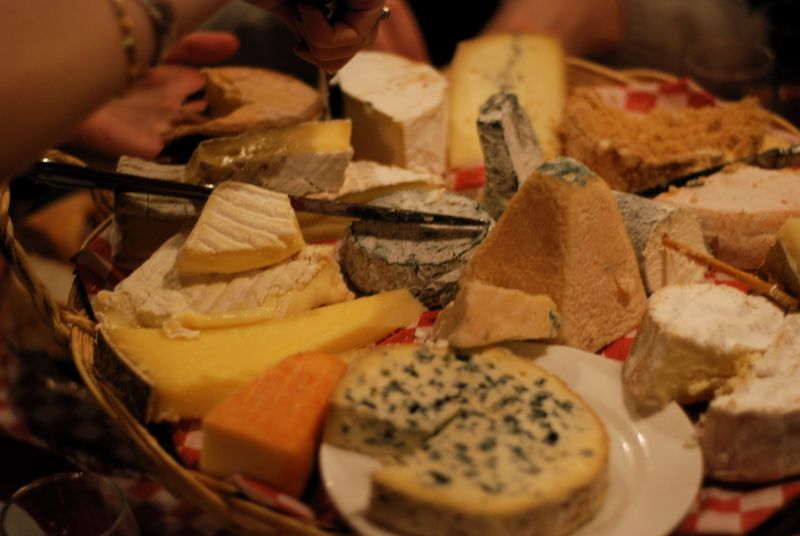
    If you don't already know about the cheese course at Astier, in the 11th, consider this your nudge. When you're in Paris, have dinner there. Skip the desserts, they're nothing special. But whatever you do, don't skip the cheese. The waiter, winking, will bring you this straw platter covered with…can you count how many cheeses? With a few knives and a nub or two of bread, settle in until he comes by again, cluck-clucking, to take the cheese away and bring it to another deserving table.

    DSC_9322

    We were lucky with the weather: a few of those perfectly moody Parisian days, in which the sky is a soft shade of gray, like old kid gloves, and the light falls just so and it never quite rains, so that each street and corner you discover feels like a gift and a temporary reprieve; and then a few days of bright, brilliant sky, where the sunlight illuminated the creamy colors of the buildings and I practically got tears in my eyes from all the beauty around us.

    DSC_9856

    The magic infused every bit of this perfect little trip. It was something that filled up our souls and made us promise to do it again next year and the year after that. It may have even made me feel like I reclaimed Paris from my ghosts of the past. Now it's all about the future, our next trips, the ones we daydreamed we might take one day with our children: a bunch of women and their kids in a rented apartment somewhere, going to Angelina for hot chocolate and the Place des Vosges for soccer and the Jardin du Luxembourg for a puppet theater. It's just a dream for now, but if the magic makes it happen, I think it's a tradition I'm going to love.

    DSC_9260

    More photos here.

  • It may have to do with the fact that in just over 24 hours I'll be on an airplane to Paris with my girlfriends, for my first trip there since my mother and I met up in the Marais for a weekend four years ago, but I can't seem to focus on any kind of proper recipe at all right now. Instead, I'm thinking about being in Paris.

    It's funny, how each time there gets sorted under a different rubric. For a long time, I associated Paris with my father, who took me there a few times in college, and who has his own ongoing love affair with the city. I lived there for a year myself, working and struggling, because despite the glorious city around me and the interesting work I had, it felt like a struggle to this then-21 year old, to be seen, to feel connected, to find a way – any way – to feel a little less alone there. I had to take a break from Paris when I left, had to banish it from my thoughts, because my experience had turned into something quite painful, a lost love haunting every memory I had of the place. But I've slowly been finding my way back, through blogs and stories and the soft passage of time. And now I'm so excited I can't sit still, can't wait to be back for a new experience this time: Paris with my girls. It's a whole new thing.

    I'll be back next week with photos and stories for you, but before I go, I have to tell you about something that seriously made my week (already): Francis Lam's method for cooking rice. Embedded deep within an article he wrote for Gourmet.com were just a few short sentences that me both smile and sit up straight:

    "Warm up a heavy saucepan with a tight-fitting lid over medium-high heat. Give it a few nice glugs of olive oil. Don’t be stingy. Now throw in your rice and stir it around…until…maybe half the rice has turned opaque. Pour in your water; it will probably boil immediately. If not, make it boil. Then cover it and drop it in the oven. Pull it out 13 minutes later. If you’re one of those freaky people who can cook rice perfectly on the stove, do whatever it is that you do. Weirdo."

    Freaky, indeed! Who, exactly, can cook rice perfectly on the stove? Not even my 12-grade boyfriend's Iranian mother and she had, like, 5,000 years of culinary perfection in her DNA. I use Martha Stewart's method and not even that is foolproof. So, clutching my computer and feeling determined, I marched straight into the kitchen and turned the oven on.

    I had an inkling about those lines of Francis's, you know, that they would somehow change my life. Some of you might scoff, but the others know what I mean, right? Yeasted doughs, homemade pasta, soufflés, caramel, the supposedly difficult achievements in the kitchen that make you feel so proud when you master them, those achievements all fall away after being confronted by yet another pot of overcooked or undercooked, slightly chewy or frustratingly soft rice. So simple in theory, yet so difficult to master.

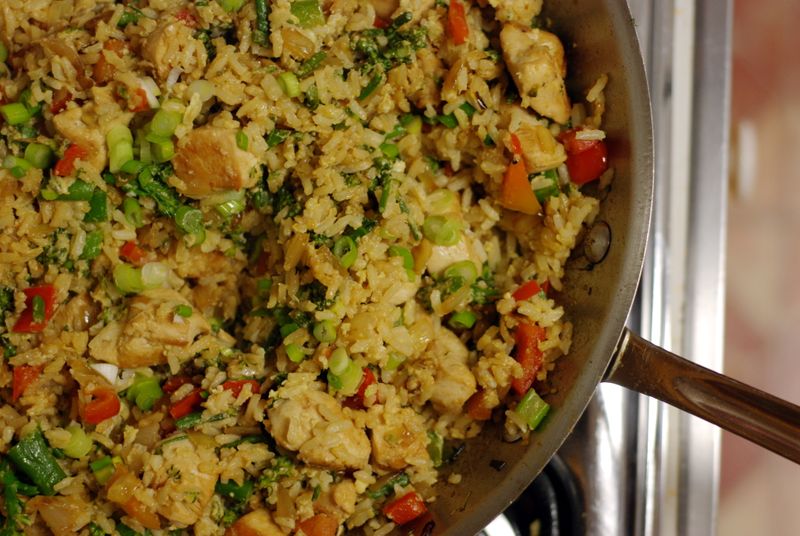
    But my inkling was right, my life changed: perfect rice, suddenly within reach. Plus, so easy, so stress-free. The oven did all the work and all I had to do was show up when the timer screeched. It was quite the mid-week surprise. We scooped out our nice grains of rice, cooked with just the right amount of moisture, and munched happily away, with plenty left over for fried rice the next night.

    (The fried rice, you ask: I used Mark Bittman's recipe, which was okay, but next time I'll try something that looks more like this, or like this. Or maybe one of you has a fried rice recipe that you think I can't live without? Pretty please!)

    DSC_9167

    Life-Changing Baked Rice
    Serves at least 4

    1 tablespoon olive oil or butter
    2 cups basmati or long-grain white rice
    3 cups (or 2 3/4 cups, if you like dryer grains) water
    1/2 teaspoon salt

    1. Heat the oven to 350 degrees. Pour the olive oil or place the butter in a heavy saucepan with a tight-fitting lid (I used my Le Creuset soup pot) and set the pan over medium-high heat. Throw in the rice and stir it until the oil or butter coats all the grain. Cook, stirring, for a few minutes. The rice will look glassy and smell toasty.

    2. Pour in the water, add the salt, and bring to a boil. Stir the rice once, then cover the pot and place in the oven. Set the timer for 13 minutes.

    3. After 13 minutes, remove the pot from the oven. Do not remove the lid from the pot and let the rice rest for five minutes. After resting, fork through the rice to fluff it and serve.

  • Portrait
     
    Hello! I’m Luisa Weiss, an Italian-American writer and home cook based in Berlin, and this is my food blog.
     
    You can also find me on my professional site, or on Instagram or Facebook.
     
    Contact me at luisa(at)luisaweiss(dot)com.
     
    How I got started:
    I was born in Berlin and grew up in both Berlin and Brookline, MA. A lifelong bookworm, I knew I wanted to work with books for a living. After college in Boston, six formative weeks at the Radcliffe Publishing Course and one lonely year in Paris, I went on to spend a decade in New York City, where I worked in book publishing as a literary scout and, later, as a cookbook editor (for more on my career path, click here). I started this blog in the summer of 2005 to work through a mountain of recipe clippings I’d obsessively saved from the New York Times and the Los Angeles Times for years. But what started out as a fun little hobby ended up changing my life. In 2010, I left New York and moved back to Berlin to live with my husband Max (who I met during that long, lonely year in Paris) and write full-time. Our son Hugo was born in 2012,and our son Bruno followed in 2017.
     
    My books:
    In 2012, I published my first book, a food memoir called My Berlin Kitchen: A Love Story (with Recipes). In the book, I wrote about my childhood in Berlin, the homesickness I battled in the kitchen, trying to find my way as an adult, and how I finally came full circle by moving back home and marrying Max. I filled the book with my favorite recipes from my three countries: roasted Brussels sprouts and braised chicken from my years in New York, bracioline siciliane and chickpea soup from summers with my family in Italy, and Pflaumenmus and Rote Grütze from my kitchen in Berlin. If you want to read a little bit more about how the book came about, click here and here. The book is also available as a paperback, an ebook and audio book, and has been translated into Dutch, Portuguese, Polish and German. It was a Los Angeles Times bestseller.

    In 2016, I published my second book, Classic German Baking, with Ten Speed Press. It’s a rigorously tested collection of my favorite German, Austrian and Swiss recipes. My goal with the book was to publish the best examples of the baking tradition from German-speaking countries where home baking is still a huge part of everyday life; classics like Schwarzwälder Kirschtorte and Sachertorte as well as lesser known gems like Swabian Seelen and traditional yeasted Gugelhupf. There’s also an entire chapter filled with the best recipes for Christmas cookies, sweet breads and other holiday confections. Both the Washington Post and the New York Times called it one of the best cookbooks of 2016.

    My work:
    I was the food columnist for Harper’s Bazaar Germany from 2014 to 2017 and a selection of my columns (in German only) can be found on their website. I’m currently working on my next cookbook, Classic German Cooking. In addition to my writing, I work as a translator for companies like Netflix and Warner Bros. I’ve also worked as a freelance editor and proofreader and cookbook Americanizer. I have taught food writing and cooking and baking classes. I speak at blogging conferences (for example, on personal productivity at The Hive in Berlin, on memoir-writing and cookbook publishing at Food Blogger Connect, and on transitioning from hobby to professional blogging at What’s Cooking Helsinki in 2017). 

  • DSC_8884

    Readers, forgive me. I first told you about the wonderful torta di carciofi my uncle made over New Year's in January, promising you the recipe soon, and, well – uh – it's Tax Day. Okay, so consider this my Tax Day present to you! Or a belated Easter gift! I finally converted his recipe from metric to Imperial (and from scribbled down on a piece of paper while watching his every move to an actual, usable recipe) and I'm so happy to present it to you.

    Eagle-eyed readers will notice that my torta doesn't quite look like his torta. I think this may have something to do with the difference in store-bought puff pastry – his Belgian pastry came already rolled out into a large, thin circle, while mine was in thickish rectangles and had to be patchworked together. His tart tin was bigger than mine, too, so his torta is flatter. And, lastly, my uncle – as I think I've mentioned before – is an artichoke whisperer. He closes himself into the kitchen with a sharp paring knife and a bowl of acidulated water and, and meditates or something, goes into a fugue state, cleaning big mountains of thorny little artichokes, transforming them into silky, delicious dishes that make me want to park myself with a fork at his table and never, ever leave.

    Me, I'm not so gifted. Also, there are no baby artichokes available here right now. So I made do with frozen. (Stop screaming! They're not so bad, in a pinch. Yes, this torta will taste even better with fresh artichokes, it's true. But it's darn tasty with frozen, too.)

    DSC_8862

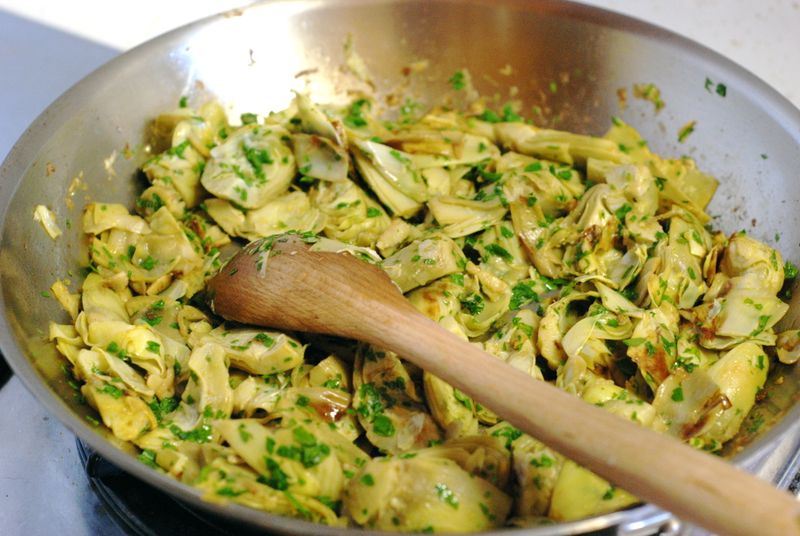
    What you do is cook the frozen artichoke quarters in olive oil, plain, no garlic, no nothing, until they get browned in places and the kitchen smells delicious. If you're my uncle, you cut the cleaned artichokes into little slivers before cooking them in olive oil. Let them get nice and brown, even browner than in this photo. That means high-ish heat, and monitoring. If things start to stick to the bottom of your pan, you can always deglaze with a little water and keep going. Brown bits stuck to the pan are a good thing! They mean flavor.

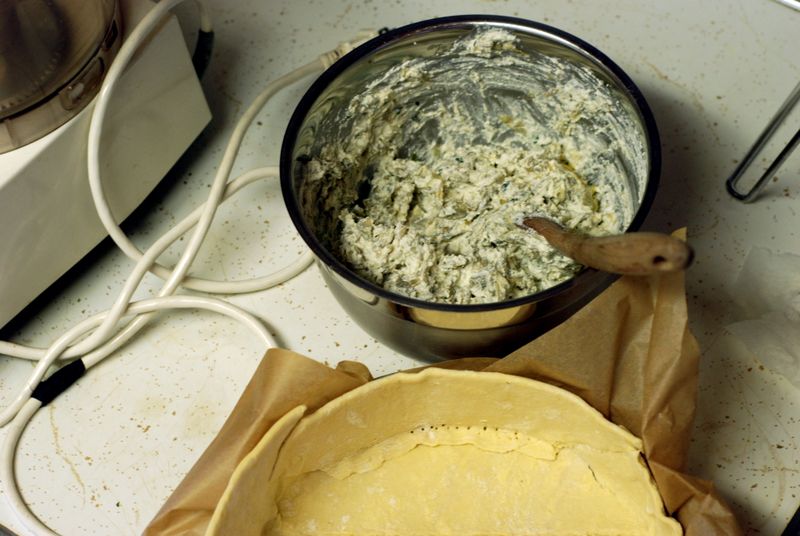
    When you're almost done with the artichokes, you season them and sprinkle with parsley, then let them cool chopping them up. You add them, fragrant as can be, to creamy, nutmeg-scented ricotta, season this a bit more and then pile the filling into a puff-pastry lined cake tin.

    DSC_8870

    If you're cooking in America, store-bought puff pastry  comes in rectangles, so you've got to do a little craft work. It's okay if your resulting lined tin doesn't look very pretty – this is rustic and rustic is good. I used a combination of pinching, a water-dipped finger, fork-work, and plain old-fashioned cursing to get the puff pastry bits to stick to each other in the tin. If you happen to live elsewhere, your store-bought puff pastry might come already rolled out into a lovely circle. Lucky you! You should make two of these, just for kicks.

    Right, so pour in the filling, fold down the pastry over the filling, brush with an egg wash which will make the torta look so pretty and burnished and bake it in a hot oven until the pastry browns and rises and the filling is set and your house smells amazing and the people coming for lunch trip over themselves to peek into the oven and hang about your kitchen, getting in the way like the adorably hungry people they are. I mean, do you blame them? You shouldn't.

    DSC_8876

    This torta is simply delicious. The pastry is light and crackly, the artichokes are nice and savory, but with that haunting, sweet top note, and there's something very pure and clean about the taste of it, not mucked up with strange herbs or too much garlic or whatever else makes vegetable pies a sometimes dubious presence on a lunch buffet.

    Pietro says you can use different vegetables in the filling, it doesn't always have to be artichokes. He recommends trying broccoli with sundried tomatoes (use only the broccoli florets, not the stalks, and boil them before sautéing in olive oil – and chop the tomatoes up nicely), or, of course, zucchini. I haven't tried those yet, but you probably all know by now that if Pietro recommends something, it's going to be good.

    Now forget about the fact that it took me four months to get this to you and go shopping! Start working on your artichoke-cleaning skills! Or be a lazy bum like me and buy frozen! Whatever you do, don't wait as long as I did to make this. Buon appetito!

    Torta di Carciofi (Artichoke Torta)
    Serves 10 to 12

    2 tablespoons olive oil
    2 9-ounce box frozen artichoke hearts OR 10 to 13 fresh baby artichokes (cleaned and cut into slivers)
    3/4 teaspoon salt, divided
    1/2 cup parsley leaves, minced
    2 large eggs
    1 pound ricotta (about 500 grams)
    20 strokes freshly grated nutmeg
    1/2 cup grated Parmigiano
    Freshly ground black pepper
    1 package prepared puff pastry

    1. Heat the olive oil in a 12-inch skillet until hot but not smoking. Add the artichokes and cook over medium-high heat for about 20 to 25 minutes, stirring occasionally and constantly monitoring the heat. You want the artichokes to brown but not burn, to sauté but not steam. You can periodically deglaze the pan with a spoonful or two of water, scraping up the browned bits at the bottom of the pan. When the artichokes have taken on color and are fully cooked, add 1/2 teaspoon salt and the minced parsley and mix well. Remove from heat and let cool until you're able to transfer the artichokes to a cutting board, scraping the pan well. Using a large knife, roughly cut the cooked artichokes into small pieces.

    2. Preheat the oven to 375 degrees. Line a 10- or 12-inch cake tin (or springform pan or pizza pan) with parchment paper and then with puff pastry, making sure that the pastry lines the sides of the pan with plenty of hang-over.

    3. In a mixing bowl, combine 1 egg, the ricotta, the nutmeg, Parmigiano, the remaining salt, and pepper to taste. Add the chopped artichokes and mix well. (If you're secure about your egg quality, taste the filling at this point and adjust if it needs more salt.) Pour the filling into the prepared pastry. Fold the pastry that hangs over the sides of the pan over the filling and press down gently where the dough overlaps. Beat the remaining egg in a small bowl and brush the beaten egg over the pastry (not the filling).

    4. Put the torta into the oven and bake for 50 to 60 minutes. The pastry will brown and the filling will set. Remove from the oven and cool on a rack before using the parchment paper to remove the torta from the tin. Set it on a serving plate, cut into slices, and serve. Tastes best cooled but not cold.

  • DSC_8762

    I may have been raised by a Roman in an extended family of Italo-Saxon gourmands, but I will have you know that I periodically, in high school, did indulge in an after school snack comprised of two slices of German Schwarzbrot sandwiching an oozy crimson layer of ketchup. Yes! It's true. I used to eat ketchup sandwiches. But, get this, that's not even the worst of it! Just to mix things up a bit – adventures of a latch-key kid, oh my – I sometimes boiled up a handful of pasta and sauced it with, you guessed it, that sauce of all sauces, ketchup.

    Will horrors never cease? You probably think I should have my food professional license revoked.

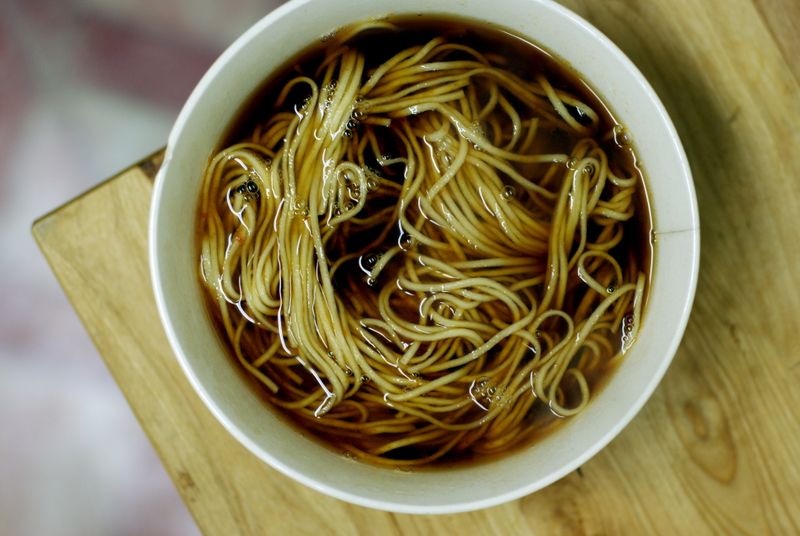
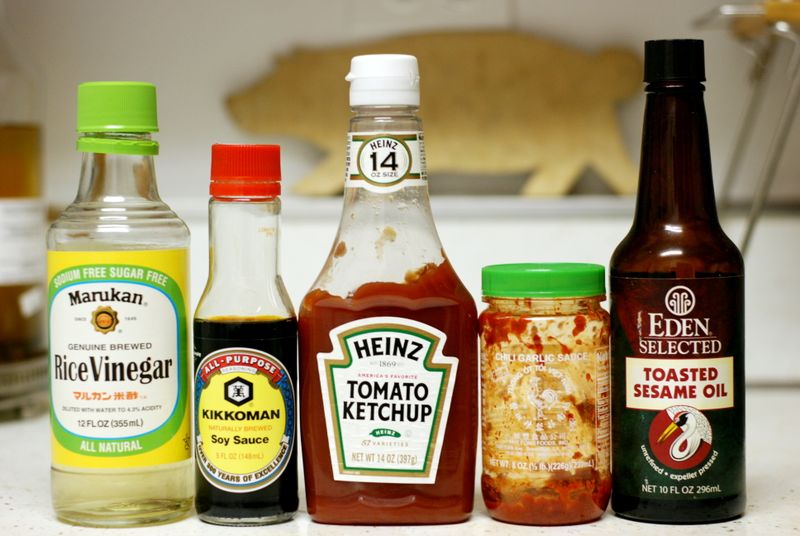
    But you need to know this to understand why, when I read this Minimalist column two weeks ago, my ears pricked up and my eyes widened. Who cares about authenticity? Noodles in a soy broth made with ketchup sounded like my kind of dinner – a throwback to my days on Bambergerstraße after school, gussied up just a wee bit with rice vinegar and toasted sesame oil.

    DSC_8767

  • DSC_8575

    Sunday morning, pad quietly into the kitchen. Kettle on, cupboards open. Pull out the box of cake flour, just the right amount still in the bag, the bottle of inky molasses, soda, baking powder. Two eggs from the fridge, cold and smooth in my hands; spices from the freezer, their bottles frosting immediately in the warm kitchen.

    Baking first thing in the morning, before the first cup of tea, before opening the door to get the paper, before even being entirely awake, is one of life's small pleasures. One of my life's small pleasures. I love the silent, solitary work in the kitchen, the concentration, the satisfaction at seeing a few simple ingredients come together under my hands and blossom into something else entirely.

    It so happens that the best recipes for this kind of early morning venture are plain and homey ones. They have to be. I'm not interested in four-layer cakes at 9:00 am on a Sunday, or in rolled fondant, or pastry cream. What I revel in making are recipes that dirty just one bowl, that surprise you with their ease, that come laden with history, the knowledge that they've been made a hundred thousand times before, in thousands of kitchens, by thousands of slightly sleepy home cooks who don't have the luxury to worry about whether or not the cake will rise or turn out as it should.

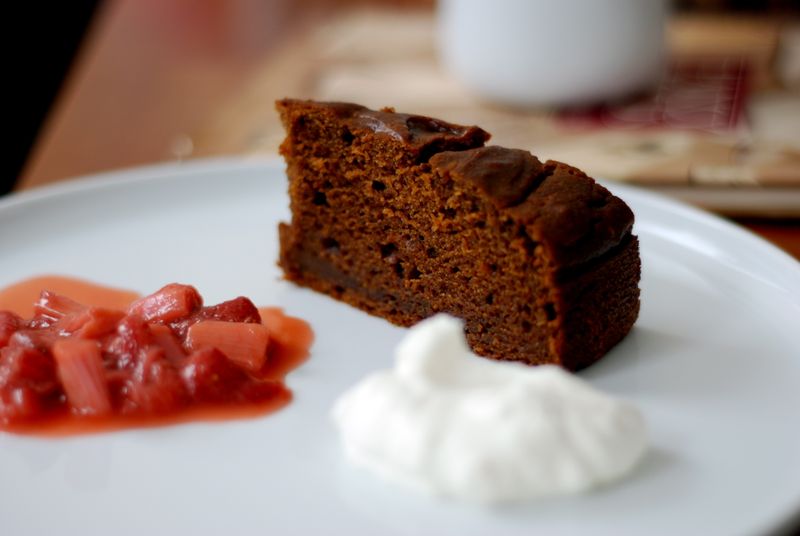
    This recipe seems to have been made for this purpose – you whisk together the dry ingredients: cake flour and leaveners for lightness and a mix of cloves, ginger and cinnamon for warmth and flavor. Then you melt a stick of butter in boiling water and whisk that, along with a couple eggs, into the flour. That is it. Quite literally. What results is a dark and moodily cracked cake that, if left to its own devices for a day, gets moister and more complex, and if eaten while still warm, is a very good snacking cake, best if served with whipped cream to round out the hard molasses edge.

    The cake is from The Gift of Southern Cooking by the late, great Edna Lewis and Scott Peacock, which doesn't have the same bewitching lilt as Miss Lewis's The Taste of Country Cooking, but is packed with information and interesting recipes from a region that I used to know very little about culinarily. The baking recipes, in particular, are just the kinds of things I like to think about making early on a weekend morning, while the neighborhood still sleeps and the day stretches languidly, full of promise, ahead of me.

    For a short film on Edna Lewis, go over to Gourmet's website, right here. The first photo you see of her, a black-and-white one with her in profile at 0:21, kills me.

    Dark Molasses Gingerbread
    Serves 8
    Note: This cake is also delicious the day after it is baked. The spices meld and the texture gets more like a steamed pudding.

    1/2 cup (1 stick) unsalted butter, more for pan
    2 cups cake flour, more for pan
    1/4 teaspoon baking soda
    2 teaspoons baking powder
    1/2 teaspoon ground ginger
    1/2 teaspoon ground cloves
    1 teaspoon ground cinnamon
    1/2 teaspoon salt
    2 eggs
    1 1/2 cups dark molasses
    Freshly whipped cream, for serving

    1. Preheat oven to 350 degrees. Butter and flour an 8-inch round baking pan. Sift flour, baking soda and baking powder into a large mixing bowl. Blend in spices and salt with a wire whisk.

    2. In a small pan, bring 1 cup water to a boil. Melt 1/2 cup butter in it, then whisk water into flour mixture. Beat eggs and add to mixture, along with molasses. Whisk until well blended. Pour into pan.

    3. Bake for 40 to 45 minutes or until a skewer plunged into center comes out with no trace of raw batter. Interior will be moist. Serve warm with freshly whipped cream.

  • DSC_8243

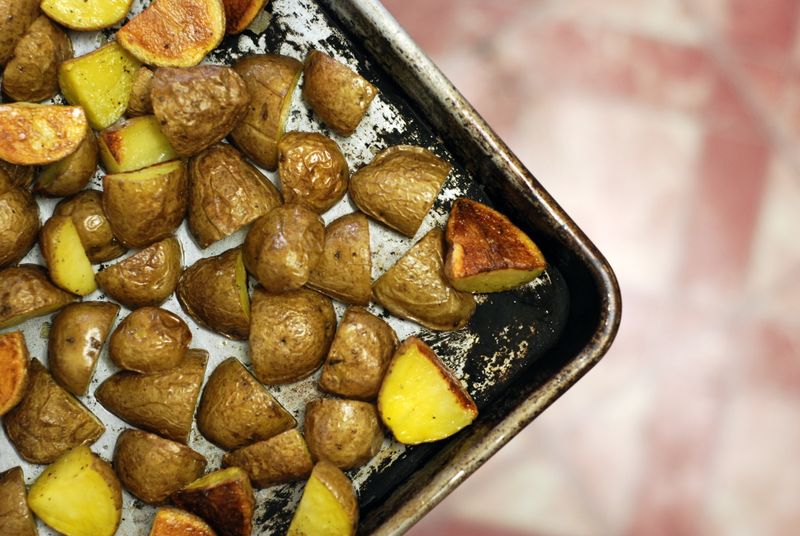
    A secret: for nigh on 4 weeks now, I've had a plastic bag full of potatoes sitting on my butcher block counter. They've been sprouting strangely pretty purple and green nubbins, which I rub off each time I pass them. Their skins have grown wrinkly and I've felt worse and worse every time I enter the kitchen, seeing the potatoes in their dusty bag reproach me silently for not ending their misery and cooking them.

    The thing is, I've not really been in the mood for wintery mashed potatoes or herbed roasted ones. Those are for the real winter, when all you want to do is wear wool socks and watch the snow fall and listen to old jazz from the 40's on the radio. Today I want sourness and spice and sharp, bright flavors, a little heat to wake up my taste buds, gustatory jolts to shake off the remaining winter doldrums.

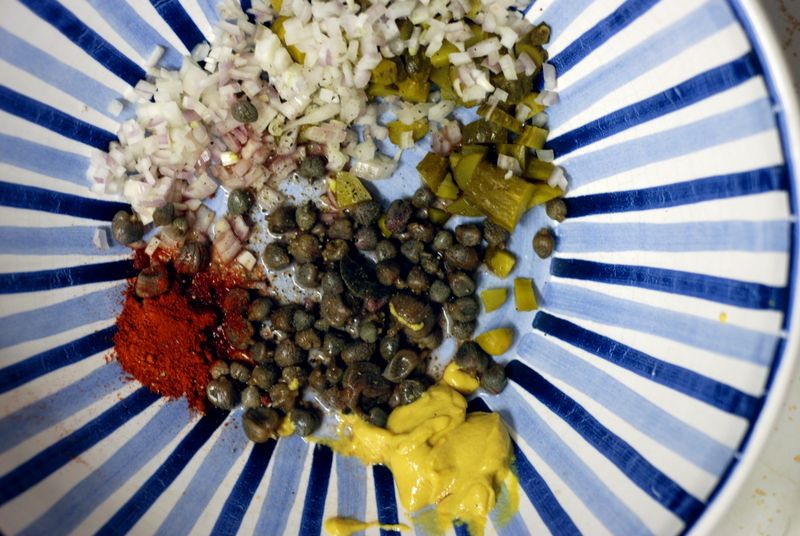
    Now think about this: a little pile of minced shallots, a tiny mountain of diced cornichons, a palmful of salted capers, soaked and squeezed, a spoonful of sharp mustard, a few glugs of vinegar, and smoked paprika, glowing red. All of these things, plus some nice olive oil, mixed together, then used to dress that whole bag of potatoes, roasted. Can you imagine that? Is the water running together in your mouth now? You're welcome.

    DSC_8237

    Actually, thank Bread Baby and Clotilde, for drawing my attention to Rose Bakery's way of getting rid of excess potatoes (though they probably don't use that exact – er – phrasing). The dressing is sort of a deconstructed sauce gribiche, a classic mayonnaise-based sauce, though it's lighter, of course, and instead of being used to dress a calf's head, you use it to dress a pile of salt-and-pepper-flecked roasted potatoes.

    The salad tastes really, really good and it's simply such a relief after the relentless march of cold weather potato dishes. I, for one, can't stand them any more. The capers and pickles and mustard provide nice little zings and pops of flavor, the shallots give the salad a faint bite, the chopped eggs add creaminess and ballast, and the smoked paprika is just its usual mysterious and alluring self. Seriously, smoked paprika is like the Penelope Cruz of the spice world.

    DSC_8233

    Clotilde didn't much like this salad the next day, but I had so many leftovers that I didn't have a choice but to refrigerate them and turn them into lunch the next day. I think the salad stands up just fine – all it needs is to be brought to room temperature and tossed with a fresh glug of good olive oil, which helps to brighten the flavors that have actually melded quite nicely overnight.

    But a cook's work is never done, is it. Though my CSA's winter share is over (praise be), I still have about three more pounds of potatoes to fight through. I figure I've got at least another week of ignoring this batch before they start to sprout…

    Potatoes Gribiche
    Serves 4

    1 1/2 pounds small waxy potatoes
    Olive oil
    Salt, pepper
    2 hard-boiled eggs, diced
    5 to 6 cornichons, diced
    2 tablespoons capers (if using salted capers, soak for a few minutes in water first)
    1 shallot, peeled and minced
    2 teaspoons Dijon mustard
    1 tablespoons red wine vinegar
    1/2 teaspoon smoked Spanish paprika
    A handful of flat-leaf parsley, chopped

    1. Preheat the oven to 425°F. Put the potatoes in a medium saucepan, cover with cold water, cover with a lid, and bring to a boil. Drain immediately, let cool for a minute, cut in two-bite wedges, and transfer to a baking dish large enough to accommodate them in a single layer. Drizzle with olive oil, sprinkle with salt and pepper, toss to coat, and roast until golden and crusty, about 30 minutes.

    2. In the meantime, combine in a salad bowl the eggs, cornichons, capers, shallot, mustard, vinegar, paprika, a bit of salt and pepper, and 2 and 1/2 tablespoons olive oil.

    3. When the potatoes are ready, add them to the salad bowl, toss gently to coat, and fold in the parsley. Taste for seasoning. Let cool to slightly warm or at room temperature.