• I know a lot of you are probably up to your eyeballs with Thanksgiving preparations, but I thought you might appreciate a little headstart on your holiday gift-buying. I really loved putting together the gift guide again. Each year, discovering so many talented people making incredible things all across the world inspires me anew. I hope you find something here for yourself or a loved one that makes you happy.

    (And may I suggest, as a bonus item, ahem, that my book makes for a wonderful gift? Now available in German!)


    Leckerlee

    1. A friend of mine in New York sent me a tin of Sandy Lee's Leckerlee Lebkuchen last Christmas and they absolutely blew me away. Big, plump and deeply delicious, these Lebkuchen are even better than the real thing from Bavaria. No joke. Sandy perfected her Lebkuchen recipe while living in Germany, then moved to New York and opened Leckerlee, bringing her handmade Lebkuchen stateside. I love the fact that Sandy keeps her wares tightly edited – she makes only traditional Lebkuchen coated in a thin sugar glaze or a crisp layer of good chocolate. In addition to her fabulous Lebkuchen, Sandy's tins – beautifully designed updates on the traditional Lebkuchen designs – are so useful and collectable. I want them all!
     

    Salt

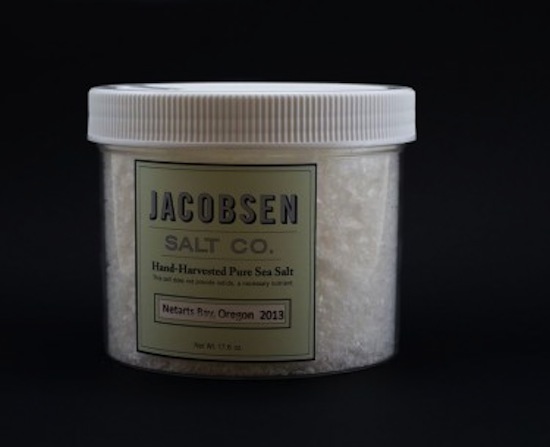
    2. I can't remember who turned me onto Maldon sea salt (Jamie? Nigella?), since it's been so long since I started using it, sprinkling it onto tomato salads and buttered toast, feeling the salt crumble between my pinched fingers. But recently, I discovered a salt that makes Maldon sea salt seem like an industrial product. Jacobsen's hand-harvested American salt, collected on the Oregon coast, is snowy white and sturdy – its naturally formed pyramids still almost entirely intact. And it's got a lot of famous fans – the list of restaurants that use Jacobsen salt in their kitchens is impressive (Sitka & Spruce in Seattle, Blackbird in Chicago, The Spotted Pig in New York, among many others). This is the perfect gift for the person in your life who lives by the farm-to-table credo and the slide tins are just the thing for pulling out of your jacket pocket discreetly the next time you're at your mother's dinner table.
     

    Apollo

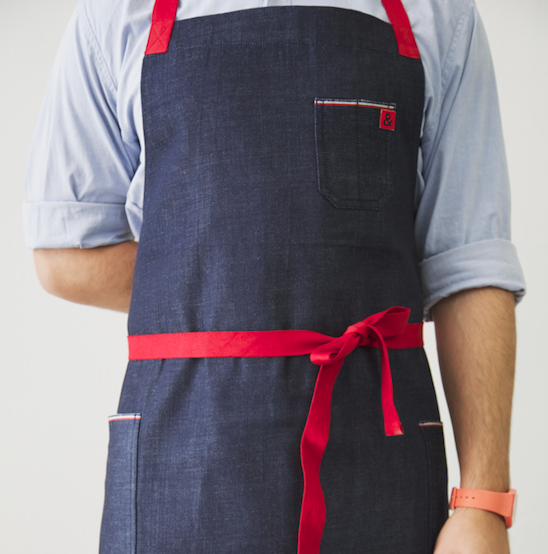
    3. I'm always on the lookout for smartly designed aprons and LA-based Hedley & Bennett hit the mark. Their denim and red Apollo apron is so chic! I love that their aprons have adjustable neck straps and quality materials like pure denim and brass hardware elevate these into fantastic gift territory.
    20404_1

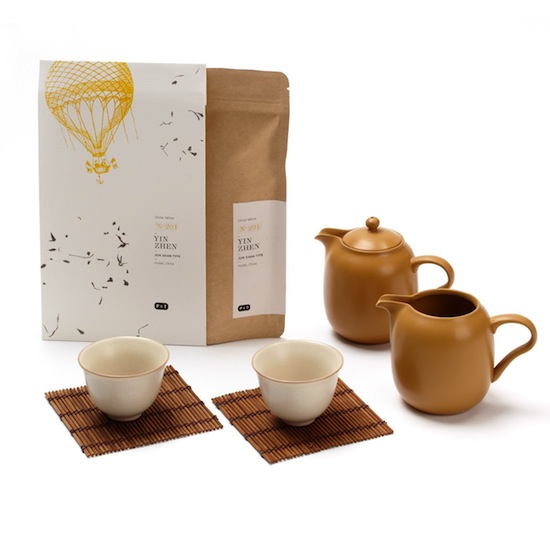
    4. The most stylish store to open in Berlin in recent memory is Paper & Tea, a cool, clean emporium for loose teas, beautiful (and tiny!) Japanese, Korean and Taiwanese tea cups and pots, and expertly selected paper products. It's hard to enter the store without purchasing at least three new teas to try. My favorite of the moment is their genmaicha, studded with toasty brown rice, but White Earl, a white tea scented with bergamot, is delicate and lovely. While all their products are available for mail-order, they also offer tea tasting classes for local folks. 
     

    P1150434
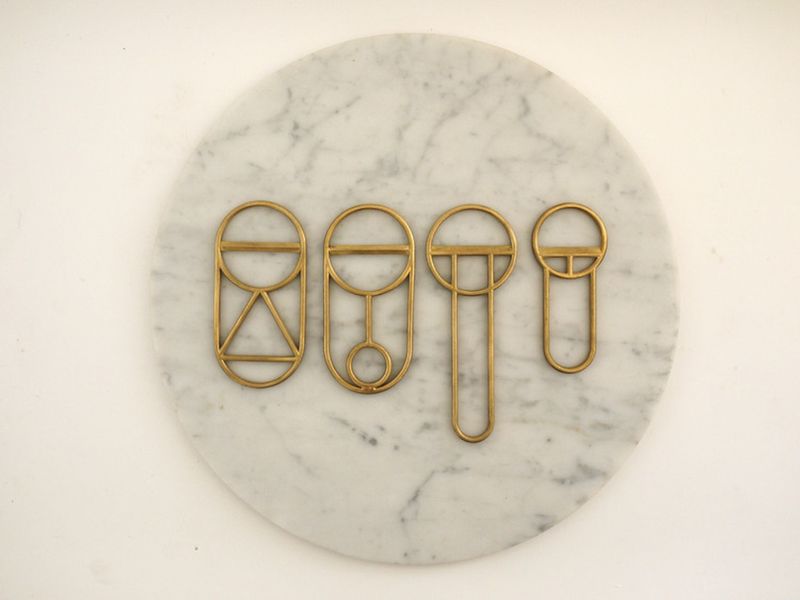
    5. These stunning bottle openers need little explanation. Solid brass. Made in Rhode Island. Simply amazing. (Via Lottie & Doof.)


    Grater-pack-shot

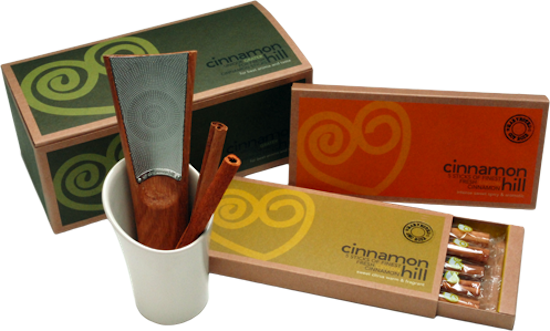
    6. Cinnamon Hill's cinnamon grater seems at first glance to be the kind of superfluous gizmo the world doesn't need. Isn't ground cinnamon in a jar good enough? The answer turns out to be, actually, no. After all, we all grate nutmeg whenever we need some; why not do the same with a spice used far more commonly even? Cinnamon Hill sells different kinds of cinnamon paired with their grater, sticks of "true" Ceylon cinnamon from Sri Lanka that have citrusy notes and Vietnamese cassia cinnamon that is hotter and sweeter. These aromas unfold immediately when you freshly grate the cinnamon on the beautifully designed grater, helping to boost the scents and flavor of your holiday baking.

     

    Poiré

    7. I went to a wine seminar last month with a bunch of girlfriends and made the discovery of the year: Eric Bordelet's pear cider. Bordelet used to be the wine director of L'Arpège in Paris, but left to return to his family vineyard in Normandy, specializing in fruit ciders. To be clear, though, these ciders have a lot more in common with Champagne than they do with juice. Bordelet's Poiré Authentique is crisp and dry, its flavor stunningly precise and delicious. I plan on serving a bottle with dessert this Christmas, but you could also buy a whole case and bring a bottle to every holiday party you go to. I guarantee you'll be the star of the season. And if you have a few shekels left over after that, spring for a bottle of Poiré Granit (a reserve cider made exclusively from the fruit of Bordelet's oldest trees – 200 to 300 years old) and let me know how it is.
     

    Runner
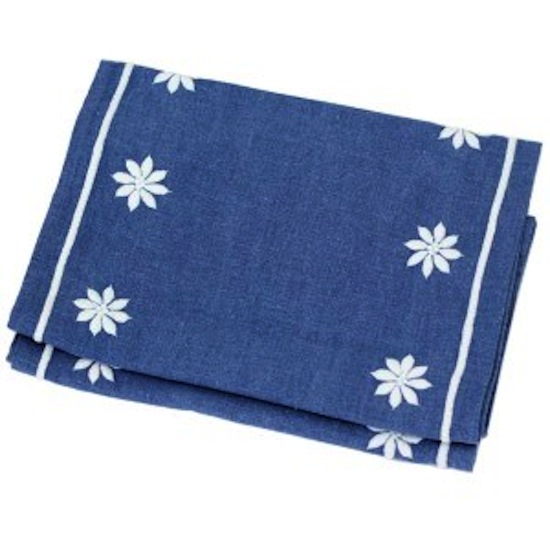
    8. Heather Taylor's hand-embroidered indigo linen runner feels cooling and summery as well as festive for winter. I happen to be a linens fiend – we have more tablecloths than we'll ever need – and yet I can always find reasons to add more to the collection. I love the casual elegance of a good runner and sometimes even use one on our coffee table during tea time (though Hugo's put a swift end to this practice for now). The blue-and-white combo here makes my heart sing.
     

    Spice_glacier_cap_1
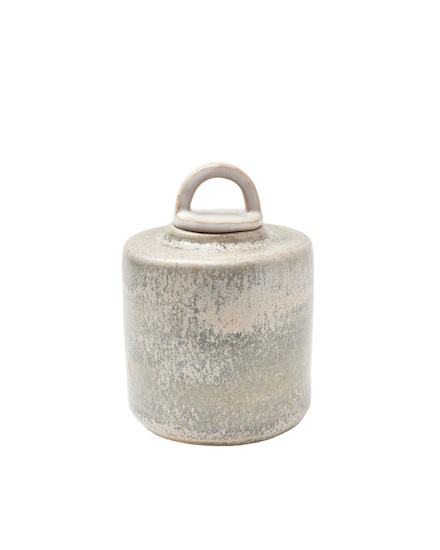
    9. Juliane Ahn of Object & Totem recently moved to Berlin and now produces her beautiful beads and vessels just a few neighborhoods over from me. It's hard to choose amongst her austere, yet still cheeky objects. Pick up one of her lidded spice jars for your kitchen or a chrome-beaded necklace for your mother. Maybe leave just one brilliantly blue Berliner mug for me.
    Tea_1313

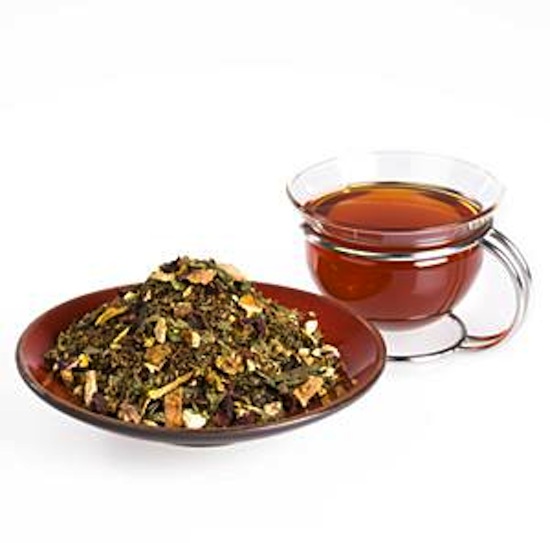
    10. I recently discovered a package of Gschwendner's rooibush-orange-peppermint tea on our groaning tea shelf. I have no idea how it got there or who gave it to us, but it has quickly turned into my very favorite tea to quaff all day long. I make a big pot in the morning, after my essential mug of milky black tea (Hugo is an early riser and I need that to help my eyes open), and then sip it all day long. It's got that gorgeous reddish rooibush hue and the combination of orange and peppermint is inspired. The peppermint tones down the exuberance of the citrus and the orange softens the peppermint's bite. I love it. It's delicious plain or sweetened with honey.

     

    Candles

    11. Food 52's Provisions shop is stuffed to the gills with wondrous things (these porcelain fairy lights? these napkin rings? this ginger beer kit?). I'm particularly enamored with the simplicity of these hexagonal beeswax candles and want to fill my dining table with a whole snaking line of them come Christmastime.


    Collage
    12. I discovered Julie Lee's gorgeous market collages on Instagram this past year and was thrilled when she decided to start selling prints of them recently. They're printed in an 8×10 format (wouldn't a row of them look great in a kitchen?), but Julie will also do custom-sized prints if you like.

    Full disclosure: Jacobsen Salt and Cinnamon Hill provided me with review samples of their products, but the decision to include them in this gift guide was entirely my own.
  • Parents Need to Eat Too
    Way back in the early days of food blogging, when there were only about six people doing it, a woman named Debbie Koenig started a blog called Words to Eat By. Long before I started this site, I read hers and loved it. Debbie lived in New York, like me, had worked in publishing, like me, plus her recipe for chocolate chip cookies really was so good. It's not a big leap to say that she certainly helped inspire my own jump into food blogging.

    When Debbie and her husband had their son in 2006, she realized, as most of us then do, that cooking with a baby is a whole new universe to navigate. Where once you thought nothing of spending an afternoon in the kitchen to make an elaborate dinner, you now have a screaming baby attached to your body, in desperate need of your full attention, to the detriment of your ability to shower, pee or even just make a sandwich. Bit by bit, Debbie figured out her way back into the kitchen and was inspired to help other mothers get their sea legs cooking again.

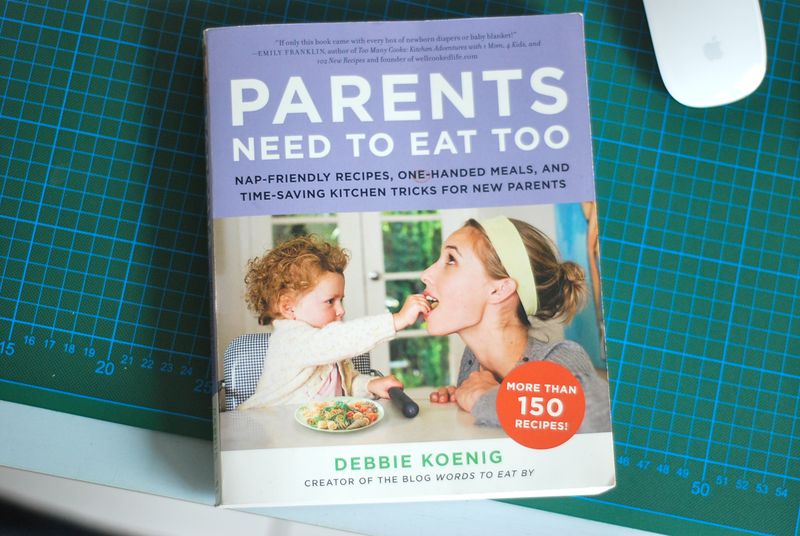
    Parents Need to Eat Too, her book and the name her blog has since taken over, is a compendium of all the wisdom she gained over the years since then. By teaching cooking classes to new mothers and keeping the conversation alive on her website, Debbie found herself with scores of recipes and tips to share with other sleep-deprived, harried and hungry new mothers. Parents Need to Eat Too holds all of them, plus a glut of information on freezing big batches of food, foods to promote milk production and soothing reassurances that one day things will feel normal again, even if right now your world is one big mess of burp clothes, peanut butter eaten out of a jar and multi-night wakeups.

    I first read Parents Need to Eat Too when Hugo was a few weeks old. I hadn't though it possible before, but just like they tell you, in those days I couldn't figure out how to do anything but nurse Hugo. I barely found time to shower and dress and fixing myself a bowl of yogurt (as in, open fridge, get yogurt, find bowl, pour yogurt into bowl, get spoon and eat) seemed so remote and difficult that the one time I managed to do so I felt a level of achievement I hadn't had since learning how to tell time in the third grade. Oh, early motherhood! You are a kick in the teeth.

    Debbie's book was a breath of fresh air. The few parenting books I had scattered around the apartment filled me with dread (nap schedules? infant character profiles?), but reading Parents Need to Eat Too was the soothing distraction I really needed. It didn't matter that I actually was in no position to cook again just yet. Debbie was telling me that I would be again, in time, and that it was just a matter of being patient and resourceful until then. At a time when everything I knew about my old life was gone, it was deeply comforting to know that.

    I've, of course, long found my way back to the kitchen, but these days I find myself reaching for Debbie's book all the time. Because now is the time that I'm really cooking for my family. Max is living at home again (praise be!), Hugo no longer needs his little pots of puréed veg (glory be!) and getting food on the table for all of us is my job. Along with everything else I do. So what I'm looking for these days is help in preparing dishes that all of us will eat, as well as stocking the freezer for those days when I just don't have the time to cook and finding recipes I can make with one hand tied behind my back.

    Parents Need to Eat Too has all of that, but is tailor-made for those of us who love to cook anyway and don't want Hamburger Helper to get dinner on the table. The recipes are relatively sophisticated despite their supreme easiness and there are lots of delicious things to get excited about. (Big-Batch Adobo Chicken is next on my to-do list.) Currently, I'm having a delightful love affair with the slow cooker chapter even though I don't own a slow cooker. (Debbie says that a cast-iron pot with a lid in a low oven mimics the heat of a slow cooker pretty well.) So the other day I decided to try my hand at brisket.

    I bought a big slab of brisket meat after a hilarious back-and-forth with the German butcher who, despite my having researched this exhaustively online beforehand, had no idea what I was talking about and a bottle of apple juice (I already had barbecue sauce in my fridge leftover from this).The prep was almost comically simple: First, I preheated the oven to 200 degrees F (about 90 degrees C) and put the slab of meat in my biggest cast-iron pot. Then I poured in a cup of apple juice and a cup of barbecue sauce. Then I put the lid on the pan and put it in the oven for about 6 hours. And That Was It.

    Sliced brisket

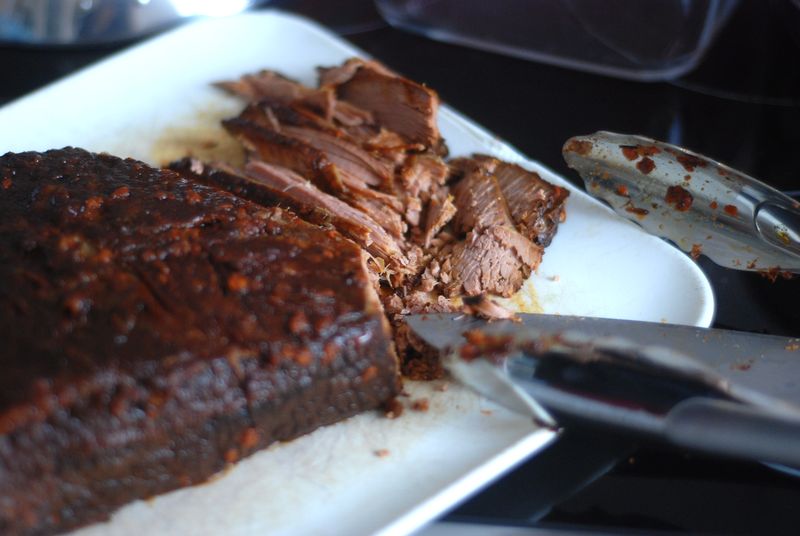
    When I removed the pot from the oven and took off the lid, the brisket – shrunken from its impressive girth in its raw state – was dark brown and fragrant, swimming in a pool of mahogany cooking liquid. I sliced it thinly and spooned the liquid over each portion. The meat was wonderfully lean and flavorful, pleasing both Hugo and his daddy. (Hugo loves chomping away on the meat for a while, then spitting it out once he's leached all the good stuff out, so while I can't guarantee that your child will have quite the same delightful table manners as mine does, the recipe is definitely kid-friendly.) We had a big dinner, the three of us, and I packed the freezer full of leftovers, my biggest thrill these days.

    Along with Dinner: A Love Story for people with children over 3 and which I wrote about here, Parents Need to Eat Too is the best parenting resource for cooks.

    Barbecued Brisket
    Serves 6 to 8
    From Parents Need to Eat Too

    1 3-4-pound brisket, trimmed of as much fat as possible
    1 cup barbecue sauce (if store-bought, then as natural as possible)
    1 cup apple juice

    1. Put the brisket in the slow cooker or a large cast-iron pot (if using the pot, preheat the oven to 200 degrees F). Pour the sauce and juice on top, making sure some of the liquid ends up underneath the meat. The meat should not be fully submerged.

    2. Cook on LOW for 6 to 8 hours or, if using the pot, for 6, checking once at the 5-hour-mark. The brisket is done when a fork pierces the meat easily. Slice the meat against the grain thinly, then serve with the cooking liquid. Debbie suggests rounding out the meal with these beans and cornbread.

  • DSC_3869

    "Who will free apples from the tyranny of cinnamon?" was something I was, no joke, thinking about the other day. "I mean, I like cinnamon," I continued telling myself, as Hugo took a 17th screeching turn around the coffee table (his new thing: racing around it like it's Daytona and he's, um, one of the guys in a fast car), "but why is it in every single apple recipe I come across? Free yourselves, apples!!" I howled silently. And then, because my companion was a crazy-eyed 16-month-old coffee-table-racing machine screaming "hallo! hallo! hallo! hallo!" as he zoomed forward, I howled it out loud too. Good thing toddlers are so easily amused!

    And lest you think I have completely lost my marbles, I would just like to take this moment to say that not a few hours later, I finally happened upon a recipe for apple cake with nary a fleck of cinnamon in sight. It was like someone had heard me or something! Or Dorie Greenspan, to be more specific.

    The reason I'd been thinking about apples and their everpresent cinnamon fog is because we are drowning in apples at the moment. I have this irritating habit of buying a few at every market we go to,  but Max and Hugo aren't the biggest apple eaters (they're more in the pear/clementine/grape camp), so unless I eat an apple at every meal, I get buried under them pretty quickly.

    DSC_3860

    And, like I said, while I have no beef with cinnamon per se, it just gets a little tedious to see it in every apple cake under the sun. So along came a fabulous French friend of Dorie's named Marie-Hélène to liberate me both of my moldering apples and my cinnamon resentment.

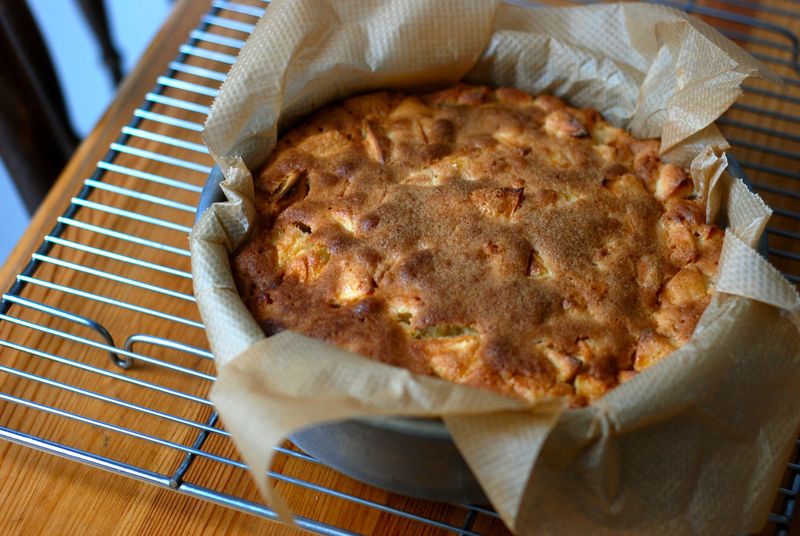
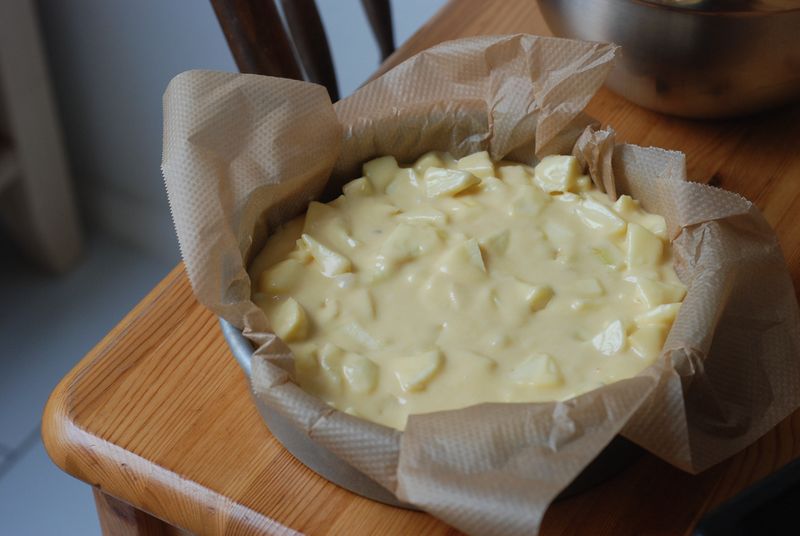
    Marie-Hélène's apple cake is one of those genius recipes that is hardly a recipe, really, but is the kind of thing you need in your arsenal for the rest of your life. The batter is awesomely easy – you only need a whisk and a bowl and a stove for melting butter. The original recipe asks for 3 tablespoons of rum, which would make for a fabulously grownup cake, boozy and moist. But since I was making this for a playdate with a friend and her son, I decided to go with only one tablespoon of alcohol (bourbon, since I was out of rum) and two tablespoons of whole milk. The batter is silky and there's relatively little of it, especially with regards to the mountain of chopped apples that gets folded in. In fact, when you pile it into the cake pan, you'll see it is that holy grail of cakes: more apple than cake. Exactly what I wanted.

    DSC_3883

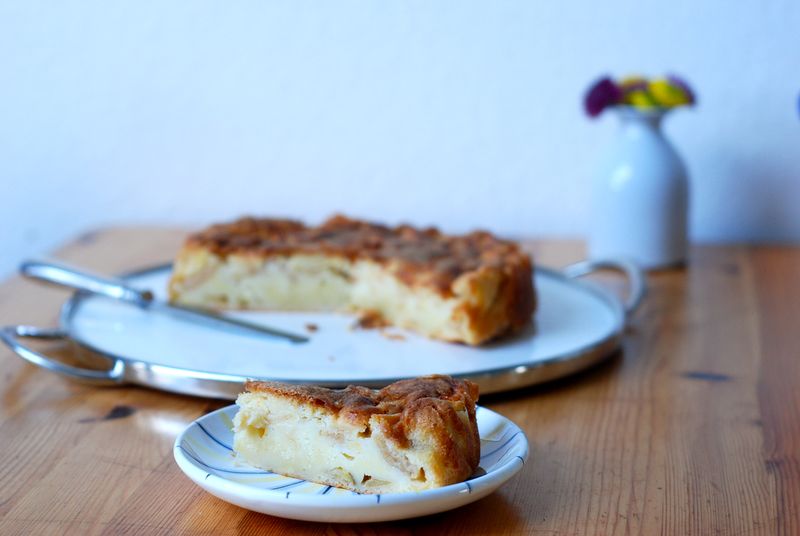
    We ate it once it had cooled sufficiently and it was fragrant and delicate and the apples (I'd used a mix of Boskoop and Elstar, I think) were supple and lovely. It was perfect playdate material, though of course I was also already imagining it as a dinner-party dessert, since it was so light and appley. (Though the next time I make it, I will be reducing the sugar by a few tablespoonfuls.) By the next day, the cake had morphed into something almost akin to a clafoutis – the cake bits were more pancakey than cakey and the fleeting flavor of the bourbon was entirely gone. It was just as delicious and very well suited for breakfast.

    An apple cake for every time of day! Holy grail indeed. And no cinnamon in sight.

    Marie-Hélène's Apple Cake
    Makes one 8-inch cake
    Adapted from Around My French Table

    3/4 cup all-purpose flour
    3/4 teaspoon baking powder
    Pinch of salt
    4 large apples (if you can, choose 4 different kinds)
    2 large eggs
    3/4 cup sugar
    1 tablespoon dark rum or bourbon
    2 tablespoons whole milk
    1/2 teaspoon pure vanilla extract
    8 tablespoons (1 stick/4 ounces) unsalted butter, melted and cooled

    1. Center a rack in the oven and preheat the oven to 350 degrees F. Line the bottom and sides of an 8-inch cake pan with parchment paper.

    2. Whisk the flour, baking powder, and salt together in small bowl. Peel the apples, cut them in half and remove the cores. Cut the apples into 1- to 2-inch chunks.

    3. In a medium bowl, beat the eggs with a whisk until they’re foamy. Pour in the sugar and whisk for a minute or so to blend. Whisk in the rum, milk and vanilla. Whisk in half the flour and when it is incorporated, add half the melted butter, followed by the rest of the flour and the remaining butter, mixing gently after each addition so that you have a smooth batter. Switch to a rubber spatula and fold in the apples, turning the fruit so that it's coated with batter. Scrape the mix into the pan and even the top.

    4. Slide the pan into the oven and bake for 50 to 60 minutes, or until the top of the cake is golden brown and a knife inserted deep into the center comes out clean; the cake may pull away from the sides of the pan. Transfer to a cooling rack and let rest for 5 to 10 minutes.

    5. Carefully pull the parchment paper – and the cake – out of the pan and let cool on the rack until it is just slightly warm or at room temperature, then transfer to a cake plate. The cake can be served warm or at room temperature, with or without a little softly whipped, barely sweetened heavy cream or a spoonful of ice cream. The cake will keep for about 2 days at room temperature. However long you keep the cake, it's best not to cover it — it's too moist. Leave the cake on its plate and just press a piece of plastic wrap or wax paper against the cut surfaces.

  •  

    For everyone who wasn't able to attend the evening at NYU's Deutsches Haus, here's the taping of our lovely evening. Big thanks again to Amanda and Deb and Martin and to all of you who came!

  • MBK in NYC
    Mark your calendars! Save the date! On Tuesday, October 22nd at 6:30 pm, I'll be at NYU's Deutsches Haus for a conversation with Amanda Hesser and Deb Perelman about My Berlin Kitchen, out now in paperback!

    I am beyond excited, as you can well imagine.

    New York City! Amanda Hesser! Deb Perelman! My book! YOU!

    I hope you can come and am counting the days, hours, minutes, seconds until I am back in New York City again. I have been in the throes of missing New York for several weeks now and it's been this dullish sort of ache in my chest where I keep pushing it down to to keep it from interfering with the rest of my life. But now, now! It is in reach! And I am all afire.

    (I also need to cool it with the exclamation marks, but it is just one of those evenings.)

    Can't wait to see you there!

    Time and date: Tuesday, October 22nd, 6:30 p.m.
    Location: Deutsches Haus at NYU (here is a nifty map)
    The Scene: Me, Amanda and Deb chatting about food blogging, recipes, love and happiness (!) with Martin Rauchbauer, director of Deutsches Haus.
    Other: The event is free of charge, but space is limited so please rsvp to this address: deutscheshaus[dot]rsvp[at]nyu[dot]edu

  • Fuchsia dunlop's braised chicken

    I have been on a cookbook-buying bender lately, even though we really don't have room for any more books and I already don't cook enough out of the books that I do own. There is just so much good stuff out right now. (I promise to do a post or two on new cookbooks and my cookbook collection in general soon. Don't you love knowing what other people's cookbook shelves are like? More fascinating than the bathroom cabinet!)

    Fuchsia Dunlop's Every Grain of Rice is my latest baby, one I'd had on my wishlist since it was first announced. I own every one of her books and adore them all (even though I have yet to cook from any of them…until now). In fact, Fuchsia could take to writing cereal box copy and I'd probably buy every last thing her words adorned. I was thinking about it the other night and realized that, in my opinion, Fuchsia's the best living food writer out there these days. She makes everything she writes about – stinky tofu! cooking school in Sichuan province! chewy chicken cartilage! – utterly captivating.

    Every Grain of Rice is Fuchsia's most recent book and it focuses on simple Chinese home cooking, with recipes sourced mostly from the south of the country. It's vegetable-heavy and beautifully photographed and, in short, will have you keeping your local Asian grocer in business as you keep trotting back for more ingredients, like black vinegar and dark soy sauce and dried shiitake mushrooms and chili-bean paste. (Actually, none of these things should cost very much at all. Which is sort of the point.)

    Fuchsia's evangelical about the resourcefulness of Chinese home cooking, how light on the wallet and the waistline it is and what a shame it is that China's newfound wealth is corrupting a centuries' old reliance on simple things like vegetables and rice and a little bit of protein (far, far less than our Western diet could fathom). A bottle of black Chinkiang vinegar bought at my local Korean grocery the other day cost me less than 3 euros and it'll last me quite some time. So while you'll have to stock your pantry somewhat to get started with Chinese cooking, it's actually a very economical way to eat.

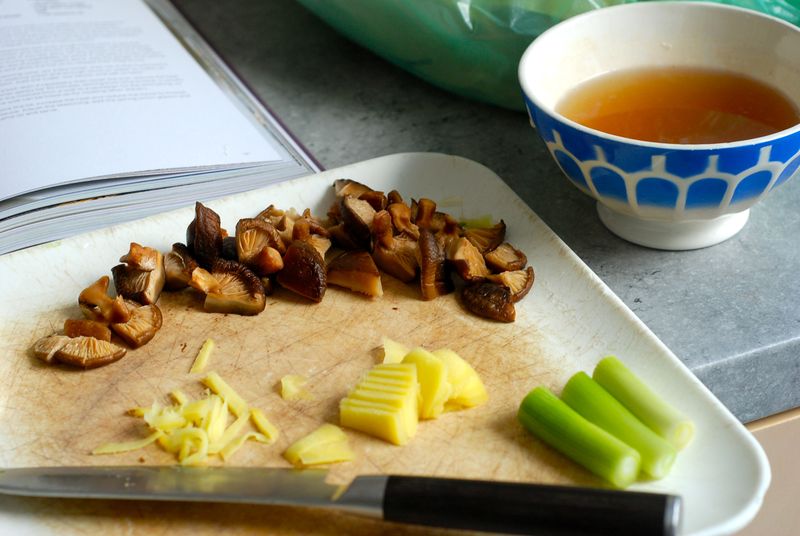
    Reconstituted shiitake musrooms

    The recipe that jumped out at me on my last perusal through the book was a braised dish of chicken and dried shiitake mushrooms. Most of the recipes in the book require a wok, but while I actually own an authentic hammered-steel wok given to us for our wedding by a friend in Hong Kong, I don't have a gas stove. So the wok sits patiently in the basement awaiting the day that we move to an apartment that still has a gas line (not an easy feat in Berlin). And I try to find recipes in Every Grain of Rice that could conceivably be made in a different pan. (And yes, a flat-bottomed wok for an electric stove is at the top of my shopping list now.)

    This braise sounded perfect – I was supposed to stir-fry the chicken and aromatics to start, but the bulk of the cooking was going to be braising. I figured this was one dish where I could circumvent the missing wok without too much trouble.

    Chicken and shiitake mushrooms

    I've always been intimidated by Chinese cooking, just as I have been with Indian, for fear that I'd never be able to approximate the flavors and techniques of authentic Chinese food at home. But once again – ding ding! – it's nowhere near as complicated as it seems. What's crucial, besides assembling the correct pantry, is doing all the chopping and preparing before you start cooking. Because the cooking itself goes at lightning speed. The work is mostly beforehand.

    In this case, you soak and chop dried shiitake mushrooms, chop chicken thighs into pieces roughly the same size as the mushrooms, peel and slice ginger and chop and bruise scallions. And that's it. After that's done, you put the pot on the stove and fairly fly through the rest of the recipe.

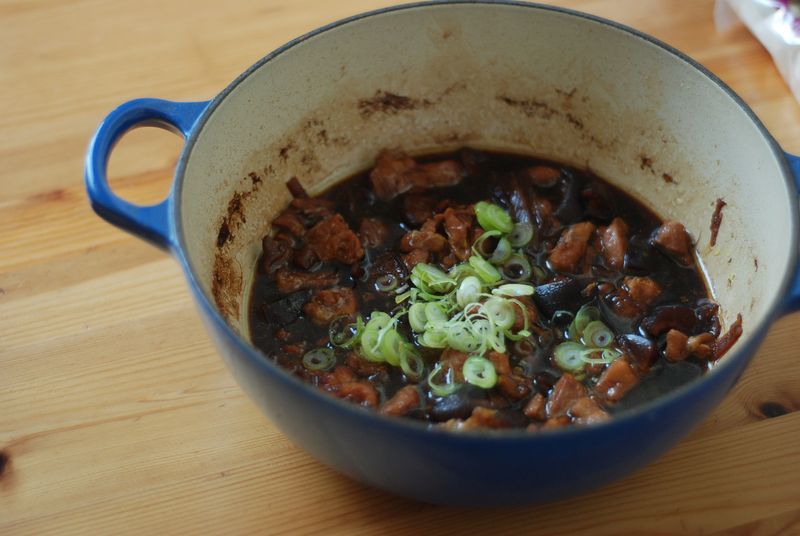
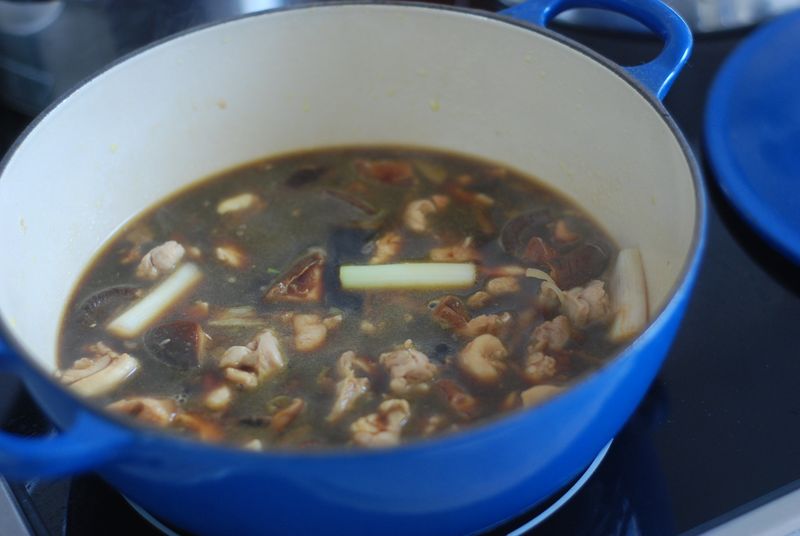
    The chicken is briefly stir-fried before the ginger and scallions are added to the pan to let their aromas unfold. You pour in a bit of Shaoxing wine, the soaked mushrooms and their liquor, a bit more water, soy sauce, sugar and salt. This is cooked together for half an hour, during which time the broth goes a deep, rich brown. It's very exciting. At the end, you take off the lid from the pot and let the braising liquid reduce slightly.

    Braised chicken with dried shiitake mushrooms

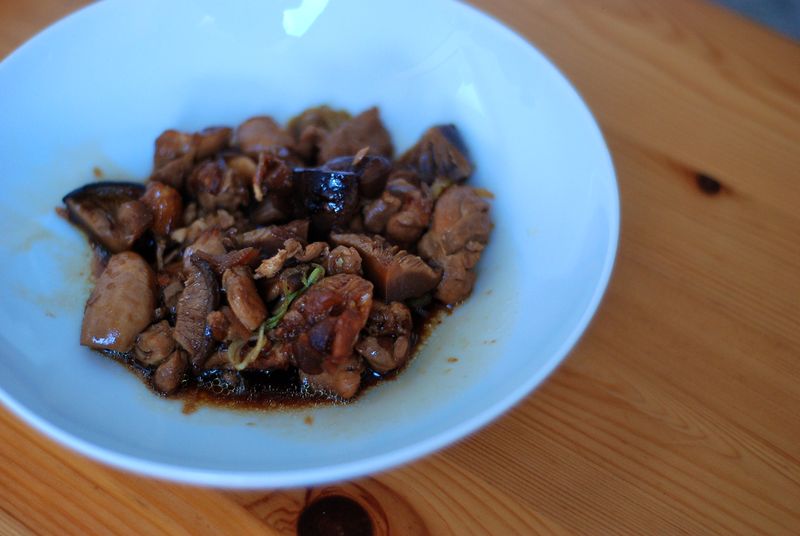
    What you're left with are chunks of tender chicken, thoroughly infused with the aromatic flavors of ginger, scallions and soy. The mushrooms are silky-soft. And the broth – the broth! – is so good that I wished I'd made an entire potful of it. It was like chicken soup that had died and gone to heaven?

    Incredible.

    Fuchsia Dunlop's Braised Chicken with Dried Shiitake Mushrooms
    Serves 4 as part of a larger Chinese meal or 2 as a main with rice and a vegetable dish

    8 dried shiitake mushrooms
    4 boneless chicken thighs
    2 scallions
    2 tablespoons cooking oil
    1-inch piece of ginger, peeled and sliced
    2 tablespoons Shaoxing wine
    About 200 ml chicken stock or water
    1 tablespoon sugar
    2 teaspoons dark soy sauce
    Salt
    1 teaspoon sesame oil

    1. Soak the dried mushrooms in hot water to cover for at least 30 minutes. Then cut them into quarters, reserving their soaking water. Cut the chicken into similarly-sized pieces. Cut the scallions into 2-inch sections and separate the white and green parts. Crush the whites slightly with the side of your knife handle. Slice the green parts thinly and set aside.

    2. Add the cooking oil to a seasoned wok or braising pan over high heat. Then add the chicken and stir-fry for a few minutes until lightly browned. When the chicken is nearly done, add the ginger and scallion whites and allow the hot oil to release their fragrance.

    3. Add the Shaoxing wine, stir a few times, then add the mushrooms, their soaking water and enough stock or water to make up 300 ml. Add the sugar, soy sauce and salt to taste.

    4. Bring to a boil, then cover the wok or pot, reduce the heat and simmer gently for 30 minutes, stirring occasionally. Remove the lid, increase the heat and reduce the liquid to thicken the sauce. Adjust the seasoning, add the sliced scallion greens and sesame oil and serve.

  • Tomato mustard tart

    The ivy on the back wall of the building I can spy from my office has turned a deep, vibrant crimson. We've put away our summer clothes and pulled out our woolen hats, our thick socks, our flannel pyjamas. The toasty smell of the heating rises up against the windows in the morning. But my favorite stand at the green market is still selling plum tomatoes, the last ones of the season, and I am physically incapable of passing them by, no matter how heavily autumn presses upon us. Every week, I buy a sackful of those tomatoes and simmer them into sauces, chop them into Hugo's pastina, turn them into a quick lunch with a piece of cheese and bread. They're still irresistible, despite the winter squash and cabbage that look at me fetchingly from the side.

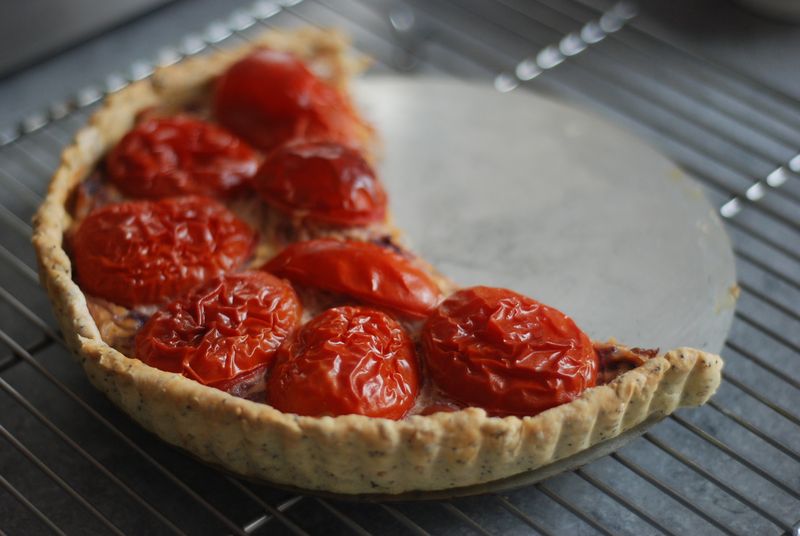
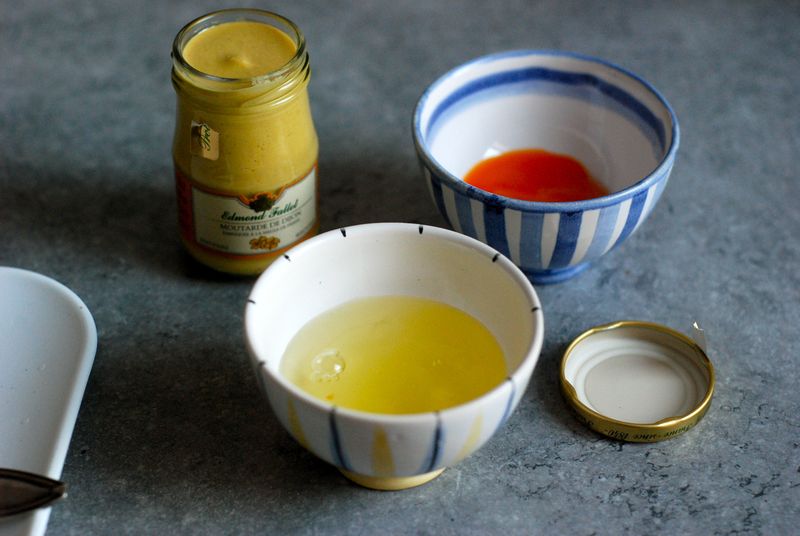
    Tart mise en place

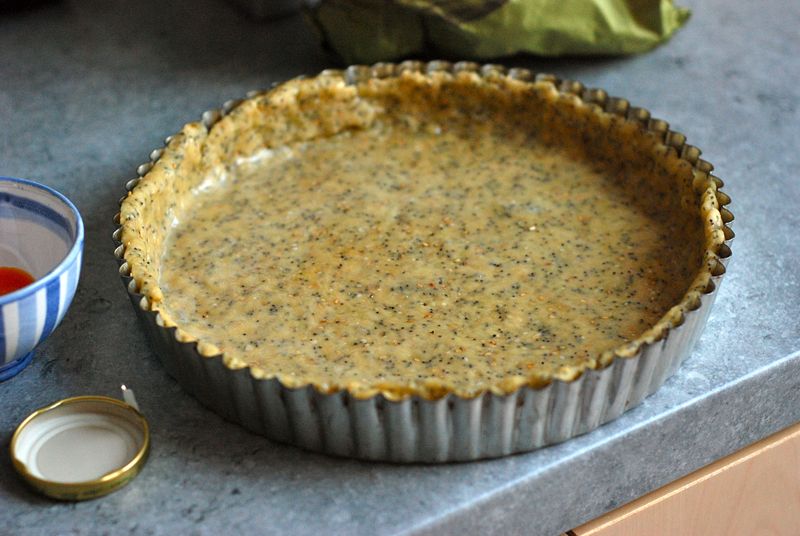
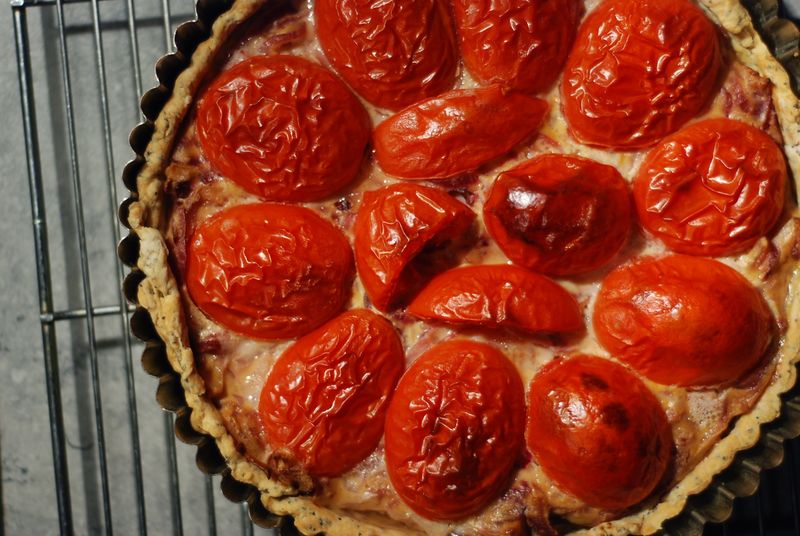
    My most recent way to make my way through a pile of tomatoes was to bake a French tomato mustard tart from Clotilde's lovely new cookbook, The French Market Cookbook. A savory olive oil tart dough speckled with poppy and sesame seeds is parbaked, then filled with a savory blend of sautéed onions, mustard and egg. On top go a whole mess of halved, seeded and salted plum tomatoes before the tart goes back in the oven. There, the tomatoes shrink and shrivel, the crust goes crisp, the mustard and onions mellow. We ate slices of the tart hot from the oven and they were very good, but an overnight rest made them truly sing. The next day, Max and I eyed each other ferociously over the last few slices.

    (A note: I mistakenly used a tart pan that was too small by a few inches, only realizing my mistake when the tart was already in the oven. Don't follow in my footsteps – make sure you use an 11- or 12-inch tart pan. You want the tart dough to be very, very thin.)

    Tart dough

    Clotilde is celebrating her blog's tenth anniversary today. Oh, 2003! I still remember first discovering Chocolate & Zucchini just a few months after Clotilde got started and feeling like I'd happened upon something seriously momentous. Her newest book, The French Market Cookbook, is a celebration of the very things that Clotilde has always done so well: simple yet creative vegetarian dishes that are seasonal and delicious, but also very, very beautiful.

    One of Clotilde's gifts lies in the ability to take rather prosaic ingredients and transform them into something delectable. This book is full of these ideas. To wit: a stir-fry with barley flakes, carrots and curry; a mashed broccoli casserole on a bed of green lentils and rice; or, the one I'm now most excited to try, poor man's bouillabaisse, with nary a piece of fish in sight (poached eggs and peas take center stage). She updates an old French classic, fontainebleau, with yogurt, but also goes way back with an old-fashioned take on macarons made with walnuts and almonds and sandwiched together with a simple filling of melted chocolate.

    Tomato tart

    Happily, I have an extra copy of The French Market Cookbook to give away today, in celebration of Clotilde and her lovely site and all the things she made me feel capable of doing all those years ago. So for a chance to win a copy, please leave a comment below and I'll pick a winner at random on Wednesday. Good luck!

    Update: Jennifer is the winner and has been emailed. Thank you all for participating – comments are now closed.

    Clotilde Dusoulier's Tomato Mustard Tart
    Makes 1 11-12 inch tart

    tart dough:

    1/4 cup (60 ml) olive oil
    2 cups (260 grams) all-purpose flour
    1 teaspoon fine sea salt
    1 tablespoon toasted sesame seeds (optional)
    1 tablespoon toasted poppy seeds (optional)
    1 large egg

    1. Combine the flour, salt and seeds, if using, in a bowl. Add the oil, egg and 1/4 cup/60 ml of water and mix them in with a fork until absorbed. Knead the dough in the bowl until it comes together in a smooth ball.

    2. Roll out the dough on a lightly floured surface, turning it every so often, so that it doesn't stick to the surface or pin. Avoid overworking the dough. Transfer the dough to a lightly oiled 11- or 12-inch tart pan and line it neatly. Chill for 30 minutes.

    filling:

    1 large egg, separated
    1 3/4 pounds (800 grams) plum tomatoes
    Fine sea salt
    2 tablespoons olive oil, more for drizzling (optional)
    2 small red onions, thinly sliced
    2 tablespoons Dijon mustard
    Handful of basil leaves, if available
    Freshly ground black pepper

    1. Preheat the oven to 325 F (160 ).

    2. Brush the tart dough with some of the egg white. Bake for 30 minutes.

    3. Halve the tomatoes lengthwise and squeeze out the juice and seeds and core. (Save them for drinking with a sprinkle of salt – so good!) Sprinkle the cut sides with salt and place the tomatoes face down in a colander to drain.

    4. Heat the oil in a pan and sauté the onions and 1/2 teaspoon salt over medium heat for about 15 minutes, until the onions are very soft, but haven't taken on any color. Let cool slightly.

    5. Stir the egg yolk and any remaining white and the mustard into the onions and spread over the crust. Arrange the halved tomatoes, cut side down, over the onion layer. Drizzle the tart with more olive oil to taste (optional). Bake the tart until the tomatoes are wrinkled and fragrant, 45 minutes.

    6. Top with shredded basil and black pepper and serve warm or let cool and store at room temperature overnight before serving.

  • Sauteeing fresh spinach

    Last week something terribly exciting happened: I found fresh spinach at my local green market. That never happens. Yep, Berlin may have many wonderful things now, but fresh spinach at the market still counts as a rarity. (You can sometimes find it at Turkish grocery stores.)

    (Proof? My mother-in-law, a fabulous cook and curious human being – curious as in interested in other things, not curious weird! – has literally (in the old-fashioned sense of the word) never bought fresh spinach before in her life. She stared at my enormous bag of it in something akin to wonder.)

    (Further proof? Just a week later, that same farmer had nothing even resembling fresh spinach at his stand. Curses!)

    I bought a whole kilo (over two pounds) of the spinach and lugged it home where my very obliging mother washed it for me. (She also ironed my stack of linens and shirts the other night while babysitting my child so I could go out and drink wine and have a fancy dinner, so I'm thinking I was probably a lowly insect in a previous life and am now being compensated for it, or something.)

    Then I stared at the very large pile(s) of washed fresh spinach and wondered how on earth I was going to cook it all.

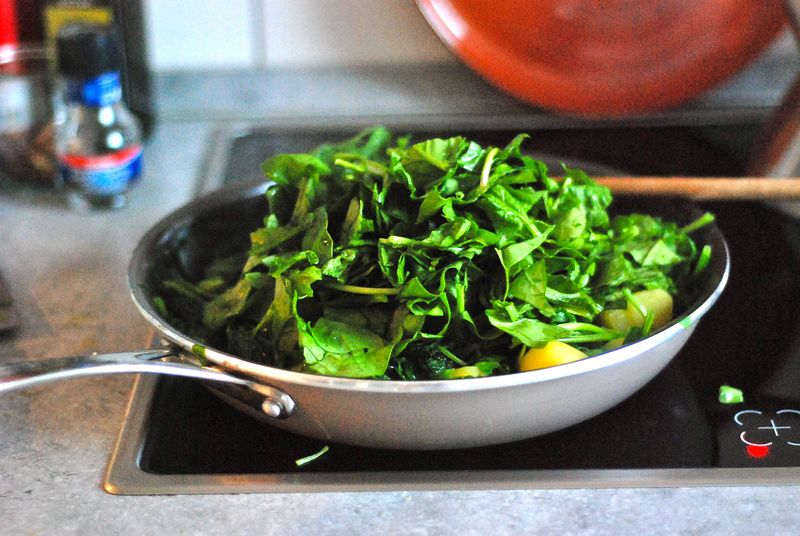
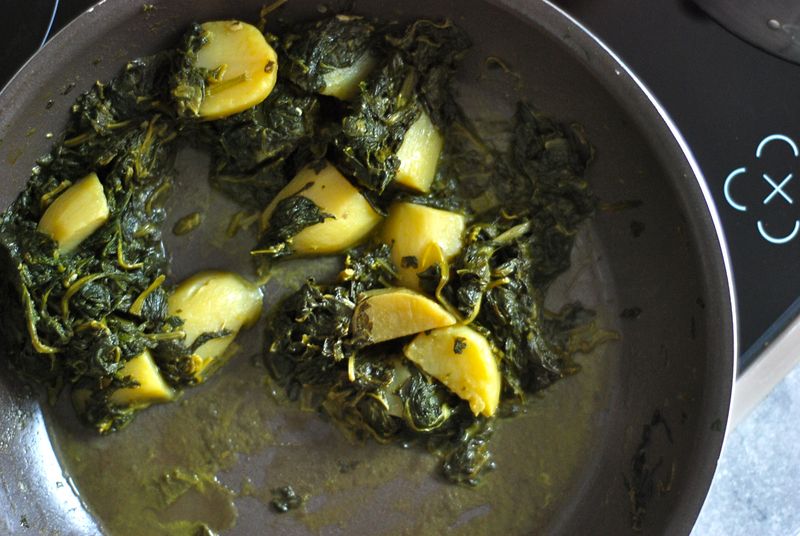
    Fresh spinach and potatoes

    Several years ago, my father resurrected his Very Serious Indian Cooking Phase (VSICP – originating in the early 1980's in Brookline, Massachusetts). He made multi-weekly visits to Moody Street for ingredients, found obscure cookbooks online and subjected his patient, loving wife to cumin and coriander in everything from potatoes to pasta. (Practically.) He planted the bug in me, too. My freezer now is a veritable smorgasbord of Indian spices and thanks to him, I know the difference between ajowan and amchoor.

    So! After a few more minutes of staring at the spinach, I headed to the bookshelf and pulled down Julie Sahni. If anyone was going to get over two pounds of spinach under control, it was going to be an Indian.

    If there's something that continues to surprise me about Indian cooking, it's how easy it is. You know, you look at the ingredient lists of Indian recipes, ten spices you've barely heard of, and get intimidated, or you think back to your last meal in an Indian restaurant and wonder how a home cook could ever get that complex, multi-layered flavor going in the kitchen. But if you just try, it's so easy. All you really need is a well-stocked spice pantry and these days, with mail-order spice companies and sophisticated grocery stores the world over, there's no excuse for not having one.

    Saag

    In this luscious, lovely recipe, you cook spinach (the original has you combine spinach with stronger-flavored greens, but I just used spinach) and potatoes with a simple blend of spices that will probably be familiar to everyone: cumin, ginger and hot red pepper, plus a little hit of garam masala at the end (if you leave this off, it will be no less delicious, by the way). The key to dish is the long cooking time; the spinach is almost melting at the end and the potatoes have gone all fudgy and sweet. There's a nice heat to the dish, but nothing that will blow your head off and even though the recipe says that it serves 6 to 8 people, I am here to bear witness to the fact that we, um, polished it off with a smaller crowd. (With Classic Indian Cooking open on the kitchen counter, I couldn't stop myself from rounding out the menu with tomato raita and a rice pilaf stuffed with goodies. And in case you're worried about the aforementioned exploitation of my mother, this is the meal I fed her in gratitude.)

    Dinner tasted like the best kind of restaurant food, the kind of meal where you sort of can't believe that you were the one who put it on the table. It's like magic.

    Bungee jumping, sky diving, that's for other folks; exotic home cooking is my kind of thrill. Have a wonderful weekend, friends.

    Julie Sahni's Saag
    Adapted from Classic Indian Cooking
    Serves 6 to 8 people

    2 pounds fresh spinach
    1 pound waxy potatoes
    5 tablespoons ghee
    1 teaspoon cumin seeds
    1 teaspoon finely chopped garlic
    2 green chiles, seeded and minced, or 1/4 teaspoon red pepper
    1/2 teaspoon ground ginger
    1 1/2 teaspoons kosher salt
    3/4 teaspoon garam masala

    1. Pick over and discard all the rotting and yellowed spinach leaves. Wash the spinach thoroughly, then drain and pat dry. Chop coarsely.

    2. Peel and cut the potatoes into 1.5-inch chunks.

    3. Heat the ghee over medium-high heat in a large frying pan, preferably non-stick. When it is very hot, add cumin seeds. When the cumin turns dark (about 10 seconds), add garlic and chili. Stir rapidly for a moment or two, and add potatoes, turning and tossing them until they are lightly browned (about 5-8 minutes). Add about 1 cup of the chopped greens and stir it in. When the greens get limp, add another cup of greens. Continue until all greens are incorporated. Sprinkle with ginger powder and salt. Stir well to mix. Add 1 1/4 cups boiling water, reduce heat and cook, covered, until the potatoes are tender (about 20-25 minutes). Uncover and continue cooking until the excess moisture evaporates (15-30 minutes). The vegetables must be stirred very carefully at this stage, as the potatoes break easily. 

    4. Increase heat to medium and continue cooking, stirring the vegetables gently until the potatoes and greens look almost dry and the butter begins to coat and glaze the vegetables. Stir in garam masala, and turn off heat. Check for salt, and serve. This dish may be prepared several hours before you are ready to serve. It also keeps well in the refrigerator for up to 4 days.

  • Pulled chicken sandwich
    When we were in Portland for one day last year on the book tour, our hotel was just a short walk from a square filled with food trucks. Once we'd unpacked, changed teeny tiny baby Hugo (sob!) and put on our walking shoes, we headed out for lunch. I wouldn't have been able to eat from more than one truck, but you should know that my husband's appetite belies his narrow frame. The man can eat and he certainly wouldn't let my wussy little appetite slow him down. Thanks to him, we were able to try things from several food trucks: poutine, Hawaiian barbecue and our absolute favorite, pulled chicken and coleslaw from a food truck specializing in Southern food.

    Since then, that pulled chicken has come up more than once in conversation, mentioned in hushed, longing tones. But funnily enough, it never occurred to me that I could just make it myself. It turns out that I have a blind spot when it comes to meat. I sort of always forget that it's there, you know? Nine times out of ten, when I go to the grocery store, I don't even remember to go near the meat display.

    But Jenny at Dinner: A Love Story mentioned pulled chicken sandwiches recently in a post about getting back into the cooking swing of things once the summer ends and, a few clicks later, there was her recipe staring back at me sweetly, looking all easy and satisfying and freezable, three words that get me hot and bothered these days. (I am such a cliché. I also cried after Hugo's first haircut the other day.)

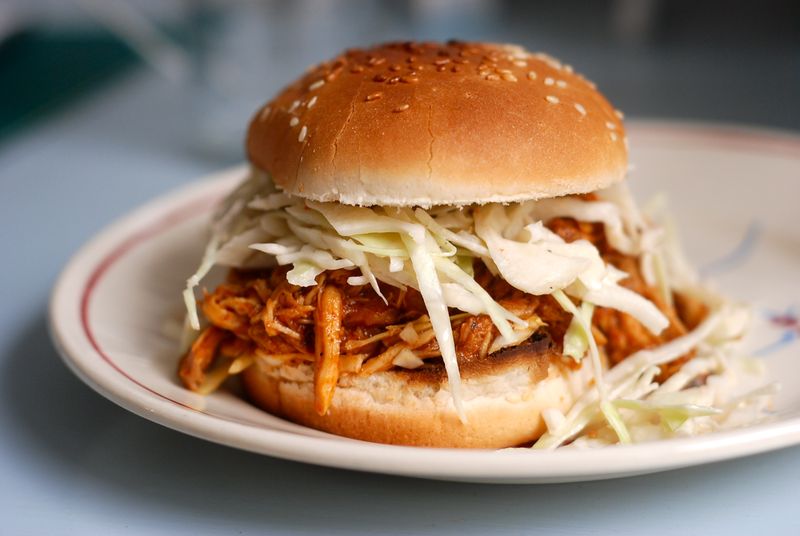
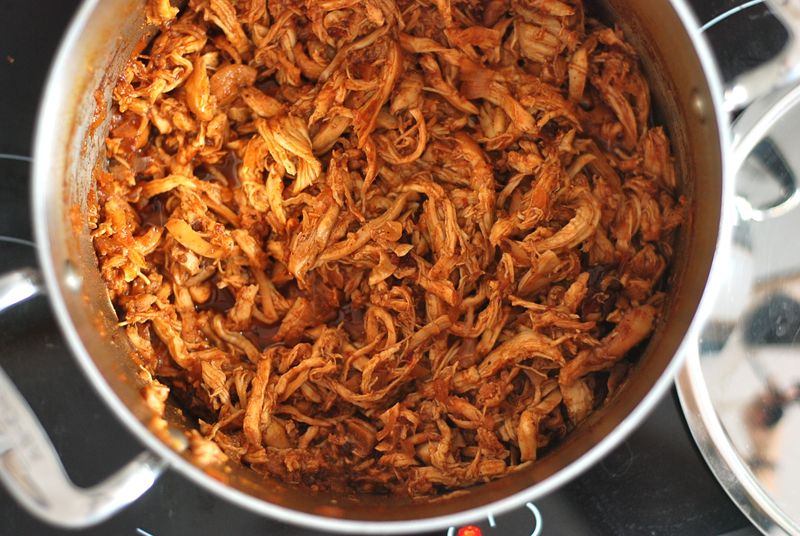
    Pulled chicken

    True to her blog's mission, Jenny's recipe is such a cinch, but it totally delivers. You can used store-bought barbecue sauce (which I did – opting for one without any stabilizers, preservatives or high-fructose corn syrup) or make your own. You mix it up with some water, vinegar, a chipotle pepper, garlic, onion and bay, then poach the chicken in that mixture until it's cooked. The only real work you have to do is shred the chicken once it's cooked. Then you reduce the cooking liquid until it's saucy and stir the shredded meat back into it. Done.

    What you're left with is a big pile of delicious meat that can be served for dinner right then and there, still leaving you with enough to freeze for a rainy day. The pulled chicken is sweet and spicy and delicious, as good forked up from a plate as it is piled high into a sandwich topped with cooling slaw. I used a mix of white and dark meat, because I like the flavor of dark meat, but Jenny's original recipe uses only breast meat.

    I served the pulled chicken with coleslaw on hamburger buns to my mother-in-law, who was mightily impressed. I put a few shreds on Hugo's plate, figuring he'd find it too spicy or strange, but he gobbled them up like a good little American. (He preferred to daintily drop on the floor the shreds of cole slaw his grandmother gave him.) The rest I froze for when Max is home on the weekend and we are hungry and feeling nostalgic about our amazing trip to the US.

    Money in the bank.

    Jenny Rosenstrach's Pulled Chicken Sandwiches
    Serves 6 at least

    1 cup barbecue sauce
    1/2 cup cider vinegar
    1 onion, finely chopped
    2 cloves garlic, minced
    1 bay leaf
    1 chipotle pepper in adobo
    6 to 8 boneless chicken breasts or a mix of white and dark meat (approximately 2 pounds)
    Potato rolls or hamburger buns
    Cole slaw or pickled vegetables

    1. In a large heavy pot, combine barbecue sauce, cider vinegar, onion, garlic, bay leaf and chipotle. Add chicken and enough water to cover (about 2 cups), stirring a few times.

    2. Bring to a boil, then reduce heat and simmer until chicken is cooked through, about 15-20 minutes. Remove the chicken from the pot and shred. Bring the sauce to a boil until it thickens and reduces, another 10 minutes. Stir in chicken.

    3. Serve on rolls with cole slaw or pickled vegetables. If freezing, allow to cool, then spoon into freezer bags, flatten slightly for easier thawing later, and freeze.

  • DSC_3080
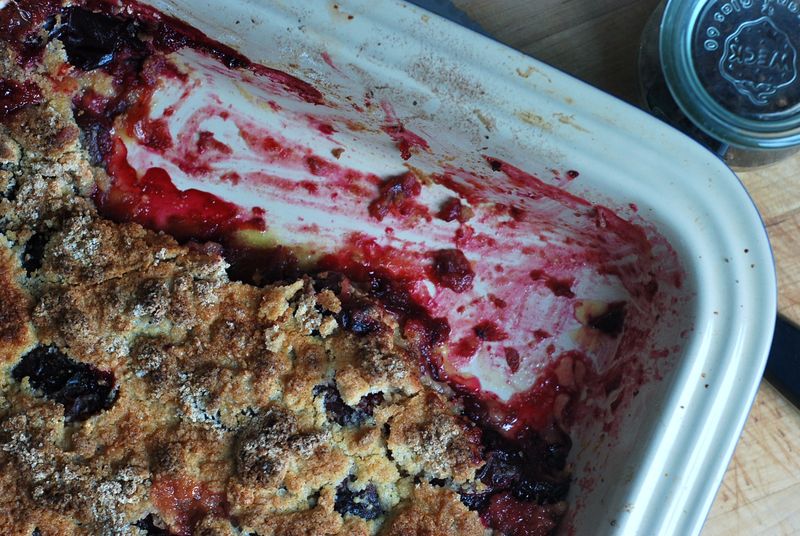
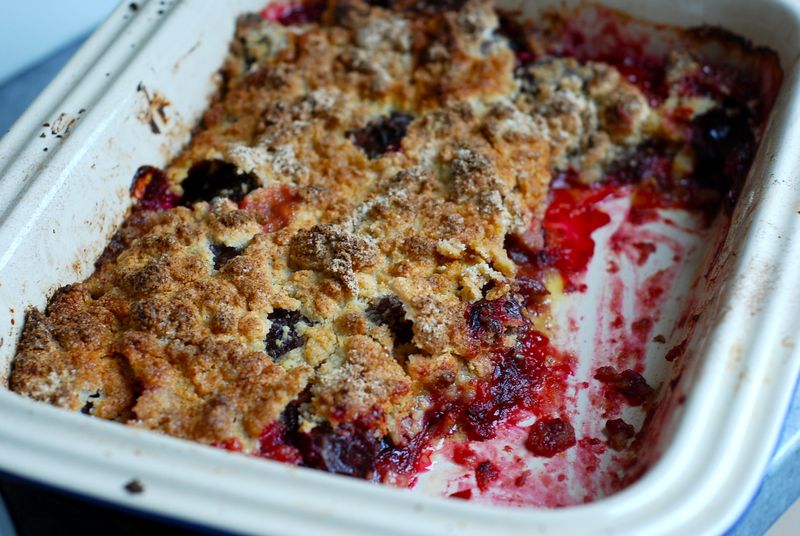
    The markets are flooding with the last prune plums of the season. I can never walk past the piles of them, dark and smooth, like big purple bullets. I've made Pflaumenmus (see my book for the recipe) and plum cake and poached plums, too, but this past week, a bowl of plums I'd bought the week earlier from a vendor who warned me that they were very sour, almost too sour, languished on my countertop. Hugo didn't want any and I didn't blame him: they were too tart for eating raw.

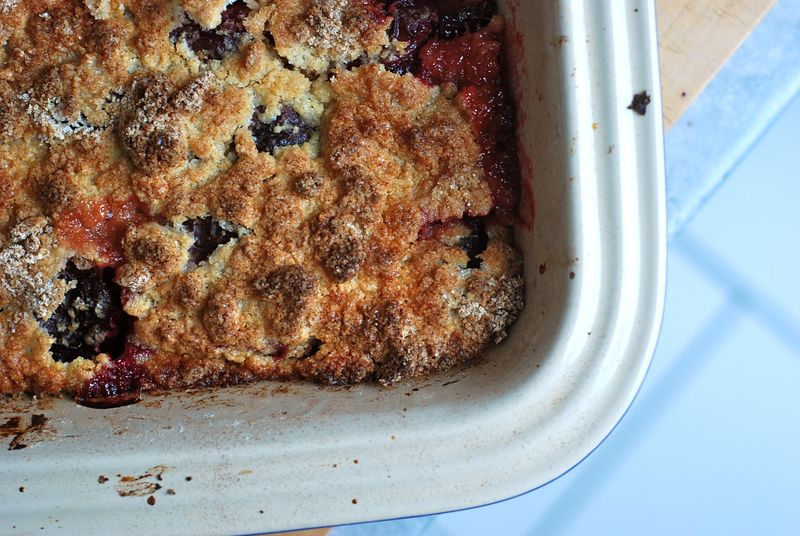
    So last night, then, after Max left and Hugo was asleep, I decided to go back to one of my all-time favorite recipes on this blog, Marian Burros' plum crumble. But this time I more than doubled the fruit. I wanted a mostly fruity dessert, with the crumble topping as a jaunty, crunchy cap. I kept the amount of candied ginger the same and only added a touch more sugar, hoping that the plums would turn into a tangy jam beneath the rubble. I was aiming for a crumble that I could eat for breakfast with yogurt with nary a second's thought and one that would use up the last of my plums, of course, too.

    DSC_3083

    I'd forgotten that the crumble topping is unusual in its assembly – you massage a beaten egg into spiced flour and sugar and baking powder, drop this streusel of sorts onto the fruit and only then drizzle (inundate?) the whole thing with melted butter.

    In the oven, magic happens. The plums soften and melt, the topping rises and browns and turns almost cookie-like, but with soft pockets of yielding dough here and there. I hadn't been mistaken, this truly is one of the best recipes I know, and this new version, heavy with fruit, is perfection. It's best eaten with a puddle of creamy plain yogurt. At least, that's how I like it best – the sourness of the yogurt a wonderful companion to the tart plums and sugary top.

    DSC_3072

    Plum Crumble
    Serves 6 to 8

    34 purple Italian or prune plums, cut in half and pitted
    3 tablespoons brown sugar
    2 tablespoons plus 1 cup unbleached all-purpose flour
    1 teaspoon cinnamon, divided
    1/2 teaspoon ground ginger
    2 heaping tablespoons finely chopped candied ginger
    3/4 cup granulated sugar
    1 teaspoon baking powder
    1/8 teaspoon salt
    1 egg, well beaten
    1/2 cup unsalted butter, melted

    1. Place plums in medium bowl. Heat oven to 375 degrees, with rack in center.

    2. In a small bowl, thoroughly mix brown sugar, 2 tablespoons flour, 1/2 teaspoon cinnamon, ground ginger and the candied ginger. Add to plums and mix well. Arrange plums skin side up in ungreased, deep 9-inch pie plate or baking dish.

    3. In a small bowl, combine granulated sugar, baking powder, remaining flour and cinnamon and the salt. Mix well. Stir in egg. Using hands, mix thoroughly to produce little particles. Sprinkle over plums.

    4. Drizzle butter evenly over crumb mixture and bake 30 to 35 minutes. Crumble is done when top is browned. Remove from oven and cool.

    5. Serve crumble warm or refrigerate for up to two days or freeze, well covered. If reheating, bring to room temperature, then warm at 300 degrees.