• Ciabatta

    Nothing beats the smell of home-baked bread, except maybe the sense of accomplishment that comes along with it. That these fragrant, plump, and crusty loaves would have been the result of the somewhat ornery recipe published in last week's L.A. Times, was not what I expected. I was looking forward to baking bread, but when I realized I'd need to use four different kinds of flour and two different kinds of yeast, I started to balk. After all, my other baking books had recipes for ciabatta that required only one kind of flour – all purpose, unbleached. But, I told myself, I am a recipe-testing blogger! No shortcuts here. This was, after all, a challenge. So I trudged over to Whole Foods on Saturday morning, bought rye flour and bread flour and whole wheat flour, and instant yeast and active dry yeast, and then brought them all home. Let the baking begin, I muttered to myself.

    To make ciabatta, you begin with a biga, which is a yeast-based starter. Unlike sourdough starter, which you can make and replenish indefinitely, a biga is made fresh for each batch of bread. Maggie has you combine bread flour, all-purpose flour, whole-wheat flour and rye flour with some yeasted warm water and some fresh tap water (confusingly, she instructs you to use ice water in the summer and warm water in the winter: well, what do you do in the fall or spring? I improvised – using lukewarm water) to make a very stiff dough.
    Biga
    You're to leave this lumpy little ball, covered tightly, in a corner for 24 hours (again, cool in summer, warm in winter: I just left it in my kitchen. What a rebel!). The first ten hours nothing is supposed to happen. I went about my Saturday (taking my friends on a culinary stroll through Chelsea and the West Village, sitting out on the Christopher Street pier, having an amazing dinner at an unassuming Turkish restaurant on 34th Street, of all places) and came home 12 hours later to find that my biga had not budged one bit. More muttering ensued. I thought I'd have nothing but a bitter, angry post, replete with pictures of a stubborn mass of flour and yeast to show for my efforts. However, the next morning, as promised, the biga had grown! And it smelled yeasty and wonderful.
    Biga24
    I did a little victory jig, then got back to business. Bread-baking is a serious matter. Because I only have one mixing bowl, I took the biga out carefully, filled the bowl with more flour and instant yeast and salt (a lot of salt!). Then I stirred in water and the biga. Using my hand-held mixer, I beat the mixture into a pliant, liquid mass for five minutes.
    Beating_biga
    This was then tightly covered and let to rise for 20 minutes. I floured the top, floured the work space, poured out the very liquid dough, patted it about ineffectually, then scraped it back into the bowl for another 20 minutes.
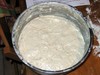
    First_rise_2
    This idiotic (and sticky) dance ensued three more times. Maggie's instructions read that the dough would be very soft but foldable. My dough didn't really comply until the end. But never mind, the dough was rising and bubbling happily, and that was enough for me. Isn't it funny how a goofy little yeast can become so dear?
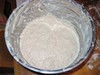
    Fourth_rise
    At the end of the fourth rise (and subsequent patting and "folding"), I was to let the dough rise, undisturbed for two hours. When I came back, the bowl was filled with puffy, yeasty dough. I divided the dough into two halves, patted them out into approximated business-letter shapes, folded them in thirds and lay them down on a floured linen towel. I covered the loaves with more floured towels, then let them rise for 45 minutes while the oven preheated (in the meantime, the end of The Shining was on television and I kept on being summoned back to see Shelley Duvall run around, shrieking, with that butcher's knife dangling from her limp hands). I was supposed to be preparing a baking stone and a peel, but I don't have these things. Instead, I Iined a baking sheet with parchment, and asked Ben to help me flip the risen loaves
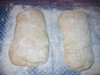
    Shaped
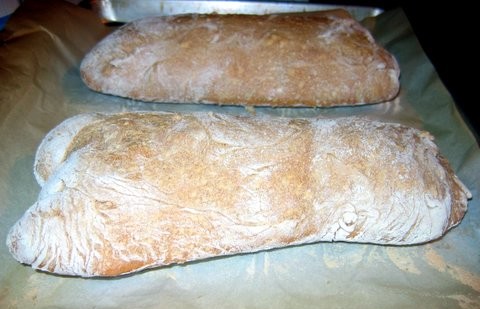
    onto the sheet. I was supposed to dimple the loaves, but I forgot. Didn't matter in the slightest! I slid the sheet into the oven, and soon enough the loaves had puffed up in the oven. Forty-five minutes later, the loaves were golden brown and crusty. Maggie instructs that you bake them until they're very dark brown all around, but I liked them at the golden brown stage, so that's when I took them out. In Italy, ciabatta usually is a light-ish bread, while pane pugliese is the darker kind, so I took my liberty with the timing. I cooled the loaves on a rack, then sliced the heel off of one. Delicious! The crust was toasty and crunchy, while the bread was yeasty and pliant. Although it's a bit of a pain to make, I can't recommend it enough. I realize I took a few liberties with the baking in the end, but none of that ended up mattering. So, go! Buy your bags of flour! Bake bread! Feel accomplished! Your friends will love you.

  • Blini

    Blini are those smallish Russian pancakes made from buckwheat flour, often topped off with a cap of sour cream and a spoonful of caviar. In a recent article in the L.A. Times about corn, Russ Parsons fiddled with a recipe from Jeremiah Tower for cornmeal blini, adding fresh corn and jalapeno peppers. They were to be finished off with a spoonful of Mexican crema and a cilantro leaf. Now, to me, not much else can beat the repulsiveness of cilantro. I believe someone somewhere is doing a study on how some of us are missing the cilantro enzyme in our mouths, rendering the flavor of a leaf of it akin to, oh, say, a chemical meant to kill us all off in a few minutes or less. So I tend to avoid all recipes that include cilantro. In this case, I figured I could easily leave out the garnish and so would also remove the jalapeno from the batter (these two go together like peas in a pod, so what's one without the other?). To make up for this omission, and because I had two cobs in the fridge, not one, I doubled the amount of fresh corn in the recipe.

    Don't attempt to make these blini any larger than the two tablespoons or so that are recommended in the recipe. The batter is thin, and the blini will rip apart if they are too big to be flipped easily. They are pretty salty, so the sour cream or creme fraiche is essential to smoothing out the taste a bit. I'd sprinkle some minced chives on top for an elegant, crunchy little appetizer. I can imagine getting creative with the toppings: slivers of smoked fish, a few tiny cubes of tomatoes soaked in basil oil, or perhaps even a tangle of caramelized onions. In total, the blini were not bad, though I do think that plain old buckwheat blini are somewhat easier to make (no pesky corn kernels flying through the kitchen), and that wonderful buckwheat texture really can't be beat.

    First, I whisked together cornmeal, salt, sugar and some boiling water to create a thickish  batter.
    Batter_1
    After this cooled off, I beat in two eggs, some milk, sifted flour and a bit of melted butter. The batter becomes very thin.
    Thinned
    I added in the cooked corn kernels and let the batter rest in the fridge for a while.
    After melting butter in a pan (I don't use nonstick, but the recipe instructs you to), I poured in five or six little puddles of batter.
    Frying_2
    I cooked them a few minutes on each side, then turned them out onto a plate. Keep the plate warm in the oven until you're ready to serve.

  • Peaches

    What do you do when the gloriously perfumed stone fruit that you so carefully selected from large bins at the market one day, transitions too quickly from the promise of juicy, pliant flesh to an almost decadent state of over-ripeness? Slice away the offending areas, douse in an acidic slosh of citrus juice and booze, and serve with a floppy crown of cream. There's no real recipe for this, because so much depends on the state of your fruit and what you have on hand in your kitchen cupboards, and what your personal taste decrees. So, use my suggestions as a guideline and feel free to experiment. Important is only that your fruit not be the mealy supermarket kind, devoid of all flavor and texture.

    First, I slice up whatever stone fruit I have that needs to consumed that very minute. Last night, it consisted of a nectarine and two white peaches. Don't bother peeling them – this is a rustic kind of dessert. Cut away whatever parts of the fruit may already be over the hill. You could use any combination of peaches, nectarines, plums, apricots and so on.

    Squeeze half a lemon (or more, depending on the amount of fruit; or else use a lime or perhaps an orange) over the fruit and pour in a glug or two of dark rum (you could use Armagnac, cognac, fruit liqueur, Prosecco or whatever else seems appropriate). The alcohol pulls out some interesting flavors in the fruit – last night my peaches tasted almost like the freshest, sweetest bananas you could imagine. You won't need any additional sugar because your fruit should be chockful of the natural stuff. Toss the fruit with the citrus juice and alcohol, then let it sit for a while. Only have 20 minutes? That's fine. Want to make it a few hours in advance? That's probably fine, too, although the fruit might darken a bit.

    When it's time to serve, plop a dollop of sour cream on top. You could sweeten this cream with honey or sugar or maple syrup, but plain is a nice balance to the sweet fruit. You could use plain yogurt or some heavy cream or creme fraiche or… you get the picture. Serve a bowlful with a snappy cookie alongside, or maybe with your morning toast. Whenever, whatever – this is one easygoing and forgiving recipe.

  • Cakelet

    It looks like a muffin or a sunken cupcake, but nothing about this delicious little cake even comes close to either one of those more pedestrian sweets. This luscious cakelet, courtesy of David Lebovitz's pastry chef genius, is like a mousse and a souffle and the lightest imaginable flourless chocolate confection all wrapped into one. Not only that, but it's made without butter or flour, and is crammed with finely diced prunes and bittersweet chocolate. Could it be – a dessert that's somewhat low in fat, full of fiber, and bursting with antioxidants, too? Okay, enough health talk. These gateaux bastille are absolutely incredible – and can be made with ingredients almost surely all found in the pantries of most homes.

    Taken out of the oven and eaten warm, they practically dissolve on the tongue. But the delicate structure of the chocolate and eggs is surprisingly sturdy. If you can stand to not eat them all at once, the flavor develops over a day or two and becomes more and more complex. The rum-soaked prunes fill the chocolate with a fruity flavor that becomes only more pronounced as the hours go by. I'd say this recipe proves the axiom that sometimes the whole is greater than the sum of its parts, though, of course, I also believe that for these soft little cakes to really shine you must use high-quality chocolate. They can be whipped up in a flash, but of course might disappear in much less time than it took to make them…

    Gâteaux Bastille
    makes 12 individual cakes

    For the prunes
    6 medium-sized pitted prunes, cut into little-bitty, bite-sized pieces
    2 tablespoons dark rum

    For the cakes
    4 ½ ounces (125 gr) bittersweet chocolate, finely chopped
    ¼ cup (50 ml) heavy or light cream
    2 large eggs, at room temperature
    2 tablespoons sugar
    pinch of salt

    1. In a small bowl, mix the prunes in the eau-de-vie. Cover, and let macerate for a few hours.
    Butter and line a 12-cup muffin mold.

    2. Preheat the oven to 375° F degrees. In a medium bowl set over simmering water, melt together the chocolate and cream. Remove from heat. Mix in the prunes and any liquor in the bowl remaining, then let cool to room temperature.

    3. Beat the eggs and sugar at high-speed with a pinch of salt until thick, about 5 minutes.

    4. Fold one-third of the beaten egg mixture into the chocolate, then fold in the remaining egg foam.

    5. Divide batter between each muffin tin. Bake for 30 minutes, until cakes are tender and still soft when you touch the top. Each will rise, then gently sigh down a bit. Remove from oven and cool a few minutes before removing the paper cake mold (use a scissors to cut it away).

    6. Serve warm or at room temperature with very cold crème anglaise and perhaps a scattering of crisp-toasted sliced almonds.

  • Chowder

    Back in August, the New York Times published a small article on summer chowders. Usually chowder calls up the image of those rich, cream-heavy seafood soups so common in fall and winter in New England. But the article focused instead on lightened warm-weather versions. Less cream and more vegetables set these soups apart from their wintery cousins.

    Two recipes were published: one chockful of smoked haddock and bacon and cream – a little too heavy for my taste – and one that had no cream, but lots of vegetables and clams – just right. Not only was the littleneck chowder healthy and light, it was also put together in very little time. John Schaefer, the executive chef at Gramercy Tavern, created the recipe. The fresh tomatoes and new potatoes and herbs give the stew a summery taste. The bok choy adds a bit of crunch. If you like clams, make this! It's delicious. We ate bowlfuls of it outside on my patio, with crusty bread dunked in the well-flavored broth and empty clam shells clanking on a plate. Summer is slowly coming to a close.

    First, I sauteed a leek, an onion and some minced garlic in olive oil.
    Onions
    Then I added tomato paste and several diced tomatoes (I didn't bother peeling them and neither should you, unless that kind of thing bothers you, in which case I suppose you could use canned, diced tomatoes), and let the mixture cook down for a few minutes over reduced heat.
    Tomatoes
    After scrubbing the clams, I added them along with the chopped bok choy, thyme, and red pepper flakes and cooked them for a few additional minutes. An aside: because my cast-iron pot was too small, I boiled the potatoes on their own and added them to the chowder at the end.
    Clams
    Because I just couldn't bring myself to make chicken stock during our hot summer, I dissolved some Better than Bouillon chicken base in boiling water and added that with white wine to the pot. I covered the pot and let it simmer for a few minutes, until the clams had opened and the bok choy was tender. No salt or additional pepper was needed by us, but season as you see fit. And of course we ate our chowder with crusty French bread. What else?

    Littleneck Clam Chowder With Bok Choy and New Potatoes
    Yields 4 servings

    2 tablespoons olive oil
    1 onion, minced
    1 leek (white and light green parts only), well washed and minced
    4 cloves garlic, minced
    2 tablespoons tomato paste
    4 tomatoes, peeled, seeded and chopped, with juice reserved
    24 littleneck clams, scrubbed
    1 head baby bok choy, cleaned and chopped
    8 new potatoes, cooked until tender and quartered
    1 teaspoon minced fresh thyme leaves
    1 teaspoon hot red pepper flakes
    ½ cup white wine
    3 cups chicken stock or canned broth
    Salt and freshly ground black pepper.

    1. Place a large wide casserole over medium heat, and add olive oil. Add onion, leek and garlic and sauté until tender. Add tomato paste, chopped tomatoes and any juice. Reduce heat to low and simmer for 5 minutes. Add clams, bok choy, potatoes, thyme and hot pepper flakes, and cook an additional 5 minutes.

    2. Add wine and chicken stock. Cover, increase heat to medium, and simmer until clams open and bok choy is tender, 2 to 3 minutes. Season with salt and pepper to taste, and serve immediately.

  • Beets

    Dear readers, I have been humbled. After being somewhat scornful of the roasted peppers I made last night, I had some cooled to room temperature for lunch. And what had seemed bland and a bit forgettable yesterday was concentrated and delicious today. It's not exactly rocket science that leftovers (when not chilled to tooth-aching temperatures) often taste better than freshly prepared dishes, but nevertheless I crossed these off the list too quickly, without giving them fair shakes. So, mea culpa. My advice to you is to make these after work for a picnic the next day! They do seem like ideal food for an al fresco meal, wedged between some crusty bread that has sopped up the deeply flavored juices.

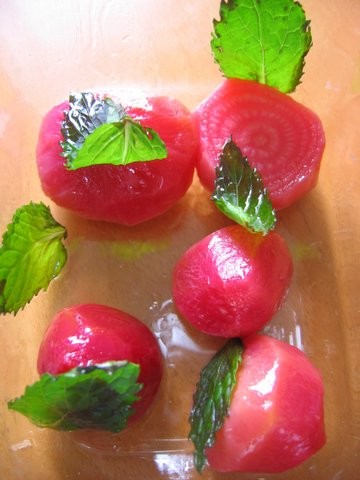
    And while we're on the subjects of picnics (and warm weather fare in general, I suppose), I have to share with you one of my favorite discoveries of the summer: the combination of beets and mint. I like to boil beets until they're tender (you could also wrap them in foil and roast), then peel off the thin skins when they've cooled. The pink and stripey beets above are Chioggia beets. I toss the little nuggets with chopped fresh mint, a delicately flavored olive oil (or if it's around, walnut oil), and a few drops of sherry vinegar. Don't forget a light sprinkling of salt. Sweet beets, faintly pungent mint, a nicely astringent dressing: not only do the flavors really work together, this salad is assembled in no time at all.

  • Roasted

    This post could alternatively be titled How Not To Prepare A Recipe. Sitting at my desk yesterday, I was going through my mental inventory of the ingredients in my fridge that needed to be used up. I vaguely remembered some fresh thyme and leftover feta haunting my fridge, and decided on a recipe clipped from a copy of Martha Stewart Living (once again, picked over at my stepmother's house): Baked Stuffed Red Peppers with Cherry Tomatoes, Feta, and Thyme.

    At the farmer's market yesterday, I picked up some shiny red peppers (and several different types of tomatoes and fresh mint and dark blue grapes and white peaches, but that's another story) and walked home happily after work to prepare my dinner. At the market, I had considered buying more herbs, just in case something was wrong with the ones I had at home, but I was feeling thrifty and decided against it.

    As I set about cutting the peppers in half and gathering up the ingredients to stuff them with, I realized that the thyme was AWOL, the feta was no longer particularly fresh, I had no aluminum foil of which to speak of, and that my thriftiness at the farmer's market was going to translate into a pretty bland plate of roasted red pepper halves. But for some reason, I felt stubborn about using up what I had at home, so I replaced the fresh thyme with dried, threw caution to the wind with the odd-tasting feta, left out the basil altogether and figured the peppers would cook just fine without aluminum foil to protect them from the oven heat. To paraphrase Julie, what could happen?
    Raw
    In fact, the peppers turned out just fine. Toasty brown around the edges, with nicely shriveled tomatoes in the middle, they were a serviceable meal. But nothing special beyond that. Plain roasted peppers sprinkled with parsley, capers, slivered black olives and toasted bread crumbs are far superior and probably less work. Then again, if I had followed the recipe, used the right herbs, tented properly with foil and been generally more attentive, maybe I'd be waxing rhapsodic now.

    Here's the actual recipe:

    2 small red peppers (5 to 6 ounces each), halved lengthwise, with seeds and ribs removed
    1 heaping cup (6 ounces) of cherry tomatoes
    1 1/2 ounces crumbled feta cheese
    1 teaspoon coarsely chopped fresh thyme
    8 basil leaves, torn into pieces
    Freshly ground pepper
    1 tablespoon extra-virgin olive oil

    1. Preheat oven to 400 degrees. Place pepper halves, cut sides up, in a baking dish. Toss together tomatoes, feta, and herbs in a medium bowl, then season with pepper. Fill each pepper with the tomato mixture. Drizzle each half with oil.

    2. Bake stuffed peppers, covered with aluminum foil, untl they begin to soften, about 30 minutes. Remove foil, and continue to bake until the tomatoes begin to burst and the cheese starts to brown, 13 to 15 minutses more. Remove from the oven and serve warm.

  • Birdseye

    My very first food-blogging community event! I'm excited to be participating. For this month's Sugar High Friday, Elise of Simple Recipes decided on the theme of Cooking Up Custard. As luck would have it, a few weeks ago the L.A. Times published an article on fruit tarts with a base of creme patissiere (pardon the fact that I can't find my accent grave and aigu). Regina Schrambling cobbled together a recipe using a shortbread tart crust from Joanne Weir, a pastry cream filling from a "Careme-worshipping dessert teacher", and a Madeleine Kamman-inspired lime marmalade glaze to top off the fresh berries that adorn the tart. I decided to make the tart for my friend Julie's birthday this week.

    To start with, I still had leftover tart dough from my blueberry tart sitting in the fridge. Since it was the best part about that failed tart, I decided I could substitute it for the lime-scented shortbread crust. I patted the leftover dough into the tart pan and blind-baked it until golden. Then I set about making the custard filling. First I whisked together egg yolks, cornstarch and some sugar.
    Eggs
    Then I set a pot of milk and cream and additional sugar on the stove and brought it barely to a boil. I poured a bit of the hot milk mixture into the bowl with the eggs, whisked it together to temper the eggs, then poured that mixture back into the milk-and-cream pot. I whisked everything together until it bubbled and thickened, turning into a gorgeous, glossy, yellow cream.
    Custard
    I poured the custard into a bowl, then smoothed a piece of clingfilm onto the top of the custard to prevent a skin from forming and let it cool in the refrigerator overnight.
    Clingfilm
    The next morning, I plopped the chilled custard into the tart shell,
    Filling_2
    and smoothed it out with a spatula.
    Filled_shell
    I carefully brushed off plump blackberries, raspberries and glossy red currants, and set about carefully arranging them on top of the cream-filled tart in concentric circles. I decided to use red currant jelly to glaze the berries, but if you have lime marmalade at your disposal use that instead! The reddish color of the glaze looked odd against the creamy-white backdrop of the custard, in the small places where the glaze had dripped down between the berries. Details, details – I know.
    Finished_2
    Happy Birthday, Julie! Hope you liked the tart!

    Edited on Monday, September 18 to give an update on Elise's roundup of SHF #12. Check out all the delicious entries here!

  • Soba1_1

    At last, success! I'm not giving up on the L.A. Times just yet. I should have known that a recipe recommended by Russ Parsons would work. From the now out-of-print The Poetical Pursuit of Food by Sonoko Sakai (Kondo) comes this deceptively simple and utterly delicious meal of chewy, slippery soba noodles with a flavorful, light dipping sauce. I put it all together in less than half an hour. With leftover dipping sauce in the fridge, I can't wait to make this again.

    I found the ingredients all clustered together in the same section at Whole Foods. I had to buy soba noodles, mirin, soy sauce and bonito flakes. It was not cheap: my total came to $17.26. But it was worth every penny.
    Ingredients_1
    Soba noodles are made with buckwheat flour. Mirin is a Japanese rice wine used for cooking. Bonito flakes, also known as katsuoboshi, are thin shavings of dried and compressed mackerel. The open bag of bonito has a strong and pungent smell, but when combined with boiling water it mellows out into a wonderfully flavored broth. This broth, known as dashi, is a cooking staple in Japanese cuisine (comparable, I suppose, to chicken stock?)
    Bonito_1
    To make the broth, I brought four cups of water to boil, then turned off the heat for one minute before dumping in three loosely packed cups of bonito flakes. The flakes wilted and shriveled upon contact with the steam. I let this steep for five minutes before draining the liquid into a bowl (don't press on the flakes, or the liquid will turn cloudy).

    I measured out two and a half cups of the liquid, and brought it to a boil with five tablespoons of mirin and a half cup plus two tablespoons of soy sauce. As soon as it boiled, I turned off the heat and dumped in three more cups of bonito flakes. I let them steep for one minute before draining the liquid into another bowl (again, don't press down on the strained flakes). This makes the dipping sauce for the soba. Refrigerated, it keeps for a week.

    I brought a pot of salted water to boil, then threw in 600 grams (or 21 ounces) of soba noodles. When foam started appearing at the top, I turned the heat down and cooked the noodles until they were done. This can take anywhere from one to five minutes, depending on the brand. I drained the noodles and rinsed them under cold running water until they were cool. I divided the noodles among four bowls, and served two thirds of a cup of the dipping sauce alongside them.

    To round out the meal, you could steam up a bunch of spinach or swiss chard and serve it with a drizzle of toasted sesame oil on top. A perfect plum would nicely finish this virtuous but delectable Japanese meal.

  • Csa_1
    Since I so often mention my CSA basket, I thought that I might also dedicate a post to it. Community Supported Agriculture is a program that has city folk support a farmer by buying shares of his harvest in advance, and thereby giving him the money he (or she!) needs to tend the farm, buy equipment, and hire farmhands. My friend Dave likes to refer to this as the Communist Vegetable Collective. The farmer delivers the vegetables harvested each week and we, the recipients, enjoy a constantly changing supply of healthy food that has been farmed organically and sustainably. Not only that, we also have the pleasure of knowing that we’ve kept a farm in business for an entire season.

    It also turns out to be incredibly cheap. I split my share with a friend: we each pay $210 for the season, which goes from June to November. This works out to be around $8 a person per week. Yesterday, our share included six zucchini, a bunch of Chioggia beets, a bunch of Bright Lights chard, five tomatoes, a basket of tomatillos, several poblano peppers, a bunch of flat-leaf parsley, six zucchini, one head of red cabbage, a bunch of Cosmic Purple carrots (purple on the outside, orange on the inside!), four Orient Express eggplant, and four yellow frying peppers. The CSA adjusts their prices on a sliding scale so that low-income families pay less, while receiving the same amount of vegetables.

    On the days when my CSA delivery matches the ingredient list of a recipe on my radar for that week, I feel like the universe is coming together in a particularly lovely way.