• Dsc_0004

    Isn’t that the cutest little globe you ever did see? (Muir Glen tomato can standing there for size comparison.) I found it this morning at the Brooklyn Flea and have decided it is already my most favorite possession. I might snuggle with it tonight, in bed. Little globe! I think I love you.

    Okay! Moving on. As I type, a chicken is marinating in spiced yogurt in the fridge. It will be our dinner tonight and I have high hopes for it. Let’s all hope there is good news to report tomorrow. In the meantime, however, I have to tell you about an idea I had earlier, when I was sorting through some more recipe print-outs (unfiled! loose-leaf! gah!) and was suddenly overcome with a desire to Purge! Purge! Purge! Because, honestly, people, sometimes the recipe collecting feels a bit out of hand. I had a hard little talk with myself (sotto voce, natch) and then plucked out a nice wee stack of recipes I know that I will never – in my heart of hearts – make. Ever. I marched them out to the recycling bin, dropped them down with a satisfying thwap, and felt all clean and good for a few minutes.

    Um. And then. I felt sort of bad! (I clearly need to get out more.)

    So I had an idea: What if I told you folks what those abandoned, discarded recipes are and if any of you are enterprising folks or just have different taste than me, you send me an email or leave me a comment telling me which recipe you’d like to make, and then I send that recipe over to you and you make it and tell me/us all about it? Doesn’t that sound like fun? Or am I totally losing my mind?

    I don’t mean to be entirely pathetic, but I actually went back to the recycling bin and pulled the recipes out. They’re sitting here now, looking up at me dolefully and I’m feeling sort of foolish. So for that reason alone, don’t let me lose face, intrepid readers and cooks! Maybe there’s one in here for you right now! Let’s play.

    1. Pommes Dauphine taken!
    2. Duck Rillettes taken!
    3. Salad of Yellowfin Tuna Confit with Cannellini Beans taken!
    4. Golden Apple Triangles taken!
    5. Pumpkin Pots de Creme with Amaretti-Ginger Crunch taken!
    6. Caramel Coulant – taken!
    7. Pumpkin Panna Cotta – taken!
    8. Overnight Coffee Cake (with variations!) taken!

  • Dsc_0041

    My beans have arrived! With their cheeky packaging and glossy little hulls, they are simply gorgeous. Giant white limas, Good Mother Stallards, Ojo de Cabras, and Christmas limas. Speckled and smooth and a delight to behold, I've quite literally not been this excited about something in my kitchen in a long time.

    Ben and I had a plate of gigantes in Astoria this winter, so good we licked the plate clean, so I thought I'd just scrounge up a recipe for that stewy Greek dish, fragrant with tomatoes (and sometimes polluted by dill). But then I got sidetracked by a dish from Diane Kochilas's book on meze that combined the giant limas with roasted peppers and promptly changed my mind. I guess I sometimes have a short attention span.

    I did a lot of things differently from the original recipe, which didn't seem to make much sense (1/4 pound of beans for 4 to 6 people?). I'm not sure you should necessarily attempt this on a weeknight, unless you get home far earlier than your eating partner, because it takes a little more than 2 hours to get this on the table.

    Dsc_0045

    But it's such a delicious pay-off. The beans are creamy, yet still pleasingly firm. The ones at the top have a chewy little crust that is browned in spots. The peppers and onions are stewy and sweet, and the vinegar gives the dish just the right amount of acidity. You could swap out the bay leaf for oregano, scattered throughout, or sage could also be a nice choice. We ate our beans with fresh slices of country bread and murmured delightedly through bites that we should eat nothing but beans and vegetables (steamed asparagus with a mustard vinaigrette) forever and evermore.

    To further the conversation about sustainability and locavorism, it's true that buying Rancho Gordo beans is a double-edged sword. On one hand, you're supporting a small business that aims to keep heirloom beans alive and well and in our tummies, and that supports small farms. On the other hand, the beans are expensive (relatively speaking) and need to be shipped all the way across the country, if you live on the East Coast. Not exactly great for the environment.

    I loved these beans and I can't wait to cook the rest of them, but I'm not sure how often I'll be able to justify ordering them. What do you think, readers? Am I overthinking? Not doing enough? And all that heavy stuff aside, what else should I be doing with beans? Recipes, please! Links! Ideas! We have a lot of beans to get through.

    Giant Lima Beans with Roasted Peppers
    Serves 2 amply as a main course    

    1/2 pound giant white lima beans
    5 tablespoons extra virgin olive oil
    1 yellow onion, finely chopped
    1 large garlic clove, finely chopped
    2 roasted red bell peppers
    Salt and freshly ground black pepper to taste
    1 bay leaf
    2 tablespoons balsamic vinegar, to taste

    1. Put the beans in a pot with ample water to cover (enough to come about 3 inches above the beans). Let sit for half an hour. Bring to a boil over high heat, then reduce the flame to low and simmer the beans for approximately 1 hour, or until al dente. About 15 minutes before removing the beans from the heat, season with salt. Drain and reserve the boiling liquid.

    2. As the beans simmer, heat the 3 tablespoons olive oil in large skillet over medium heat, and sauté the onion and garlic until translucent, about 5 minutes. Remove the peppers from their oil and finely chop. Add them to the onions and garlic, and stir over medium heat for about 3 minutes to meld the flavors a little. Remove from the heat and add the beans to the pepper mixture. Season with salt and pepper to taste, and stir gently to combine.

    3. Preheat the oven to 350°F. Scrape the bean mixture in an ovenproof glass or ceramic baking dish. Add about 1/2 cup of the reserved bean cooking liquid. Drizzle 2 tablespoons olive oil over the beans. Tuck a bay leaf into the center of the dish, covering the leaf well with the beans. Cover the dish and bake for about 45 minutes to 1 hour, or until the beans are very tender and their centers creamy.

    4. Five minutes before the beans come out of the oven, pour in the vinegar. Remove from the oven and serve. You can let the beans cool to room temperature as well and serve the next day.

  • Dsc_0018

    Oh, how I love thee, Internet.

    Shall I count the ways?

    I saw this recipe in a magazine – I can't remember which one – like, almost 10 years ago or something. Way before this blog was a twinkle in my eye and way before I even really understood what the Internet was all about. (Er – not that I now have much of a clue, but still. Fiber optic cables! Coal-fired power stations! Personal websites! I am way more informed.) I clipped it and made it and filed it away and then totally forgot about it, only to have an inquisitive reader ask me about it recently (hi, Charlotte!) because she'd read a comment I left on Adam's blog two years ago in which I waxed rhapsodic about said pasta.

    So! I set myself to digging among my recipe clippings. It embarrasses me slightly that it took me, a somewhat neurotically organized person, more than ten minutes to find the darn thing. In fact, it took me more like a week.* A week in which I desperately emailed Adam (Hadn't I emailed him the recipe? Apparently, I had not.) and had to slowly face up to the fact that perhaps my organizational skills weren't quite what I imagined them to be.

    (Sob!)

    And then, of course, ten minutes after telling myself this, I found the recipe, glued sweetly and snugly into some binder page, exactly where it should have been, obviously.
    Dsc_0009

    After all that effort, I was hungry and, frankly, a little curious. Wouldn't it be fun to see how the recipe stood up, after hiding out for so long? I marched myself out to the store, bought a pound of fettucine and got to work.

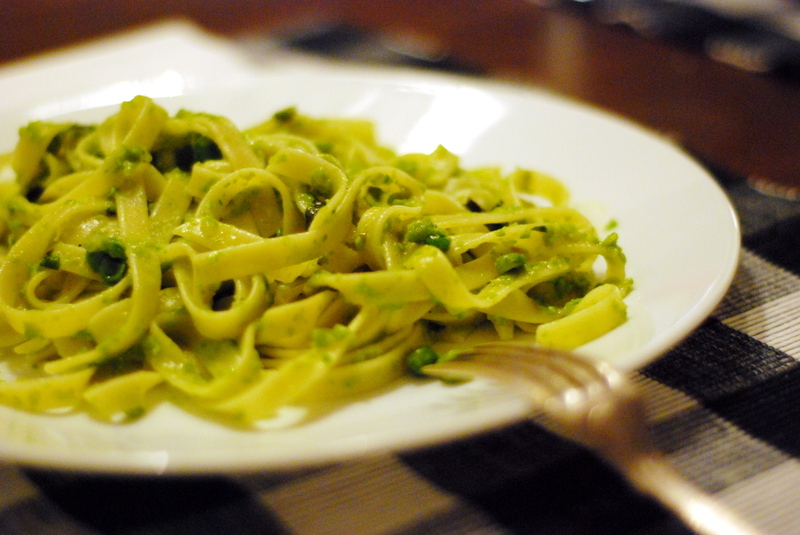
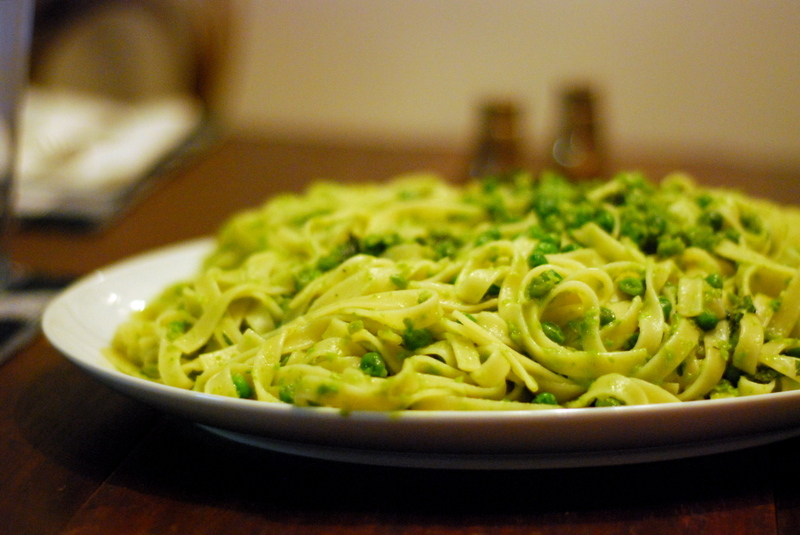
    And it is, just as you might have already imagined from the words "Mario", "Batali", and, oh, perhaps "Pappardelle", "Peas", and "Parmesan", quite tasty. Peas and mint are a match made in heaven, of course, and when you throw a silky tangle of fettucine into the mix and the long strands get all green and velvety from the pea puree and sweet-salty from the honey and Parmigiano, well then, you can imagine your delight at dinner. But there are a few things I have to note, because I strayed from the original recipe ever-so-slightly, and I think you should, too.

    First of all, watch it with the honey, folks. Mario asks for two entire tablespoons of the stuff, but this makes the dish brazenly sweet instead of delicately nuanced and I think we can all agree that nuance is better than in-your-face sweetness, no? Then, he also says you need an entire stick of butter. And you know, if you're into that kind of thing, by all means toss the whole stick in there. But this dish can do with a whole lot less of the stuff. Also, one more thing, you need to loosen the sauce with pasta water before you toss it with the pappardelle, otherwise you lose precious minutes trying to coat the pasta properly, so that by the time you do and bring it to the table, it's well on its way to being lukewarm. And we all know there is nothing worse than lukewarm pasta.

    (Don't we? DON'T WE? Sheesh.)

    Anyway, this is the story of the little recipe that could, powered by the Internet – it made it into a magazine, into a binder, into a comment section, into an email, and now finally, out to you all. May you all like it as much as I do.

    *Yes, I tried Googling it, but heavens to Betsy, this recipe was nowhere to be found online. So now it is. Thank God for blogs, wouldn't you say?

    Pappardelle with Peas and Parmesan
    Serves 8 as an appetizer or 4 as a main course

    4 tablespoons extra-virgin olive oil
    1 medium Spanish onion, chopped fine
    1 tablespoon wildflower honey
    3 cups fresh shucked peas (or frozen)
    Sea salt and freshly ground black pepper
    4 tablespoons unsalted butter
    1 pound fresh homemade pappardelle or 1 pound dried fettucine
    1 cup freshly grated Parmigiano-Reggiano
    1/2 cup packed fresh mint leaves, torn in half

    1. In a large saute pan, heat the oil until it is just smoking. Add the onion, honey, and 2 cups of the peas, and saute until softened and cooked through, about 10 to 12 minutes.

    2. Place peas in a food processor and pulse until coarsely pureed, season generously with salt and pepper, and set aside.

    3. Bring 6 quarts of water to a boil and add 2 tablespoons salt. Melt the butter in the saute pan, add the remaining peas, and cook slowly until just softened, 4 to 5 minutes. Add the pea puree to the whole peas and set aside.

    4. Just before the pasta is done, pour a ladle of the starchy cooking water into the pan with the pea puree and stir to loosen the sauce. Cook the pasta until al dente and drain well, reserving more of the pasta water. Immediately toss the pasta into the pan with the pea mixture and place over medium heat. Stir gently to mix well, adding a little pasta water to achieve the correct texture, not too dry and not too wet – the noodles should be dressed like the greens of a salad. Add the cheese and mint leaves, and toss to combine. Serve immediately.

  • Adam, the intrepid Amateur Gourmet, rustled up a few of us for a little discussion on food blogging the other day. If you’re interested in starting your own food blog or just want to see me talk with my hands (grandfather in grave, rolling over), have a look!

  • I'm starting to feel discouraged. The forces of food politics, nutrition and food safety, and environmental responsibility are feeling insurmountable these days. First, I've spent far too much time lately parsing the various charts on fish, trying to find some overlap. The fish we eat can't have too much mercury, but it also has to be fished sustainably. The people worried about mercury have one chart, the people worried about overfishing and stock depletion have another chart, and I, the concerned consumer, am lost in the middle.

    And then there's the debate about Bisphenol-A. We don't drink much out of plastic bottles, so we're okay on that front, but people, we probably go through 5 cans of tomatoes a week. (As for beans, this spurred me to place a long-awaited-and-dithered-about 4-pound order for dried beans with Rancho Gordo, which has me – dork that I am – quite excited.) A question that came to me in the night as I was wondering about how to circumvent the liners of tin cans was: if the leaching Bisphenol-A in those cans is potentially cancerous, but the lycopene in the canned tomatoes is so cancer-preventing, won't those two cancel each other out? Do I have a doctor/medical researcher in the audience? Anyone?

    Because my alternative right now is to drive into the city to Buon Italia this weekend and buy 24 units of bottled tomatoes and store them in our closet, like paranoid schizophrenics. (Yes, I briefly contemplated buying 50 pounds of tomatoes this summer and processing/bottling them myself, but then decided that sort of lunacy can only go so far before it threatens to swallow me whole. I've got exactly 2 square feet of counter space, folks. So, no to that.)

    Sigh.

    Meanwhile, we're also trying to eat less meat and more vegetables. Our CSA hasn't started up yet and the Greenmarket is just barely green right now, with expensive baby lettuces the only springtime option at the moment. Our recent tax bill makes those kinds of purchases somewhat outside the realm of daily possibility, but the alternative – rotting, limp, and pallid produce at our local grocer – isn't much better. Then, of course, the moment I start to complain about this I want to punch myself squarely in the face, because food shortages are looming the world over, not to speak of general impoverishment and hunger, and am I really whingeing about the fact that we have abundant food that's not entirely up to my (picky, though I prefer to say exacting) standards at our disposal?

    Sigh and double sigh.

    I'm not quite sure how to tie this neatly into a quick report on a wonderful fish bake I made from Jill Santopietro's fantastic round-up of recipes with yogurt, except that it was while trying to figure out what to substitute for Madhur Jaffrey's haddock (according to the Monterey Bay Aquarium, it's to be avoided, though hook-and-line caught haddock is okay) that I really started getting frustrated. Cod is a good substitute for haddock in terms of taste and texture, and it's low in mercury, but if it's wild-caught and/or from the Atlantic, then it's a bad choice in terms of sustainability. I tried to engage the fish guy at Whole Foods who mostly just looked bored, and ended up taking my chances with the cod they had on display.

    This is a lovely, simple recipe – you fry up a few onions and then layer plump, white fillets of fish on top of them in a baking dish before topping the fish with a thick, creamy coat of spiced yogurt that looks and feels as lush as cake frosting. A pass in the oven renders the fish incredibly moist and tender, while the yogurt topping subtly infuses the fish with exotic warmth. If you're afraid of cooking fish, this is the dish for you. If you're afraid of cooking Indian food, this is the dish for you. If you're afraid of spending more then 15 minutes on prep work for dinner, this is the dish for you. The original recipe has you pour off and reduce the watery liquid exuded from the fish after baking and then enrich that sauce with butter, but I skipped that step, simply pouring off the watery juices and serving the yogurt-topped fish with rice and some steamed broccoli.

    Ben and my mother, visiting from Europe, couldn't stop telling me how good it was and I'd have to agree. It was a wholesome, hearty meal that at least temporarily assuaged my anxiety about feeding myself and the ones I love safely and well. Don't worry if you don't have Greek yogurt at your disposal – just use regular whole-milk yogurt that you first drain in a thin-meshed sieve for an hour or so. (Oh, and if you're wondering, the fish, despite being delicious, was also absolutely hideous to photograph. I tried, I really did, but posting the results of that particular photo shoot would have done more harm than good, I think.)

    Cod Baked in a Yogurt Sauce
    Serves 4 to 6

    3 tablespoons vegetable oil
    2 medium onions, cut into 1/8-inch slices
    2 pounds thick fillets cod
    2 cups Greek yogurt
    2 tablespoons lemon juice
    1 teaspoon sugar
    Salt and coarsely ground black pepper
    2 teaspoons ground cumin
    2 tablespoons ground coriander
    ¼ teaspoon garam masala
    ¾ teaspoon cayenne pepper
    1 teaspoon grated fresh ginger
    3 tablespoons unsalted cold butter, cubed (optional)

    1. Preheat the oven to 350 degrees. In a large skillet, heat 2 tablespoons of the oil. When hot, add the onions and cook over medium until translucent, 5 minutes. Season with salt and pepper and transfer to a baking dish just large enough to hold the fish in a single layer. Cut the fish fillets crosswise into 2-by-3-inch pieces and lay them over the onions.

    2. In a large bowl, whisk together the yogurt, lemon juice, sugar, 1 ½ teaspoons salt, ¼ teaspoon pepper, cumin, coriander, garam masala, cayenne and ginger. Whisk in the remaining 1 tablespoon oil. Pour sauce over the fish, tucking some under each piece. Cover with foil and bake until the fish is just cooked through, 30 to 40 minutes.

    3. Pour the liquid from the baking dish into a small saucepan; keep fish warm. (The sauce will look separated.) If you'd like to make an extra sauce, bring the sauce to a boil and reduce it by half. Remove from heat. Whisk in the butter, a few cubes at a time. Season to taste with salt and pepper and pour over the fish.

  • Dsc_0050_2

    What can I say that hasn't been said before? I went to New Orleans and I fell in love. I wasn't expecting to, but I did. I'm back at my desk in New York now and all I keep thinking about is how much I want to be back there again, smelling that sweet, soft air. It got me, wrapped itself around me, and now I don't want it to let me go. When can I go back? I have so much more to see and do.

    Okay, a quick report. It turns out that while Central Grocery may indeed have the city's best muffaletta, I simply don't like muffaletta. I did, however, like sitting by the Mississippi eating said sandwich and thinking about Mark Twain and Italy and you, dear readers. It also turns out that if you think you are above some old tradition of eating fried dough squares with coffee, you should get over yourself right quick, because revered traditions exist for a good reason. (Ninny.) So yes, I loved Cafe du Monde. It really is worth the whopping $1.82 you'll spend to get three puffy beignets covered in what seems like an excessive amount of powdered sugar. You'll discover that they're yeasty and delicious and chewy and crisp and, improbably, not too sweet at all. Huh.

    Dsc_0078

    Dinner at Cochon was indeed fantastic, so thank you all for the recommendation (I loved the pork cheeks and the pickled green tomatoes). I also have it on good authority from Russ Parsons that if you go to Cochon, you should not leave before ordering the Catdaddy Moonshine to end the meal (sadly, I didn't know about it until after my meal there).

    If you go to New Orleans, get up early on a Saturday morning and get yourself over to the corner of Girod and Magazine Streets to the Crescent City Farmer's Market. It's small and cozy – contained in just one little parking lot – but making a loop or two around the market, smelling fresh, bright shrimp and seeing strawberries glow in their pint baskets, is an absolutely lovely way to spend the morning. Plus, you have to eat breakfast, right? Well, some genius set up a couple of hot griddles there and cooks sweet and savory pancakes, so once you've had enough produce fondling, you can sit down, listen to gypsy jazz and tuck in. If you aren't so charmed that you have to wipe the grin off your face in order to speak, I will be very surprised.

    Dsc_0164

    A shrimp po' boy at Parkway, foie-stuffed rabbit at Bayona, and an old-fashioned meal at Antoine's – I'm ready for a week of salads and early-morning gym visits. But I'm also ready to start planning a return trip. All I want to do is sit by the open window on a streetcar as it rumbles down the street, feel that gentle New Orleans air brush my face and hair, and ride, ride, ride.

    To see more of the photos that I took there, click here.

  • Uh…

    Food mill, bread knife – wha?

    Dsc_0028_2

    Instead I came home with:

    1. A baking sheet to replace the wonky, floppy one I never use because I hate it.
    2. A little peeler to simulate a mandoline (I saw Jamie Oliver do it).
    3. A magnetic knife rack because we have all of our knives lying on top of each other in a drawer, and now you know my secret shame.
    4. A John Boos board because it was $7.99 (!).

    Dsc_0039

    Also, the sardines: your recipes and ideas were good, but in the end I wanted my first tin to be simple and straightforward. I smeared a Triscuit with a little whole-grain mustard, piled a small filet on top, and popped it in my mouth. Simply delicious. Though the soft little spine and the miniscule organs (and there definitely were some) floating about in the tin were something to get used to. I’ll be experimenting with your ideas, though they’ll have to wait for those nights when Ben isn’t home – apparently his ban extends to all small fish in cans. Fine! More omega-3 fatty acids for me.

    Ralph’s suggestion sounded really good: "A recipe for sardines (I like the oil-packed better) I love is
    wrapping them in a Boston lettuce leaf after sprinkling them with a
    dressing made of chopped shallots, lemongrass, garlic, chili, nam pla
    and lime juice."

  • Dsc_0039

    I always thought cheesecake was one of those inarguably beloved foods, like expertly prepared French fries or the perfect baguette or the tender oysters of a roast chicken, plucked delicately from the carcass. But in a highly unscientific study I did a few weeks ago, I discovered something quite to the contrary. It turns out that more people dislike cheesecake than like it.

    I know, earth-shattering, right?

    The complaints all seemed to be the same. Too rich, too heavy, too much. To the people whom I polled, cheesecake was a thing of the past. And once I turned the poll on myself, I realized I wasn't exactly cheesecake's biggest advocate. Give me German Kaesekuchen or Italian torta di ricotta over a slice of cheesecake any day. Airy, refreshingly sour, and – most importantly – not a leaden brick sinking in my stomach, those cakes feature Quark and ricotta, relatively light fresh cheeses when compared to our dependably stodgy cream cheese.

    Dsc_0018

    But my compulsive recipe-clipping led me to a cheesecake recipe from all the way back in another lifetime – February 2001 – when Amanda Hesser wrote about a cheesecake from New York City's Tasting Room restaurant. Her description, of a cheesecake akin to a wedge-shaped marshmallow, is what made me stop and think twice. I simply had to try it.

    The filling of the cake is quite straightforward: cream cheese and vanilla, folded into a shiny, billowy mass of beaten meringue. You pour this ambrosial, cloudlike mixture into an almond crust and bake it in the oven. There's no water bath, which means that the cheesecake will probably crack. Not at first (ah, hubris), so you'll think you're in the clear, but as it cools, oh man, it can get ugly. Never mind. Just tell yourself it's rustic that way. Oh, and in any case, the recipe has you cover the top of the cheesecake with vanilla-flavored, sugared sour cream for another run in the oven. I assume this is meant to mask some of that crackage, but it can also backfire, leading to a cheesecake that practically looks like a crucifixion in cheese.

    (Quite fitting, that, since this was my contribution to our Easter lunch with our friends upstairs.)

    Dsc_0025

    But when you cut into it, all thoughts of cracks and ugliness disappear. What you're left with are towering wedges of the lightest, airiest cheesecake you can imagine. At our table, we had two avowed cheesecake foes and they had two pieces each. Two! Each!

    Here are my quibbles, though:

    For one, the crust was a pain in the neck to eat. It was quite tough and hard – each time I tried to use my fork to pierce it, pieces went skittering across my plate. Next time, I'd make this with a traditional graham-cracker crust.

    Second of all, the vanilla flavor can be somewhat overwhelming. Now this may be an issue of personal preference. I happen to like lemon in cheesecakes. I happen to also like the combination of vanilla and lemon. Vanilla all on its own is a little bit…cloying? Next time, I'd add some lemon zest to the filling and perhaps reduce the vanilla by a 1/4 teaspoon.

    And last but not least, that damn layer of sour cream. I'd leave it off if I make this again. It was a little goopy and I didn't really understand its point. Mask? Topping? Crack-filler? It did none of these things very well.

    Cheesecake

    Makes one 9-inch cake

    1 1/2 cups ground almonds
    3 tablespoons brown sugar
    1/3 cup butter, more for pan
    1 1/2 pounds cream cheese, softened
    4 egg whites
    1 cup plus 2 tablespoons sugar
    1 tablespoon plus 1/2 teaspoon vanilla
    1 pint sour cream

    1. Heat oven to 350 degrees. In a small bowl, combine almonds and brown sugar. Melt butter, then stir in. Butter bottom and sides of a 9-inch springform pan, then press nut mixture into bottom but not up sides.

    2. In a small pan, warm cream cheese over low heat. When very soft, remove from heat, and set aside. In a large bowl, whisk egg whites and 1 cup sugar until they hold soft peaks. Be patient, this can take quite a while. Fold in cream cheese and 1 tablespoon vanilla. Pour into pan, and bake 25 to 30 minutes, until a toothpick inserted in center comes out only slightly moist; cake should not be brown.

    3. Meanwhile, in a small bowl whisk together sour cream, remaining sugar and vanilla. When cake comes out of oven, increase setting to 450 degrees, and carefully spread mixture over cake. Return it to oven for 5 minutes. Do not overcook or it will crack or turn brown. Remove, and let cool in pan. Chill in refrigerator. To serve, run a knife along edge of pan, and remove sides of pan. Cut into wedges and serve.

  • Dsc_0025

    After sitting glumly on my butcher block for the past three weeks, my dryish Israeli dates – cast aside in favor of their juicy, more voluptuous sisters -  were finally used this weekend and, like an 80's movie wallflower in a pink dress at a long-awaited prom, they bloomed and shone.

    You all offered up some great suggestions for my dates, but Heather's comment stood out:

    "Luisa – I have an amazing date cake recipe from my Granny that is perfect for dates that are a little mangled or tough. The dates soak in hot coffee or chicory so they kind of fall slightly apart, giving the cake this awesome texture. It's got a little bit of chocolate in it for good measure. Let me know if you want the recipe!"

    Key words: mangled, tough, a little bit of chocolate.

    Um, yes, please?

    Dsc_0032

    Heather's grandmother, Geraldine, sure knows her way around a dried date. Her chocolate-chip dappled cake combines coffee-soaked, pureed dates with an easy cocoa batter to velvety-soft effect. This is the kind of unassuming cake that you make once or twice and then commit to memory, enshrining yourself in family lore as the originator of a truly great snacking cake. You can't really taste the dates and coffee, but there are revelatory grace notes of fruit that give the cake an unexpected complexity. The elusive flavor of coffee deepens the chocolate flavor.

    I made this cake for dessert on Saturday night and my friend Pat said, between mouthfuls as he ate, that it was the best cake he'd ever eaten. I know this just happened with the squash pie, but I swear to you that I do not put my friends up to this kind of hyperbole. I swear it! They come up with it all on their own.

    I loved the fact that the cake required no fussy frosting or gilding-the-lily icing. Sliced into thick wedges, we topped them with a melting scoop of vanilla ice cream. But you don't even really need to do that. It can be nibbled on at the counter in the kitchen or refrigerated and cut into squares for a plain afternoon office snack. I baked it in a 10-inch pan, but you could do a 9 x 13-inch rectangular pan or even a 9-inch round pan for a thicker cake (just adjust the baking time somewhat). The cake is delicate, yet sturdy and has a crumb so soft and moist that it almost melts in your mouth.

    Dsc_0013

    I made this cake to get rid of the dates sitting on my counter making me feel guilty, but we've both fallen so hard for it that I've now been instructed to keep our pantry stocked with dry-ish, sub-par dates. It turns out we need this cake on a regular basis. Sigh. Oh, okay. Twist my arm, why don't you.

    Thank you, Heather and Geraldine!

    Geraldine's Date Cake
    Makes one 10-inch cake

    2 cups of pitted dates, halved
    1 1/4 cups hot coffee
    2/3 cup butter
    1/2 cup sugar
    1/4 cup brown sugar, lightly packed
    1 teaspoon vanilla extract
    2 large eggs
    1 cup unbleached white flour
    1/2 cup cocoa powder
    1 teaspoon baking soda
    1/2 teaspoon salt
    1/2 cup good-quality chocolate chips

    1. Preheat the oven to 350 degrees F. Butter a 10-inch round cake pan, line the bottom with a round of parchment paper and butter the paper as well. Set aside. Loosely fill a 2-cup measure with the pitted, halved dates and cover with the hot coffee. Let sit for 5 minutes while you prepare the other ingredients.

    2. Cream together the butter and sugars until fluffy. Beat in the eggs, one at a time, and the vanilla extract. Sift the flour, cocoa powder, salt, and baking soda into the butter-egg mixture. Mix gently to combine.

    3. Pour the dates and coffee into a blender or use an immersion blender to puree the mixture completely. Add the pureed dates to the batter and blend to combine.

    4. Pour the batter into the prepared pan and sprinkle the top evenly with the chocolate chips.Bake for 40 to 45 minutes or until the edges begin to pull away from the side of the pan. Cool the pan on a rack until cool enough to handle, then gently turn the cake out onto a cake plate. Serve at room temperature.

  • In a few weeks, I’ll be flying to New Orleans for IACP. I don’t have much time while there to explore, but something tells me that a few of you might have strong opinions about where to go and what to do while in New Orleans, even with limited time. Hmm?

    Go on, tell me. Hole-in-the-wall places are my favorite, but I’ll take whatever advice you throw at me.