• Batch_22_007

    It’s time for another Role Reversal post, courtesy of Moriah of Where I’m Cooking From. Despite the pedigree of the recipe’s creator and the fact that her other recipe went over so fantastically well over here, I had high hopes for this dessert, alluringly named Caramel Coulant. Unfortunately, well, I’ll just let you keep reading:

    "Last weekend I dusted off my email archives, bought cream and flour,
    and set to work making Caramel Coulant as written. I read the
    instructions first, then followed all steps to the letter. I’m
    actually proud of myself for doing that, because I have a habit
    of always tweaking a recipe before I’ve made a control group. 

    It’s a nice change of pace to follow exact instructions and see
    what happens rather than my usual method of cooking by instinct (ie,
    the seat of my pants). I would not, however, make this recipe again. It sounded for all the world like the tawny cousin of the molten
    chocolate cake – a delicate egg-risen puff with liquid gold oozing from
    the center. But it turned out to be just an under-baked cupcake.

    The
    half-baked cake concept works flawlessly in almost all molten
    chocolate cake recipes, but without the flavor-power of chocolate, the
    flowing center of batter ends up tasting like cake batter. That can be
    good in small doses, but when there’s about an ounce of liquid batter
    in each 4 ounce cakelet, it’s too much. Of course, this may appeal to
    some people — I understand that. But I’m very particular about being
    able to taste raw egg and flour, even in custards, so this grossed me
    out a little bit. I baked them according to the recipe, tasted one and
    took some photos, then put them back into a 300 degree oven until the
    centers were firm. My roommates quite enjoyed the fully-baked cakes
    and they saved me the trouble of having to eat more than one, though I
    entertained thoughts of spreading slices of dense cake toast with
    marmalade. 

    On
    the upper-most-upside, the 3/4-cup of leftover caramel sauce made an
    excellent ice cream when mixed with 3 cups of milk and run through the
    ice cream maker.

    Overall,
    I’m glad I tried this recipe, at least
    for the experience.  It was pretty obvious to me that it was scaled
    down from a huge restaurant-sized batch (it’s from Nicole Kaplan,
    during her reign as pastry chef at Eleven Madison Park), because there
    was so much extra caramel sauce and no
    instruction on how to use it, and it produced a slightly-awkward number
    (5) of
    cakes. When quadrupled, it would use all the sauce and make a nice
    even 20 cakes. I didn’t try it with salted caramel ice cream as
    suggested, but I don’t think that would make a difference in my
    enjoyment of the dessert. What I should do is check out the dessert in
    its native environment at Eleven Madison Park, if it’s still on
    the menu. You know, for
    research."

    Caramel Coulant
    Serves 5

    For the caramel sauce:
    1 cup plus 2 tablespoons sugar

    1/3 cup cream

    1 ½ tablespoons butter

    ¼ cup milk

    For the coulant:

    4 tablespoons unsalted butter

    Pinch of fleur de sel

    ¼ cup plus 1 ½ teaspoons sugar

    2/3 cup cake flour.

    2 eggs

    1. Preheat the oven to 400 degrees. Combine the sugar and ¼ cup
    water in a pot. Do not stir. Cook over medium-high heat to a dark
    caramel, swirling as it begins to brown to distribute the sugar. Reduce
    the heat to low and deglaze with the cream, standing back to avoid
    bubbling caramel. Add the butter and milk. (It will bubble again.) Stir
    until well incorporated. Let cool. (The sauce can be made ahead and
    refrigerated.)

    2. Spray 5, 4-ounce ramekins with cooking spray; cover the
    inside of the ramekin with sugar and remove excess. Place on a sheet
    pan.

    3. Make the coulant by warming 1/3 cup caramel sauce in a
    medium saucepan; then stir in the butter and fleur de sel. Off the
    heat, stir in the sugar, then flour, then eggs, adding the next just
    after the prior has been combined. Pour the mixture two-thirds of the
    way into each ramekin. Bake 8 to 10 minutes, turning the sheet pan
    halfway through, until the shell is cakelike but the center is flowing.
    Let cool. When ready to serve, rewarm the cakes in the ramekins for a
    few minutes. Place a serving plate over the ramekin and flip it to
    release the coulant. Serve with salted caramel ice cream.

  • Dsc_0287

    Phew. There now, that’s a lot better. A relatively cool 71 degrees brushing against my skin this morning, marking a 27-point drop in temperature from yesterday afternoon. Why, it’s enough to make you drag out the pizza stone and heat up the oven, isn’t it?

    On a day so hot that you could fry an egg on the sidewalk or at least on the roof of a black car parked in the sun, it felt pretty silly to be posting about pizza. In heat like that, I like to eat cool slices of kohlrabi, fresh from the fridge, or chilled cherries, the dark, juicy orbs cooling me down from the inside out. A salad will do, and maybe a puddle of cold plain yogurt, but pizza? That requires an oven? And preheating? And then eating the food while it’s still piping hot? Good lord, my brow requires a delicate mop just thinking about it.

    But that was yesterday. And today’s a whole new day. The kind of day that can stand a little bit of action in the kitchen. And after four days of cold meals, maybe you’re ready for something warm for dinner again. I know I am. Last Friday, the day before the heat descended, I dragged out the pizza stone from its closet and heaved it into the oven. We were having our upstairs friends over for dinner and I’d been gripped with the urge to make pizza. You can’t turn your back on that kind of urge, can you?

    I had Amy Scattergood’s recipe for pizza dough at the ready, a
    recipe that has you make the dough and then let it proof overnight in
    the fridge, ensuring flavor and structure. Being lazy and last-minute
    and happy to cut corners, I made the dough the same day as dinner, so
    my dough’s fridge time was just a few hours. And still the
    pizza was quite delicious! Well, you know, as delicious as pizza made
    in a regular gas oven as opposed to a wood-burning oven that gets all
    the way up to 900 degrees is going to be.

    Though I adore a good pizza made in a wood-burning oven, I am
    definitely not the kind of person who tries to replicate that quality
    at home. I’m fine with the fact that some things must be eaten in a
    restaurant to be really, really good. Like pizza with blistered crusts
    and airy holes. Or perfectly crisp French fries. You know? Pizza at
    home has different charms. You have complete control over what goes on
    it and it’s quite a lot cheaper. Two good reasons right there to make
    this a regular occurrence in our kitchen.

    Amy’s pizza toppings are unorthodox for someone who only eats pizza
    topped with tomato sauce, mozzarella, and a few judicious basil leaves
    (I make an exception for the occasional scattering of mushrooms because
    Ben is so cute), but one in particular is totally delectable. Roasted
    radicchio and browned sausage are evenly distributed over the dough,
    while fennel seeds add a pop of flavor and milky mozzarella (or if
    you’re lucky enough to get your hands on burrata) tops it all off.
    What’s best about it this pizza is that it’s not groaning with
    toppings. Everything’s distributed perfectly and the crust-to-topping
    ratio is just right.

    Dsc_0290

    The second pizza, arugula – from our first CSA haul of the year –  with walnuts and goat cheese was less to my liking. Too timid, or perhaps I just don’t like goat cheese on pizza. I also admit I entirely forgot the vinegar. Maybe that’s what it needed to shine. No matter, I’m so smitten with the sausage and radicchio that I’ll be making it again and again.

    Tell me, readers, what’s your favorite homemade pizza like? What are the toppings that you love so much you’ll even make pizza in the dog days of summer?

    Basic Pizza Dough
    Makes 2 pizzas, about 10 inches in diameter

    1 cup warm water
    1 packet (1/4 ounce) active dry yeast
    Generous pinch of sugar
    1 tablespoon best-quality olive oil
    About 2 1/2 cups all-purpose flour
    1 1/2 teaspoons kosher salt

    1. In a large bowl, combine water, yeast and sugar, and set aside for 5
    minutes, until it begins to foam. (If it doesn’t, discard and start
    over with new yeast.) Stir in the olive oil and 1 cup of flour and mix
    until incorporated. Then add the salt and the second cup of flour,
    stirring with a spoon or spatula.

    2. Turn out the dough onto a floured board or, if your bowl is large
    and shallow enough, just knead it in the bowl. Knead the dough,
    incorporating the rest of the flour as needed, until it’s smooth and
    elastic, about 10 minutes.

    3. Put the dough into a clean, well-oiled bowl, turning to lightly coat
    the top of the dough with oil. Cover with plastic wrap and put in the
    refrigerator overnight.

    4. The next day, about 1 1/2 hours before you want your pizza, take the
    dough out of the refrigerator, punch it down and divide it into two
    balls. Lightly coat the dough with olive oil, cover with plastic and
    let it rest on the counter for an hour.

    5. After an hour, using your fingers, spread each ball of dough into a
    10-inch disc on a piece of parchment paper. The edges should be 1/2
    inch thick, and the centers should be about 1/4 inch thick. Assemble
    your pizzas.

    Sausage, Radicchio and Mozzarella Pizza

    3 tablespoons olive oil, divided
    1/3 pound mild Italian sausage, removed from casing
    1 teaspoon fennel seeds
    1 head radicchio
    1/4 teaspoon kosher salt
    1/2 recipe pizza dough
    Freshly ground black pepper
    4 ounces fresh burrata or fresh mozzarella, sliced

    1. Place a cast-iron pizza pan or pizza stone on the middle rack of the oven and heat to 350 degrees.

    2. In a sauté pan over medium heat, add 1 tablespoon olive oil. Sauté
    sausage and fennel seeds, breaking apart the sausage as it cooks. Cook
    until browned, about 8 to 10 minutes. Set aside.

    3. Trim the radicchio and cut it into 3/4-inch slices. Toss in a bowl
    with 1 tablespoon olive oil and 1/4 teaspoon kosher salt. Mound the
    radicchio on the pizza pan in the oven and roast, stirring and turning
    with a spatula, until it just begins to caramelize, about 10 minutes.
    Take the pan out, remove the radicchio and set it aside and return the
    pan to the oven. Turn the oven up to 450 degrees.

    4. Brush the prepared pizza dough with the remaining olive oil. Spread
    the sausage, then the radicchio, evenly over the pizza. Grind a little
    black pepper over the top.

    5. Slide the parchment paper with the pizza onto an inverted cookie
    sheet, then transfer both parchment and pizza to the hot pizza
    pan or stone. Cook until golden and crispy, about 12 to 16 minutes, rotating
    once halfway through (use the parchment to do so). One minute before
    the pizza is done, add the burrata to the pizza in the oven, so
    that it gets just melted. If using mozzarella, add about 5 minutes before the pizza is done.

    6. Remove the pizza from the oven either by pulling out the parchment
    paper and sliding the pizza back onto the cookie sheet or by taking out
    the hot pizza pan and placing it on a trivet. Slice and serve hot.

    Arugula, Goat Cheese and Walnut Pizza

    1/2 cup shelled walnuts
    1/2 recipe pizza dough
    1 tablespoon roasted walnut oil, divided
    2 cups arugula
    4 ounces goat cheese
    Freshly ground black pepper
    Balsamic vinegar for finishing

    1. Place a cast-iron pizza pan on the middle rack of the oven and heat
    to 450 degrees. Scatter the walnuts over the hot pan and toast until
    browned and fragrant, about 5 minutes, stirring frequently to make sure
    they don’t burn. Carefully take the hot pan from the oven, remove the
    toasted nuts and return the pan to the oven. Break apart the walnuts if
    they’re large.

    2. Brush the prepared pizza dough with 1 teaspoon walnut oil. Spread
    the arugula over the dough, then crumble the goat cheese over the top.
    Sprinkle the walnuts over the pizza, drizzle with the remaining walnut
    oil and grind black pepper over the top.

    3. Slide the parchment paper with the pizza onto an inverted cookie
    sheet or peel, then transfer both parchment and pizza onto the hot pan
    in the oven. Cook until golden and crisp, 12 to 16 minutes, rotating
    once during baking. Remove the pizza from the oven by pulling out the
    parchment paper and sliding it back onto the cookie sheet, or remove
    the hot pizza pan and place on a trivet. Drizzle with a little balsamic
    vinegar, slice and serve immediately.

  • Dsc_0301

    I crossed a life goal off my list this weekend: making cheese. It was so easy it felt like cheating. A pot full of hot milk and buttermilk was transformed into a firm bundle of cheese in about 30 minutes. It took me longer to half-heartedly scrub a few lines of grout in my bathroom than it did to make cheese, which, you know, can come as a bit of a surprise. Now, granted, we're talking about fresh cheese, but still. Even creme fraiche takes longer than this!

    Here's the thing, though. Ricotta made with cow's milk basically just tastes like cottage cheese or farmer cheese. I followed the article's lead and loosened the block of it with some milk before sprinkling it with herbs, salt and olive oil for a nice little pre-dinner snack spread of toasted bread gently rubbed with garlic. And it was just fine – everyone seemed quite happy with it (I think the pink Champagne we served might have helped). But unless you're using sheep's milk, you can forget about this tasting like real Italian ricotta.

    Still, it's a great alternative for American recipes calling for ricotta – you'll be far better off using homemade than the stuff that comes in a tub at the grocery store. If anyone knows how to get their hands on some fresh sheep's milk, though, let me know. I'm finding it surprisingly difficult to track down, but I'd like to attempt this again.

    Dsc_0304

    I've been wallowing in a swamp of homesickness for Europe lately, the ache lodged in my chest like an unchewed piece of bread. We booked our annual flight to Italy last week, so I now find myself in the strange position of hoping to savor summer's hot days while simultaneously wishing desperately that the weeks fly by so that the last week of August gets here just as soon as it can. I'll be mixing the leftover ricotta into a plain tomato sauce with pasta tonight and eating it, hopefully without crying, to remind me of all the good things to come.

    Fresh Ricotta
    Yields approximately 2 cups

    2 quarts whole milk
    2 cups buttermilk

    1. Line a wide sieve or colander with cheesecloth, folded so that it is at least 4 layers thick. Place in sink. 

    2. Pour milk and buttermilk into a heavy-bottomed pot. Cook over high heat, stirring frequently; scrape bottom of pot occasionally to prevent scorching. As milk heats, curds will begin to rise and clump on surface. Once mixture is steaming hot, stop stirring.

    3. When mixture reaches 175 to 180 degrees on a candy thermometer, curds and whey will separate. (Whey will look like cloudy gray water underneath a mass of thick white curds.) Immediately turn off heat and gently ladle curds into sieve.

    4. When all curds are in sieve and dripping has slowed (about 5 minutes), gently gather edges of cloth and twist to bring curds together; do not squeeze. Let drain 15 minutes more. Discard the whey.

    5. Untie cloth and pack ricotta into airtight containers. Refrigerate and use within one week. 

    Ricotta Crostini with Fresh Thyme and Dried Oregano
    Serves 6 to 8

    About 8 slices (about  3/4-inch thick) crusty bread such as ciabatta or levain, chewy and substantial but     not very sour
    Extra-virgin olive oil to taste
    Kosher or table salt, to taste
    2 cups fresh ricotta, at cool room temperature
    1 cup whole milk
    1 teaspoon coarse sea salt
    1 teaspoon coarsely ground black pepper
    1 teaspoon fresh thyme leaves
    1 teaspoon dried oregano
    1 peeled garlic clove

    1. Heat a grill or broiler to very hot. If bread slices are very large, cut in half or thirds. Brush bread slices on both sides with olive oil and sprinkle with table or kosher salt.

    2. In a mixer fitted with a paddle attachment or in a bowl, whisk ricotta and milk together until light and fluffy. Add 1 teaspoon kosher or table salt and mix well. Transfer to a shallow serving bowl and sprinkle with sea salt, pepper, thyme and oregano. Drizzle more olive oil on top, about 2 to 3 tablespoons.

    3. Grill or broil the bread until toasted all over and lightly charred in places. Lightly rub each slice on one side with the garlic clove. Serve hot, with ricotta mixture on the side.

  • Dsc_0021

    I was planning on writing a post about granola today – about how I didn't think I'd like it, how I prefer my un-sugared flakes, how I was converted by this recipe, how I'd seen the light and now you could tooooo, except that it was a total disaster. Over-salted, burnt, cringe-worthy even when doused in yogurt and studded with blueberries. And it left me with nothing to write about, to boot. Oh, I hate hate hate it when that happens.

    I guess it's a lesson. Don't mess with breakfast? Just keep eating your plain old flakes with milk and leave granola to the others. Sigh. Do you think I should try again? Molly's chocolate granola sounds dreamy, though I fear for my energy levels if I start having chocolate for breakfast. (I used to eat this treacly German cereal called Crunchy Nut when I was in high school – sugary corn flakes bedazzled with little pieces of peanuts, man, that stuff was heaven in a bowl and furthermore, much like crack for the delicate bloodlines of this girl who would eat a bowl for breakfast and proceed to practically hum with zany energy until lunchtime. Unless that was just because I was fifteen. Fifteen! Oh, come back, would you?)

    And maybe it's also a kick in the pants to tell you about this rice salad I've been sitting on (well, not the salad, but you know) for a few weeks now. Upon first impression, there's not all that much special about this salad at all. I mean, there's rice, and some tender edamame (or favas, as the original recipe calls for but which are far too difficult to track down in this city and, in any case, to deal with once they are tracked down) and a few crunchy bits of red pepper and fennel, some nice bright herbs and a sprightly dressing. But it's not exactly rocket science, right? In fact, it seems mostly like a kitchen-sink type of dish, you know, the kind that you cobble together out of all the odd bits and bobs lying around your pantry and your fridge.

    Dsc_0016

    So, you know, not all that special, though certainly delicious and filling and different – for God's sakes – from all the pots of plain boiled rice we seem to eat around these parts. And goodness, but suddenly that recipe seems a little scant for two people, let alone four, let's double it next time. And there was the strange fact that I kept making versions of this salad with whatever I could find lying around the house. Sauteed ramps and peas with mint and some lemon juice instead of the edamame and peppers and fines herbes. Or toasty Indian spices and canned lima beans. Suddenly room-temperature rice spruced up with all sorts of delicious things feels elemental, like we'll be eating it all summer long and with gusto.

    It's hardly rocket science, no, but it's creeping its way into my permanent repertoire and that's chemistry, at least.

    Edamame and Rice Salad with Fines Herbes Vinaigrette
    Serves 2 to 3

    1/3 cup sliced almonds
    Salt
    1 1/2 cups frozen edamame
    1/2 cup long-grain rice, preferably basmati or jasmine
    1 tablespoon Dijon mustard
    1 tablespoon tarragon vinegar
    3 tablespoons peanut or canola oil
    2 teaspoons chopped chives
    1 teaspoon finely chopped oregano (technically this is meant to be chervil, but oregano is what I've got on my balcony)
    1 teaspoon finely chopped flat-leaf parsley
    1 teaspoon finely chopped tarragon
    Freshly ground black pepper to taste
    1/4 cup finely diced red pepper
    1/4 cup finely diced fennel

    1. Heat the oven to 300 degrees. Toast the almonds in the oven on a baking sheet until fragrant, about 10 minutes, and set aside.

    2. Fill a medium saucepan with water and add about a teaspoon of salt. Bring to a boil and cook the frozen edamame for 4 to 5 minutes, just until tender. Using a slotted spoon, transfer them to a shallow bowl to cool. Bring the pot of water back to a low boil.

    3. Rinse the rice in a small strainer, then add the rice to the boiling water. Cook, stirring occasionally, just until tender, 8 to 10 minutes.

    4. While the rice is cooking, whisk together the mustard and vinegar in a small bowl, then whisk in the oil until the dressing emulsifies. Whisk in the chives, oregano, parsley and tarragon. Season with one-fourth teaspoon salt and a pinch of pepper, or to taste.

    5. Strain the cooked rice and add it to the edamame. Pour half the vinaigrette over the mixture. Add the red pepper and fennel and toss until coated. Add more vinaigrette, salt and pepper to taste.

    6. If you are serving the salad right away, sprinkle the toasted almonds over the top. If you want to chill it, cover the salad and refrigerate until needed. Just before serving, stir the salad again and add more vinaigrette if needed, then sprinkle with the toasted almonds.

  • Dsc_0041

    Summer is almost here, beach season is almost upon us. Have you tried on last year's bikini yet? Figured out what diet to use to whittle down those last few pounds of winter insulation before you slip into something a little more revealing?

    Well, this is your last chance to change your life. How about the Total & Utter Disgust 'n' Despair Diet TM? It's remarkably effective. Why, all you have to do is read a couple of books, starting with Fast Food Nation and The Omnivore's Dilemma and ending with Bottomfeeder, and maybe watch a documentary or two, like King Corn or Super Size Me – yes, from the comfort of your very own couch! no movement required – and you'll lose your appetite, ensuring slimmer thighs and a chiseled face, guaranteed.

    Protein will lose all its allure – poultry, beef, pork, even fish (shrimp!) will be entirely nauseating! Turn your nose up at rice – millions of people need it more than you do – and eye vegetables, both conventional and organic, with suspicion: the twin dangers of E. coli and murky ethics lurk everywhere, didn't you know? You'll find yourself grateful to have nothing but HFCS-free cereal with antiobiotic-free milk for dinner, and that can do wonders for the flabby, late-spring body.

    The Total & Utter Disgust 'n' Despair Diet TM! There's simply nothing else like it.

    (Side effects may include depression, rage, and hopelessness. But everyone knows you hate to eat when you're feeling like the world is coming to an end – so look on the bright side: You'll drop a dress size in less than a week!)

    *****************

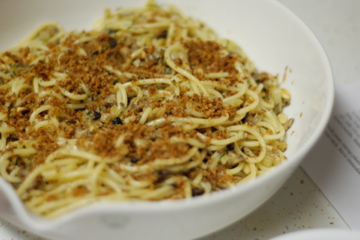
    Yes, folks, I seem to have lost my appetite. I'm 182 pages into Taras Grescoe's Bottomfeeder (which is a must-read, especially for people who like to eat fish) and it feels like the straw that broke the camel's back. About the only thing I feel good about eating now from the piscine world are a dozen oysters and a can of sardines. You might end up feeling that way, too. So in anticipation of that, here's a recipe for pasta with canned sardines that's quite delicious.

    (Don't even try serving it to people who are avowed anchovy haters – the hate seems to extend to all small canned fish. Believe me, I tried. And failed. Miserably.)

    Pasta con le Sarde
    Serves 4

    ½ cup currants
    ¼ teaspoon red-pepper flakes
    ½ cup dry white wine
    1 tablespoon butter
    ½ cup unseasoned dry bread crumbs
    ½ cup plus 6 tablespoons extra-virgin olive oil
    1 medium onion, finely chopped
    2 small cloves garlic, minced
    1 pound fennel, bulb finely chopped, fronds chopped and reserved
    1 tablespoon fennel seeds, crushed
    Salt
    1 pound canned sardines
    1 pound bucatini pasta
    ½ cup pine nuts, toasted
    ¼ cup capers, rinsed
    Freshly ground black pepper

    1. Bring a large pot of water to a boil. Combine the currants, red-pepper flakes and wine in a bowl; set aside. In a small sauté pan, melt the butter. Add the bread crumbs and cook, stirring, until golden brown. Transfer to a bowl, stir in 2 tablespoons of the olive oil and set aside.

    2. In a heavy skillet, heat ½ cup olive oil over medium-low heat. When hot, add the onion, garlic, fennel bulb and fennel seeds. Season with salt. Cook, stirring occasionally, until the fennel is tender, about 25 minutes.

    3. Add the wine mixture and the sardines, breaking them into pieces with a fork. Bring to a boil and gently simmer for 10 minutes.

    4. Add enough salt to the boiling water so that it tastes salty. Boil the bucatini until al dente, 6 to 8 minutes; strain. Return the pasta to the pasta pot and set over low heat. Fold in the fennel-sardine mixture. Toss in the remaining 4 tablespoons olive oil. Add 3/4 of the fennel fronds, the pine nuts, the capers and a quarter of the bread crumbs. Season to taste with salt and pepper.

    5. Divide pasta among plates and sprinkle the remaining bread crumbs and fennel fronds over each. Serve immediately.

  • Duck1

    Our next recipe reviewer, Lynn at Spoon & Fork, sacrificed herself for the sake of the duck rillettes from the chef at Vertical Wine Bistro in LA. And I, for one, am quite glad she did.

    "So my fiance and I are plopped on the couch in a duck fat-induced food coma.

    Wow.

    The duck rillettes were pretty fabulous. We ate them on top of toasted baguette slices, along with a salade nicoise. The spread turned out really creamy and delicious. The flavor was terrific, although we were just the tiniest bit bummed that the Dijon mustard flavor was so strong, because we felt like we didn’t taste as much of the duck as we’d like. Next time I might tone that down a bit.

    And there definitely will be a next time: our food-loving and Francophile friends would love these as a pre-dinner snack with a glass of wine or Champagne. It’s a lovely dish for entertaining. A little decadent for a regular Sunday dinner, but hey, this was an assignment! The recipe was easy to follow.

    Finding duck legs that weren’t confit, on the other hand, was a little tougher. After a, uh, wild duck chase (ha) I eventually found them at Todaro’s on 2nd Avenue and 30th Street. They were from Long Island. Meanwhile, the man at the meat counter at Garden of Eden on 23rd Street went in the back of the store and filled up a container of duck fat for me.

     The procedure was simple. You rub the duck with herbs and spices (the recipe was a little unclear about some things; for instance should the parsley be chopped or left in whole leaves? I left it whole. Is the mint dried? I figured yes). You refrigerate it, loosely covered, overnight. Some fat drains out during that time. You sear the duck in a dutch oven, add veggies, then wine, and let it reduce. It goes into a very low oven with chicken stock for about 3 hours, and then you set to work emulsifying the meat with melted duck fat and mustard. At that point, though, the consistency isn’t quite right for spreading on bread–too gooey. I put the rillettes in three small custard cups, and after about 20 minutes in the refrigerator they were ready. 

    I definitely recommend this for a dinner party. You’ll get about 45 servings from the whole recipe. I’m freezing one cup–will let you know how that turns out."

    Okay, duck rillettes are all fine and well, but what’s this about the butcher at Garden of Eden filling up containers with duck fat? Somehow I’m stuck on that alluring detail.

    Oh, also, Lynn – what did you do with that miraculous-sounding braising liquid (Step 3)? I’m having visions of some kind of stewy soup of rice and asparagus built off that base of braising liquid and let me tell you: the meal of roasted asparagus and scrambled eggs with ramps that I’ve been looking forward to all day suddenly seems a whole lot less interesting now.

    Duck Rillettes
    Makes about 2 cups

    2 duck legs
    2 tablespoons kosher salt
    1 small bay leaf, broken
    1 1/2 teaspoons chopped thyme
    1/4 cup parsley leaves
    1/4 teaspoon peppercorns
    1/4 teaspoon coriander
    1/4 teaspoon mint
    1/4 cup sugar
    1 tablespoon canola oil
    1 white onion, chopped
    1 carrot, chopped
    2 cups white wine
    2 cups chicken stock
    1 cup duck fat
    1/4 cup Dijon mustard

    1. Place the duck legs on a rack on a baking sheet and
    rub them with the salt, bay leaf, thyme, parsley, peppercorns,
    coriander, mint and sugar. Cover loosely with a sheet of parchment
    paper and allow to cure for 24 hours in the refrigerator.

    2. Heat the oven to 250 degrees. In a large
    heavy-bottomed Dutch oven, sear the duck legs in one tablespoon of
    canola oil over medium-high heat until you get a bit of color, about 2
    minutes. Add the onion and carrot and sauté until softened, 7 to 8
    minutes. Add the white wine and reduce by half, about half an hour.

    3. Add the chicken stock and braise the duck legs in
    the oven, covered, until the meat is tender and falling off the bone,
    about 3 1/2 to 4 hours. (If it begins to bubble, turn down the heat.)
    Allow the meat to cool, then remove from the braising liquid; the
    braising liquid can be reserved for another use such as for a soup base.

    4. Remove the meat from the bone and place it in a bowl. Place the bowl of duck meat on top of a bowl of ice.

    5. In a small pan,
    heat the duck fat over medium-low
    heat until it’s melted. Slowly pour the duck fat over the duck meat,
    using a fork to emulsify the duck meat with the duck fat until fluffy
    and smooth. Add the Dijon mustard and adjust seasoning to taste.
    Transfer to a serving dish or container; the restaurant serves
    rillettes in a French canning jar.

  • Dsc_0018

    I made this chicken last night and thought it tasted just like garlicky chicken bathed in a sauce made of melted hard candy. (Well! Anyone still out there?)

    Ben and our dinner guest, Seb, didn't agree, but now that I think about it more carefully, Ben really didn't say anything about the meal at all, and I think it's possible that Seb might have just been protesting out of politesse. The silly thing is that when I first read the recipe, I just knew I shouldn't even try it. There's just something about vanilla's cloying perfume that I find difficult, even in luscious sweet recipes. So in a savory chicken dish? I thought it best just to steer clear.

    But Elaine Louie's One Pot column has a special little place in my heart and I've had success with the dishes I've tried from it so far (these noodles and this curry – which I'm just realizing I never told you about…delicious, it was!). So somehow I let myself be convinced to try it.

    To think, I used two more chicken thighs than called for, a little more cayenne, and only half of the vanilla bean, and I didn't even strip out the seeds – I just split it and let it boil in the syrupy orange sauce. Oh, that orange sauce, so saccharine and sticky, even with the cayenne and vinegar and garlic, and such a strange, unpleasant combination of savory and sweet. Ooh, I'm suppressing a shudder just thinking about it again.

    Thank God we had salad.

    Chicken with Orange Juice and Vanilla
    Serves 2 to 3

    6 chicken thighs (about 2 pounds)
    1 teaspoon salt
    1/4 teaspoon plus 1/8 teaspoon freshly ground black pepper
    2 tablespoons vegetable oil
    1/3 teaspoon cayenne pepper, or to taste
    2 large garlic cloves, finely chopped
    2 tablespoons cider vinegar, Japanese rice vinegar, or other mild-flavored vinegar
    1 tablespoon butter
    1 1/2 cups fresh orange juice
    1 vanilla bean, split
    A few sprigs of cilantro, for garnish
    Cooked rice or tortillas for serving (optional) 

    1. Season chicken with the salt and 1/4 teaspoon black pepper. Heat vegetable oil in a large skillet over medium-high heat. Add chicken pieces skin side down, and brown until golden on both sides, turning once, 3 to 5 minutes on each side.

    2. When chicken is browned, pour off any excess fat from skillet and return to medium heat. Sprinkle cayenne and 1/8 teaspoon black pepper over chicken, turning pieces to coat evenly. Taste a pinch of the skin, and add more cayenne if additional heat is desired. Add garlic and sauté for 1 minute. Add vinegar, butter and orange juice. Scrape in pulp of vanilla bean and add bean. Stir liquid to blend.

    3. Cook chicken skin side up, uncovered, basting occasionally with sauce, until sauce is reduced to a syrupy glaze, 20 to 25 minutes. If interior of chicken needs further cooking (it should be 170 degrees when tested in center with an instant-read thermometer), cover and cook over medium-low heat for an additional 5 to 10 minutes, or as needed. Garnish with cilantro. Serve hot, with rice or tortillas, if desired.

  • Golden_apple_triangle

    The first results of my Role Reversal experiment are in! Bonnie Small, of Savoir-Flaire, did us the honors of trying Golden Apple Triangles, published in the New York Times a few years ago, along with an article on quick and easy Thanksgiving desserts.

    Bonnie says,

    "Golden apple triangles were easy to make and good to eat. How wrong can you go with a list of ingredients that includes puff pastry, apples and sugar? 

    As I was getting the bits and pieces together to begin, I admit I was a bit perplexed by the amount of apple to use. The ingredient list indicates “1 cup peeled and grated apple – about 2 apples” but those two calculations didn’t add up. One grated apple is roughly equivalent to one cup, so I stopped there, figuring, in typical schoolyard fashion, that my apple was bigger than their apple.

    Freshly grated, one cup of apple would certainly be sufficient to fill 12 turnovers, however the recipe calls for the grated apple to be mixed with the sugar, salt and lemon juice and allowed to macerate for five minutes. The resting time draws out the majority of the juice from the fruit, leaving a large amount of reserved juice and a greatly reduced volume of apple – barely half a cup to be exact. So I just quickly grated the second apple, tossed it in with the rest and moved on.

    The filling for these tasty tri-corners diverges from a typical apple turnover in a couple of ways. Firstly (and as noted above), the apples are grated rather than diced or sliced; secondly, instead of pre-cooking the filling ingredients, or quickly tossing the apples and sugar together before scooping them into the dough triangles, the apples are left to extrude their juices pre-assembly.

    While the reserved juices are used both as adhesive for the edges of the dough and as finishing glaze, I can’t help feeling that almost a cup of the all important flavor (juice/sugar/lemon) went unused. Not to mention that with all of the liquid removed, one tablespoon of limp apple gratings seemed out of proportion with a 4.5 inch square of puff pastry.

    Once assembled, quickly frozen, and finished with cinnamon and turbinado sugar, they baked up beautifully and were eagerly devoured by all.  My husband (not a fan of copious fruit fillings) thought they were just right, but I couldn’t help thinking about the yummy apple flavor still sloshing around in the bowl."

    Hmm. I rather like a copious fruit filling. I think I’d probably make smaller pastry squares if I tried these, or I’d double the amount of filling and then have leftover puff pastry with which to make cheese straws or something (Like these Cheese Puff Pastry Strips, which I made long before this blog existed and which were totally delectable, plus easy, though also tragic because I made them for a dinner party, tried them fresh out of the oven, then packaged the rest up to take on the train out to my friend’s place – in Forest Hills! Where I live now! Oh, life – and ended up leaving them on the subway platform at 53rd and Lex. Sob.) I would also suggest boiling that remaining apple juice-sugar concoction down into a syrup and drizzling it on oatmeal or stirring it into iced tea. Genius? Terrible?

    Oh, and one more thing. There is a serious drawback to this Role Reversal game. I am without my own Golden Apple Triangle. Must have my own Golden Apple Triangle.

    Golden Apple Triangles
    Makes 12

    6 tablespoons granulated sugar
    ½ teaspoon ground cinnamon
    1 cup peeled and grated tart apple, like Granny Smith (about 2 apples)
    1 tablespoon fresh lemon juice
    1/8 teaspoon salt
    Flour for rolling out pastry
    2 sheets frozen puff pastry, thawed overnight in refrigerator
    2 tablespoons coarse sugar like Demerara or turbinado (optional)

    1. Heat oven to 375 degrees. In a bowl, combine 2 tablespoons
    granulated sugar and cinnamon; set aside. In another bowl, mix apples,
    remaining granulated sugar, lemon juice and salt. Let sit 5 minutes,
    and drain, reserving juice.

    2. On a floured work surface, roll out a sheet of puff pastry to a
    rectangle roughly 9 by 12 inches. Cut into 6 squares, and place 1
    tablespoon apple filling in center of each. Lightly brush edges with
    reserved apple juice; fold into triangles, and seal edges by crimping
    with a fork. Repeat with remaining puff pastry and filling. Transfer
    turnovers to freezer, and freeze until firm, at least 15 minutes.
    Turnovers can be kept frozen in zipper-lock freezer bags up to 1 month.

    3. Line 2 baking sheets with parchment paper or nonstick pan liners.
    Brush tops of frozen turnovers with apple juice, sprinkle with cinnamon
    sugar and arrange on baking sheets. (If reserved apple juice is no
    longer available, use commercial juice or water.) Sprinkle with coarse
    sugar. Bake until well browned, 20 to 25 minutes, rotating pans halfway
    through baking time. Let cool slightly before serving.

  • Dsc_0015

    Okay, everyone, tutorial time! Gather 'round, gather 'round.

    I somewhat blithely assumed in this post that you all knew how to roast peppers. But it was brought to my attention after the fact that perhaps a little guidance would be appreciated and I'm happy to oblige. Plus, I'm on a one-woman mission to rid the world of the misconception that "roasting" bell peppers over a gas flame is somehow an acceptable substitute for when you think you don't have time for roasting peppers in the oven.

    Ahem. Not acceptable. Not at all. At least not in this household.

    Roasting a pepper held with tongs over an open flame simply chars the outside of the pepper. This is fine if you like eating semi-raw peppers that are singed in spots, but it's not fine if your goal is to get a silky-soft pepper that slumps on a plate, sweet and aromatic. To achieve that, follow these directions:

    Dsc_0013

    1. Preheat your oven to 375 degrees Fahrenheit. While the oven is preheating, line a half-sheet pan with aluminum foil. Wash 4 bell peppers. (I use exclusively red and yellow peppers. I suppose I could be convinced to try the orange ones every once in a blue moon. But you could not pay me to eat green ones. No way. No how.) Leave their stems on, you'll use them as little handles later in the roasting process. Place the four peppers on the sheet, leaving a bit of space between them. Place the sheet in the oven.

    2. Every 20 minutes, open the oven and, working quickly, turn the peppers using their stems, so that they aren't lying on the same side throughout the entire roasting period. You'll notice each time you move the peppers that their skin has started to wrinkle and blister, even turning brown and puffing up in spots. Try to make sure that the peppers rotate evenly throughout the process.

    Dsc_0018

    3. After an hour, your home will be redolent with the scent of roasting peppers. People will be knocking on your door and asking if they can come over for dinner. You will bask in the glow of roasting success. Along with a proper roasted potato, little can make you feel as capable in the kitchen as a beautifully roasted pepper. Open the oven and check the peppers. They should be evenly browned and blistered, collapsing in on themselves a bit. Place the sheet on a cooling rack and let the peppers cool. Don't try to fiddle with them just yet – the liquid inside the peppers is amazingly hot, even for someone with asbestos fingers like myself. Be patient.

    4. When the peppers have cooled for about 20 to 30 minute, start to peel them. The peel should generally slip right off, but the peppers themselves will be quite slippery, so you'll need to do this with some care. I like to gently split the peppers and work with large sections at a time, simultaneously dumping out any of the interior liquid and, of course, ridding the peppers of all their seeds. This can get messy – I suggest working over a lipped cutting board and having a clean plate ready for the cleaned, peeled pepper segments.

    Dsc_0020

    So! You've got yourself a nice clean plate filled with roasted peppers: now what?

    Cut them into strips and lay them in small casserole dish. Sprinkle them liberally with chopped flat-leaf parsley, soaked and drained salted capers, good-quality olive oil, and a generous pinch of coarse salt. Eat with crusty bread. (If you're feeling adventurous, add to this dish a small handful of slivered, oil-cured black olives and a few anchovies. Some folks even like adding a layer of homemade breadcrumbs.) This is a classic Italian dish and should be committed to memory. It improves if left to sit and stew together for an hour or two.

    I suppose it should be noted that these peppers are also far, far superior to any roasted pepper that comes in a jar at the supermarket. Those will never do.

  • Dsc_0031

    Let's start things off with a big, happy, declarative statement, shall we? It's Monday and it's awful out and despite being almost mid-May, we're dealing with March-like winds and rain instead of flowers and sunshine. I need something to cheer me up, perhaps you do, too, and I'm thinking this might just do the trick:

    I may have found my new favorite way to roast chicken.

    There. Things feel like they're looking up already, wouldn't you agree?

    I'll always love the high-heat, Judy-Rodgers sanctioned way of roasting chicken, but the last time I did that we ended up having to live with the stench of scorched chicken fat in our apartment for nigh on a week. Since then, I've been banned from preparing chicken that way. Apparently, until we have a little elf living with us whose sole purpose is to run around silently behind me, cleaning up in the wake of my cooking endeavors and periodically scrubbing the inside of the oven (and while little elf is at it, also mopping), I won't be roasting at high heat again.

    (Tragic, I know. How do I stand it?)

    But over the weekend I found myself repeatedly coming back to a recipe printed in the LA Times a few weeks ago that has you stir Greek yogurt together with some herbs and spices and then massage big handfuls of the stuff onto (and into) a chicken, before letting it marinate for an hour and then roasting it at relatively average heat until cooked through.

    See, doesn't that sound good? Something about spiced yogurt and marinating chicken… and I'm bewitched all over again.

    Yogurt tenderizes chicken, don't you know, and the herbs and spices infuse the meat subtly. The marinating time and then the relatively long, slow roasting ensure an incredibly juicy bird. And to gild the lily – but this gilding I found absolutely necessary – the recipe has you roast shallots and red peppers beneath the chicken. After the roast is done, you gingerly peel the peppers (watch your fingers, they'll be hot!) and then puree them with the shallots and a disc of puckery goat cheese into an ochre-tinged sauce.

    The original recipe has you do a fancy pan sauce with drippings and stock and flour and whisking, but is it a surprise to any of you at this point that I was far too lazy to follow suit? It was late, we were hungry, and that burnished bird was sitting on its platter making our stomachs growl. So I scraped up the pan drippings, separated the fat as best I could and dumped the drippings into the creamy sauce before whizzing it one last time.

    Dsc_0030

    And it was fabulous. Sweet and savory and with the faint funk of goat cheese about it. We slathered the sauce onto our forkfuls of chicken, dragged the chicken through great puddles of the stuff on our plates. If we hadn't been in the presence of dignified company, I might have even taken a spoon to the bowl. Best of all, while the chicken disappeared in a flash, there's sauce to last us another night at least.

    I'm planning on using this yogurt-marinade technique over and over again – committing it to memory, even handing it over to the lamination files, if you will! The chicken was dreamily moist and juicy and would make fantastic leftovers.

    This is the perfect Sunday supper – one you can start as the sun starts its slow descent in the late afternoon and can have on the table by the time the light is gone, but the birds are still out doing their early evening calls. I love this time of day in spring and especially where we live now, where we can actually hear the birds over the sounds of the city. If I go out on the balcony, I almost feel like I'm back in Berlin again – close enough to the city that I see the sunlight sparking off the buildings in Manhattan, but far enough away that I hear more birds than sirens; birds and the rustling of leaves in the trees around our building.

    And there we go! Suddenly this cold, gray day doesn't seem so bad anymore. I have red pepper sauce, Ben, and a movie waiting for me (how to choose: Scarface on DVD or Iron Man at the theater?).

    Happy Monday, folks. I hope it's a good week for you all.

    Yogurt-Rubbed Roast Chicken with Red Pepper Sauce
    Serves 3 to 4

    Note: I made a half-recipe – the original makes two birds, and enough sauce to last for a week's worth of sandwiches, I think. Also, I omitted the steps and ingredients for the pan sauce. Click here for the original.

    1/2 cup plain Greek-style yogurt
    3 tablespoons olive oil
    1 1/2 teaspoons dry mustard
    1 1/2 teaspoons chopped thyme
    1 teaspoon ground coriander
    Kosher salt
    Freshly ground black pepper
    1 (3- to 3 1/2 -pound) chicken
    1/2 pound (about 8) shallots, peeled and left whole
    3 carrots, peeled and cut into chunks
    2 red bell peppers, halved, cored and quartered
    1 2-ounce piece goat cheese, softened

    1. In a small bowl, stir together the yogurt, 1 tablespoon of the olive oil, the dry mustard, thyme, coriander, 2 teaspoons salt and 1/4 teaspoon pepper. Loosen the skin around the breasts and thighs, then rub both chicken all over (beneath the skin and inside the cavity, too) with the yogurt mixture. Refrigerate the chicken, uncovered, for 1 hour.

    2. Heat the oven to 350 degrees. Place the shallots, carrots, peppers, the remaining 2 tablespoons of olive oil, and salt and pepper to taste into a large roasting pan and toss well. Arrange a rack over the vegetables.

    3. Arrange the chicken on the rack, breast-side up, and roast, basting occasionally with pan juices, until the vegetables are very tender and the chicken is deep golden brown and cooked through, 1 1/2 to 2 hours. Transfer the chicken to a large platter and tent with foil; set aside.

    4. Drain the pan drippings into a bowl, then skim off and discard the fat; set aside.

    5. Remove and discard the skin from the peppers (it should peel off fairly easily), then transfer them to a food processor. Add half the shallots and pulse until roughly chopped. Add the goat cheese, salt and pepper to taste, and pan drippings and puree until smooth.

    6. Carve the chicken and transfer to plates. Spoon 1 to 2 tablespoons of the red pepper and goat cheese sauce over each serving and serve with the remaining roasted shallots and carrots on the side.