• DSC_4958

    Dearest readers, spring has sprung here in Berlin and it feels so, so good. To celebrate, I want to inaugurate a new Friday tradition of doing a little round-up of what I'm reading, watching and cooking, along with other favorite discoveries across the web each week. I hope you like it.

    What are you all up to this weekend? I get to be my mother's date at the Berlin Philharmonic and I've been invited to a dinner party for 12 (how will they do it?) with some new friends. I also can't wait to sit in the sunshine at an outside café with a warm drink in my hand and stretch my legs in the park across the street.

    Here goes:

    I love Coralie Bickford-Smith's beautiful cover designs for classic Penguin food books. Look at the little fork and knife in the penguin's flippers!

    I've only recently discovered the joys of home-popped popcorn (I know, where have I been?) and now I can't wait to try this spicy, savory mixture.

    Also via Saveur (I'm loving all their new features), an interesting way of kneading bread. That teacher! Hubba hubba.

    We've been thinking of honeymooning up the old Pacific Coast Highway. These photos of Big Sur give me serious wanderlust.

    I need to make this whisky marmalade.

    A fantastic post on the nitty-gritty of food blogging, from the inimitable David Lebovitz.

    My friend Suzy's daughter turned two a few weeks ago and to celebrate, we ate Suzy's killer quiche with tomatoes, fennel and goat cheese. Best. Quiche. Ever.

    Michiko Kakutani thinks Gabrielle Hamilton's Blood, Bones & Butter is "brilliantly written".

    And finally, an interview with me over at Berlin Hair Baby, in which I talk about the biggest surprise about moving back to Berlin and my personal style.

    Have a lovely weekend, folks!

  • DSC_6164

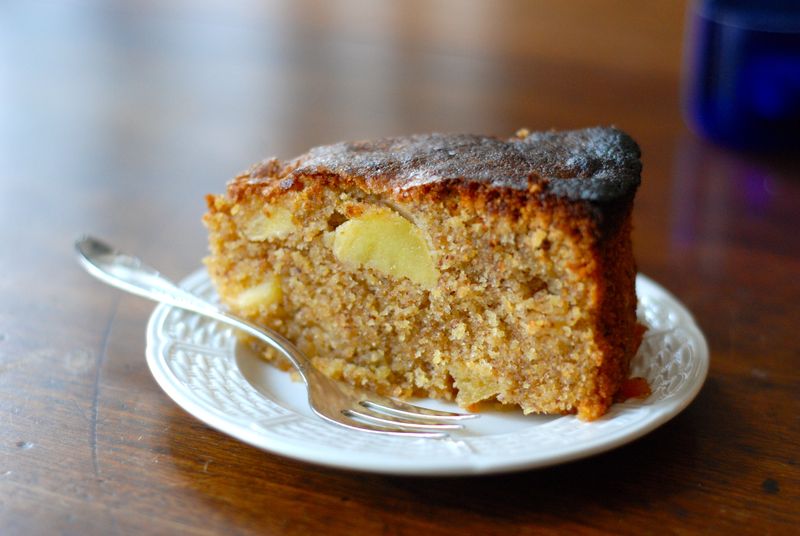
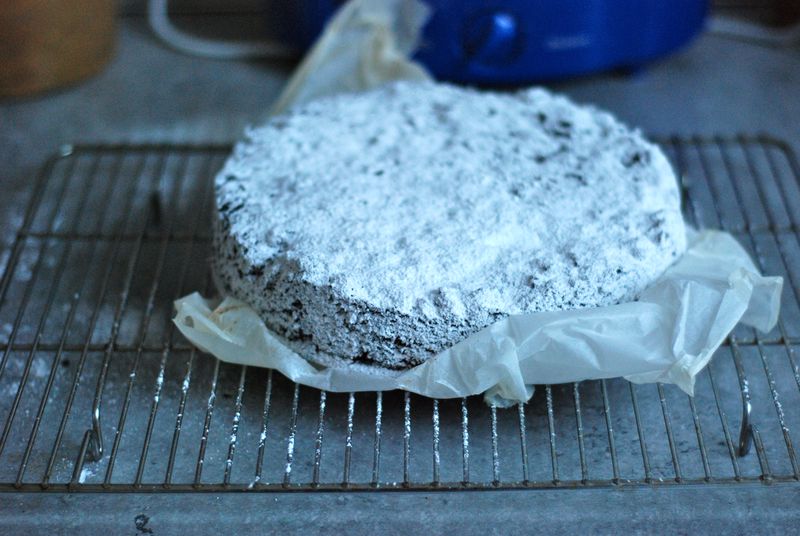
    That slice of cake up there. Looks so innocent, so pure. Right? Rustic, grainy, apple-studded; why it couldn't harm a fly if it tried.

    Yeah. Except, let me tell you. This rustic, grainy, apple-studded cake is one two-faced little minx. Underneath that homely interior is a cleavage-flashing, loose-morals-toting, floozy of a cake, capable of reducing grown men to quivering fools and accomplished bakers to white-flag-waving quitters.

    It even made my electric mixer start to smoke.

    DSC_6128

    It starts out innocently enough. A bowl full of almond meal, fragrant and nubbly, whole-wheat flour, sunny cornmeal and a bit of all-purpose for good measure.

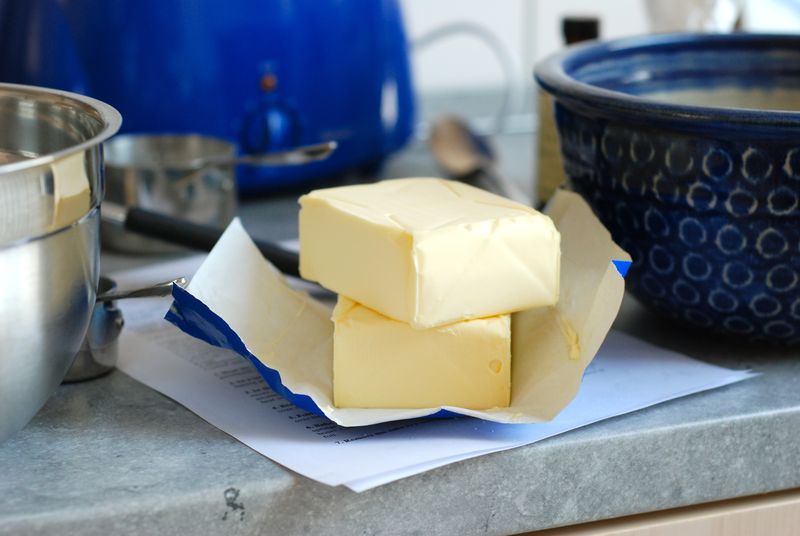
    And then, bam!, along comes one whole pound of butter (breathe, breathe) plus a whole pound of sugar (see what I mean?) and Eight. Whole. Eggs. to drag that bowl of good intentions right down a one-way street to damnation.

    DSC_6134

    If you, like me, are using an electric mixer that predates your birth, I'd advise you to skip this recipe unless you like it when the motor begins to emit a high whine, then a thin stream of smoke and then becomes uncomfortably hot in your hands. I don't ever actively wish I had a stand mixer (counter space real estate is precious, no matter what city I live in), but this cake changed all that. In a flash.

    Strumpet!

    Also, you're going to need the biggest bowl you own for this cake, along with the biggest pan you can muster. This cake, man. Take it from me, it's like a baby kitten that looks all sweet and tiny at the pound and then grows up to be a coon cat, capable of opening sliding doors with handles once fully grown.*

    I'm just trying to warn you, is all. I guess I was forewarned, too, what with phrases like "unabashedly rich" and "no shortage of butter" rolling around the description of Huckleberry's apple butter cake, but I must not have been paying attention or something. Or, more likely, I let myself get snowed by all those virtuous other ingredients. (Baby kitten eyes.) I can be so naive.

    DSC_6156

    This cake is the biggest, baddest thing I've baked in a while. It is intensely rich and not for the faint of heart. In fact, I think it should come with a warning sign: "Only to be eaten in slices less than 0.5 inches in thickness." Any bigger than that and you'll be fighting with the food sweats before you're done with one slice. Take it from me; I actually saw this happen.

    The cake does also happen to be delicious. Which is nice. The texture is wonderful, grainy, toothsome and firm, and the moist little pockets of cooked apple are a welcome relief. In fact, the cake could even handle a little more apple than called for in the original recipe (noted below). Nutty and sweet (you should leave off the sugar topping, also noted below), the vanilla notes really pop between all those apples and butter. Hoo boy, this most definitely is not your average simple apple cake.

    Keep it filed away for those days when you've got to bake for a crowd, when you know you'll have at least 10 eaters to help whittle away the enormous, buttery, burnished round. Or, you know, if you're surreptitiously trying to kill your oldest kitchen appliance so that you simply have no choice but to buy a shiny new stand mixer. Or! If you're entering a contest for Foxiest Apple Cake Ever. You'd totally win. Totally.

    *True story!

    Whole-Wheat Apple Butter Cake
    Makes 1 10-inch cake

    Cooked apples

    2 tablespoons butter
    1.5 to 2 pounds apples, peeled and cut into large chunks (about 4 or 5 cups)
    1/4 cup sugar
    1/4 teaspoon salt

    In a large sauté pan, melt the butter over medium heat. Stir in the apples, then the sugar and salt, tossing to coat completely. Cook, stirring often, until the apples are just softened, about 6 minutes. Remove from heat and spread out the apples on a rimmed baking sheet to stop the cooking process. Set aside to cool.

    Cake assembly

    2 cups (7 ounces) almond meal
    1 cup (4.5 ounces) whole-wheat flour
    3/4 cup plus 1 tablespoon (3.5 ounces) all-purpose flour
    1/2 cup plus 1 tablespoon (2.5 ounces) cornmeal
    2 1/4 teaspoons baking powder
    2 1/2 teaspoons salt
    1 pound butter
    2 1/4 cups (1 pound) sugar
    8 eggs
    2 tablespoons vanilla extract
    Cooked apples

    1. Heat the oven to 350 degrees. Grease a 10-by-3-inch round cake pan and line bottom with parchment paper.

    2. In a large bowl, sift together the almond meal, whole-wheat flour, all-purpose flour, cornmeal, baking powder and salt. Set aside.

    3. In the bowl of a stand mixer using the paddle attachment, or in a large bowl using an electric mixer, beat the butter until softened. With the mixer going, beat in 1 pound sugar until the mixture is light and fluffy, 3 to 5 minutes. Beat in the eggs, one at a time, until combined, then beat in the vanilla.

    4. Beat in the dry ingredients, a spoonful at a time, just until incorporated. Be careful not to over-mix.

    5. Fold in the cooked apples by hand. Spoon the mixture into the prepared cake pan.

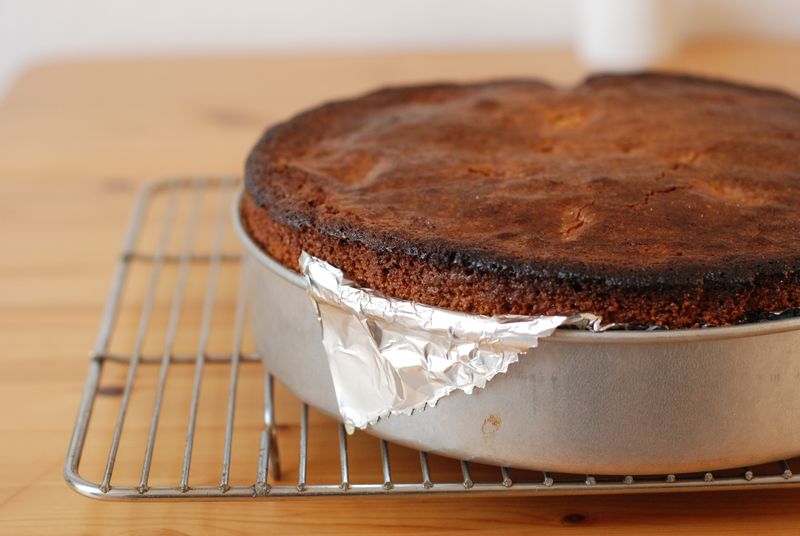
    6. Bake the cake in the center of the oven until the cake is risen and a rich golden brown on top, springs back when touched, and a toothpick inserted in the center comes out clean, about 11/2 hours. Check the cake after 1 hour; if it browns too quickly, loosely tent the top with a piece of foil.

    7. Remove the cake to a rack. Cool for 15 minutes before removing the cake.

  • DSC_6113

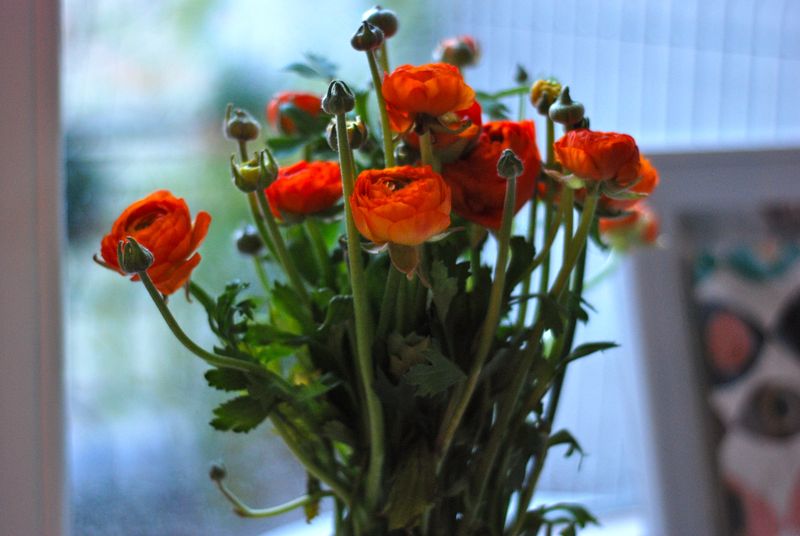
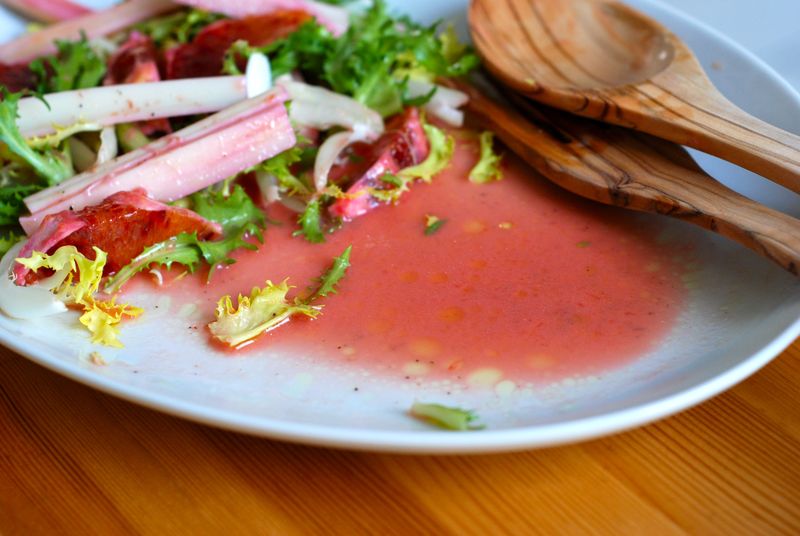
    I found myself staring into the salad plate today at lunch, wishing I had a silk shirt in exactly the color of that vinaigrette. Or maybe a stiff little canvas skirt with a bit of swing, perfect with tucked-in white tee-shirts and flat sandals. Better yet, a wedding bouquet made of peonies in this hue, or a little nosegay of ranunculus, my very favorites.

    This winter has dragged on long enough when you start seeing your spring wardrobe in the communal salad plate, methinks. And cruelly, a few weeks ago, while New York was still digging out from under all their snow, we actually had warm winds and bright sun. It felt like spring and, leaning out of my bedroom window one morning, I saw buds on the majestic chestnut tree that lives in our courtyard and whose branches frame the morning sky for me every day. But then, in one fell swoop, Arctic winds and their accompanying temperatures befell us again.

    But you know what those Arctic winds brought along with them, besides the cold wind? A whole lot of sunshine, every day this week. Which puts me in the very odd position of actually being grateful for something so cold that it sears the top layer off my skin every day.

    DSC_6109

    You know what else is nice? Discovering a new salad to eat multiple times a week. I found this one the other night when we had friends over for dinner. Another dinner party, yes! But I stuck to my guns and made only what I wanted to eat, which happened to be a cauliflower soufflé (after making this one in London last weekend with one of my besties and realizing just how awesome a soufflé dinner can be) and apple strudel with softly whipped cream flavored with vanilla sugar for dessert. We needed something cleansing and astringent between those two knockouts and I found the very thing nestled in the front pages of The Canal House's third volume, Winter & Spring.

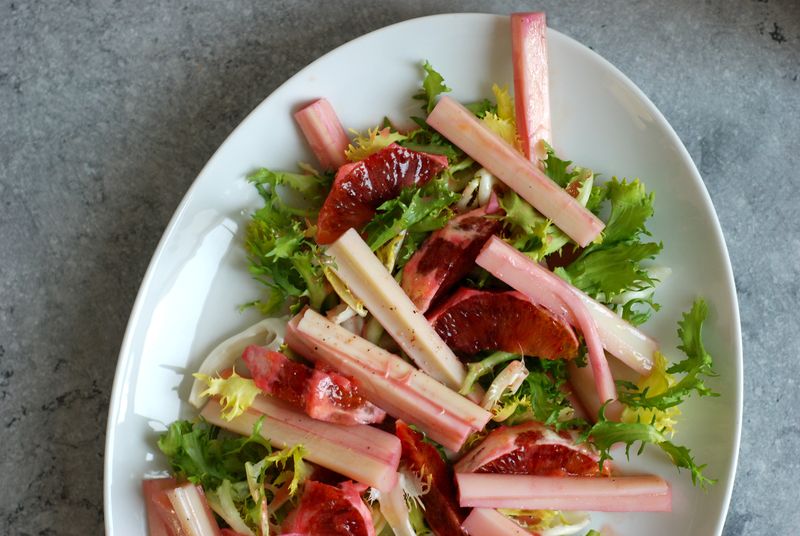
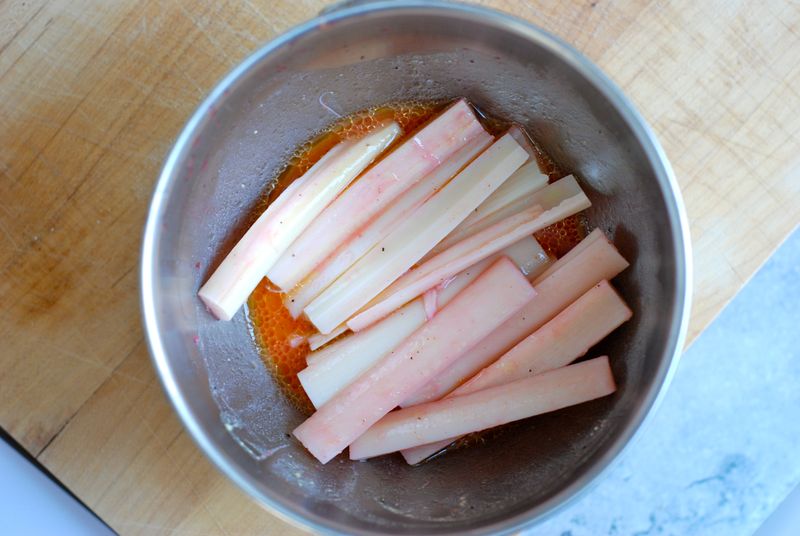
    You buy a jar of hearts of palm, locavorism be damned, a few blood oranges, which – now that I live just north of Italy – I feel I can eat with aplomb, and a head of frisée. Then you marinate the hearts of palm, ivory batons quartered lengthwise, in a vinaigrette made of little else besides mustard and blood orange juice and olive oil. Mixing it together, you'll see that lush pinkness swirl into existence. You might, like me, have to restrain yourself from using this as a dye.

    DSC_6099

    You cut little suprêmes from the oranges, meaning you hold a peeled orange gently in the palm of your hand and then, using a sharp knife and some care, you carefully slice the segments of the orange out from between their connective membranes. This is the fancy way of using oranges in this salad. If this seems like far too much fuss, you can also just peel the orange and cut it into slices crosswise. But there was something meditative and peaceful about the suprêming for me. I've spent all week in a fog of work and taxes and dirty sweatpants; standing over the counter cutting an orange into pretty segments was the most glamorous I got all week.

    That's really the hardest work, anyway. You put the washed and dried frisée (I like to rip it into bite-sized pieces) on a plate or in a bowl and then arrange the hearts of palm, stained the palest pink, and the orange segments on the salad, before drizzling the lot with the gorgeous vinaigrette. The hearts of palm, if you've never had them, feel squeaky and velvety at the same time under your teeth and work to tame the edge of the blood oranges and the bite of the frisée. They soak up the vinaigrette, transforming into the mildest of pickles, and are simply a joy to eat.

    It's such a simple little combination, but a welcome change from the usual soft lettuce-orange-avocado salad that I rely on in winter. This one's a little spunkier and a little more bitter, which I love. It's a winter salad with what I like to think of as a Caribbean soul. And will miracles never cease: I even found myself thinking, as I crunched through lunch today, that winter can stay a little longer, as long as it keeps us rich in hearts of palm and blood oranges.

    Hearts of Palm and Blood Orange Salad
    Serves 4

    2 blood oranges
    1/2 teaspoon Dijon mustard
    1 tablespoon fresh lemon juice
    Salt and pepper
    3 to 4 tablespoons extra-virgin olive oil
    1 teaspoon red wine vinegar, optional
    1 jar (14.8 ounces) hearts of palm, drained and quartered lengthwise
    Small head frisée lettuce

    1. Working with one orange at a time, peel the fruit, taking care to remove most of the pith. Working over a bowl, slice the orange into segments, letting the segments and juice fall into the bowl. Squeeze any juice from the leftovers in your hand into the bowl.

    2. Stir the mustard and lemon juice together in a wide bowl. Add some salt and pepper to taste, then stir in the reserved blood orange juice. Whisk in the olive oil. Taste for seasoning and add the vinegar, if using. Add the hearts of palm to the bowl and gently turn them in the vinaigrette. Set aside to marinate.

    3. Arrange the frisée on a serving plate or in a bowl. Place the hearts of palm and orange segments over the frisée and drizzle with the vinaigrette. Drizzle a little more olive oil over the salad and serve.

  • DSC_5943

    I made chicken stock the other day. Trudged down to the butcher to buy two organic soup chickens from France, ankles bound indelicately, skin cast in a yellowish hue. Passed the grocer on the way back home where I found wilting soup greens, as the Germans call that bundle of aromatics made up of two halves of a leek, a carrot, a slice of celery root and a spray of parsley tied together, in the dark recesses of a shelf close to the floor. At home again, I sliced an onion in half and charred each side in a pot with no oil, as every German recipe for chicken stock will instruct you to do, then filled up the pot with cold water, peppercorns, the yellow French chickens, bay leaves from my mother's garden in Italy and the soup greens, washed and peeled as best I could, plus a little bundled bouquet garni. The pot simmered away for hours, clouding up the kitchen windows, making the kitchen and my office smell like a Jewish grandmother's house.

    The stock lasted us all week. A ladleful in risotto here, a golden puddle with tiny semolina dumplings there, a jar for my mother, a container in the freezer. If I had a bigger freezer, I'd make stock once a month. There's something so elemental about cooking it (and if you have two chickens floating in the broth, you can salvage one after an hour to actually eat, dipped into HP Fruity sauce, for example, my little guilty pleasure) and finding yourself supplied with the groundwork for a great many delicious meals.

    DSC_5933

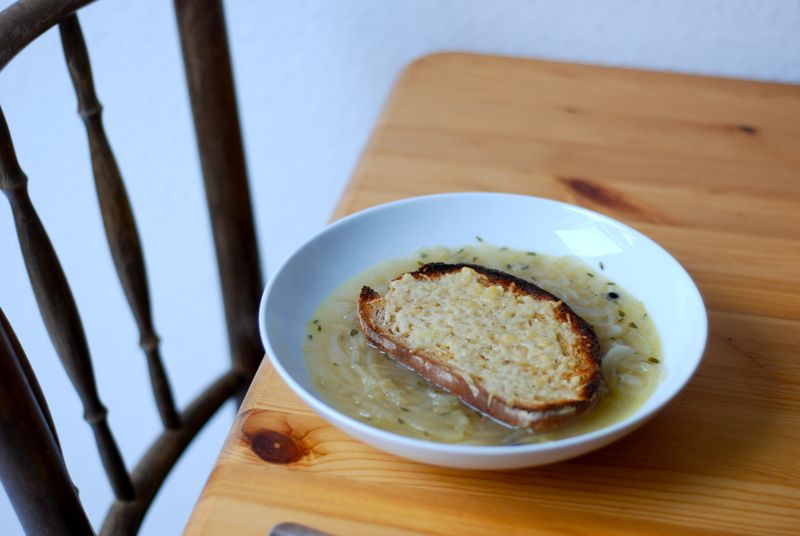
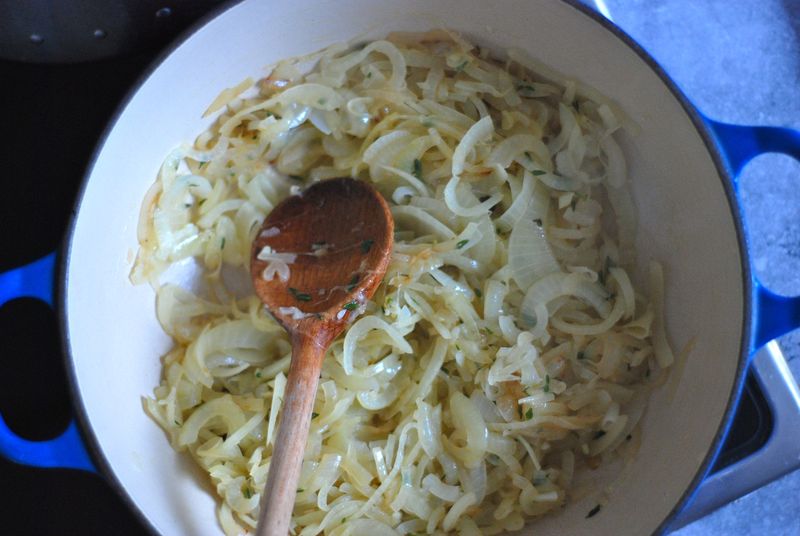
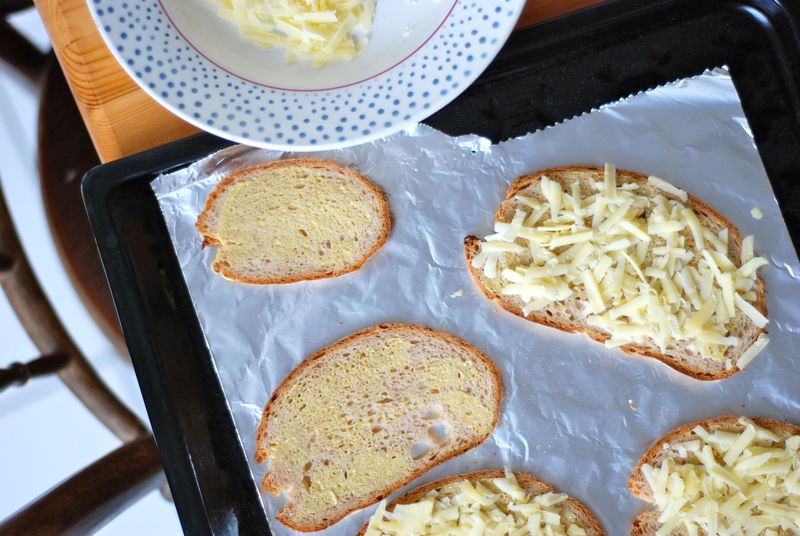
    The other day at lunch, inspired by a recipe from a German cooking magazine called essen & trinken, I sliced a small pile of onions thinly and cooked them in a little olive oil along with some unusal aromatics (star anise, juniper berries) until they were soft and translucent and going pale brown in the pan. A few sprigs of thyme from the balcony gave the onions an herbal touch. After a while, I poured a glug of dry white wine to deglaze the onions, then filled up the pot with some ladlefuls of chicken stock and let everything simmer away for a little while, while I sliced bread and spread the slices thinly with mustard before showering them with a carpet of grated Gruyère cheese. Under the broiler the bread slices went, until the edges were crisp and browning quickly and the cheese had melted and blistered in the heat.

    I filled each soup plate with onion soup, then floated a toasted cheese tartine on top. The soup softened the bread, turning the bottom-side custardy and easy enough to cut with a spoon. We slurped away as carefully as we could, marveling at the depth of sweetness in the soup, crunching away at the edges of the toasts before they sogged entirely.

    DSC_5937

    You always dream, when you work in an office, of being free one day, free to work in your pyjamas, free to be your own boss. It's a misleading little daydream, because the truth is that working from home for yourself is so much harder than being in an office. At least it is for me. I miss my commute to work, my colleagues, my office uniform. I spend too much time in my own head at home, feel far more oppressed under my own expectations of myself than I did under any employer. But in one respect, working from home really does beat everything else and that is the luxury of being able to emerge from the fog of work to cook my own lunch. To spend a half hour standing over the stove in the middle of the day, making a little salad, setting the table for the two of us, is bliss.

    In a few months, our lunchtime ritual is going to change. Max will be working far away during the week and I'll be left to my own devices, probably sentenced to a great many peanut butter sandwiches at midday. It's just not as much fun to cook for yourself than it is when you're sharing a meal, is it? That seems to be one of the great truths of a cook's life. So until then, I'm counting my blessings, boiling chickens and making onion soup.

    Simple Onion Soup
    Serves 2 for lunch

    3-4 tablespoons olive oil
    5 medium yellow onions, cut in half and sliced thinly
    1 star anise
    A few stalks of fresh thyme, minced
    10 juniper berries
    1/4 cup (100 ml) dry white wine
    4 1/4 cups (1 liter) chicken stock
    Salt, pepper
    4 slices country bread
    Dijon mustard
    Gruyère

    1. Put the oil in a heavy saucepan over medium heat and cook the onions, star anise, thyme and juniper berries slowly in the oil for 20 minutes, until the onions are limp, silky and starting to turn brown. Deglaze with the wine and let most of the alcohol cook off, stirring occasionally. Season with salt and pepper to taste. Pour in the chicken stock and let the soup simmer for another 20 minutes.

    2. Spread each slice of bread very thinly with mustard and top with a layer of grated Gruyère. Put the cheese toasts on an aluminum foil-lined baking sheet and slide under the broiler in your oven for a few minutes, just until the cheese is blistered and melting and the edges of the bread are toasted.

    3. Ladle the soup into deep soup plates and top each plate with a cheese toast. Serve immediately.

  • DSC_5906

    I've been lucky enough to eat a real pizza napoletana on a sidewalk in Naples, scarcely bigger than my two palms put together. Milky mozzarella bleeding into fruity, clean tomato sauce; heaven in three, four bites, gone as quickly as it came. I had the best pizza of my life at Pizzeria Mozza in Los Angeles, that sunswept, palm-studded city that so many New Yorkers love to hate, but that – deep inside my soul, my heart – feels like home to me. I loved the weird little pizzas at City Bakery before they started baking them on puff pastry; greasy slices in lieu of a proper dinner from the one-dollar joint down the street from my office; the glorious, glorious pies at Co. on 9th Avenue. And pizza al taglio is on my (very short) list of things you should eat before you die.

    Even for my birthday dinner in December, I had just one request: pizza, please. And a beer. (We went to Casolare, a grungy little restaurant by the side of a canal in Kreuzberg which serves pizza that is very good and on occasion so great that a slim young man with, yes, an oftentimes above-average appetite, can eat two entire pies by himself in one sitting. Ahem. As God is my witness. Also! It's a good place for people watching: last summer, I saw half the cast of Inglourious Basterds having dinner in the back of the restaurant.)

    In other words, I like pizza a lot. Probably like most of you out there, too. And there was a time when I let myself get swept up in the insanity that surrounds making pizza at home these days. You know, like cooking a pizza under the broiler on an upside-down cast-iron pan. Dealing with the weight of a pizza stone. Letting pizza dough proof for 24 hours for maximum flavor. Collecting recipes from pizzaioli far and wide to read about their favorite toppings. Sourcing Italian flour for the most authentic texture possible.

    And then I got so tired of it all. I realized that I didn't actually want to recreate my favorite restaurant pizza at home. I wanted to go to a restaurant and pay to be fed that pizza. At home, I was happy with a pizza made in less than two hours, with a chewy, flavorful crust and toppings I could calibrate myself. Turns out, when you let go and stop trying to create restaurant results in a home kitchen, you can find yourself making some pretty stellar pizza. It's just a matter of realizing that the two are totally different things.

    My favorite, holy grail dough is Jamie Oliver's pizza dough. It comes together in a flash and has the most incredible, floppy texture which translates to loose bubbles and a gorgeous, burnished bottom after a pass in the oven. Jamie's original recipe makes an enormous amount of dough so I halve it and between the two of us we usually manage to polish it off (did I mention the above-average appetite?). I don't bother using "00" flour or bread flour or the mixture of regular flour and semolina that he suggests. I use plain, old all-purpose flour with delicious, chewy results. Also, what I'm using here in Berlin is actually instant yeast and not active dry yeast since it can be added directly to the ingredients without needing to be proofed first. Score! One less thing to wash up afterwards. As for you, just use whatever yeast you've got.

    DSC_5895

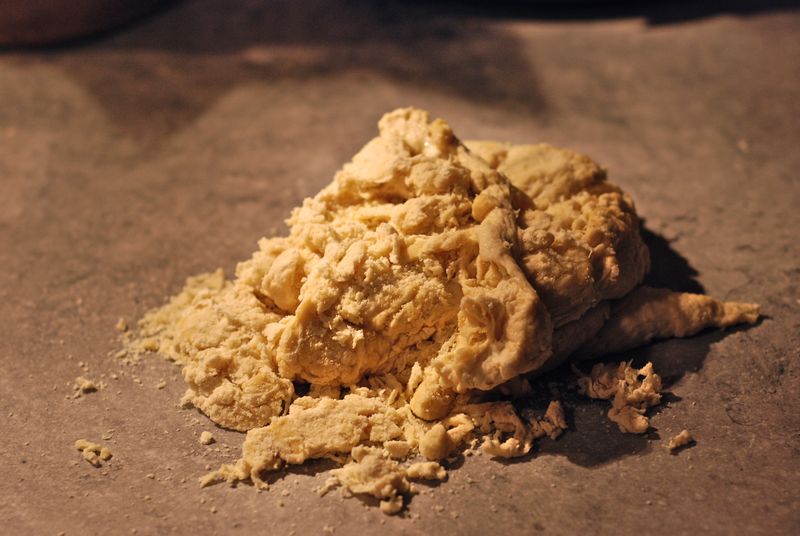
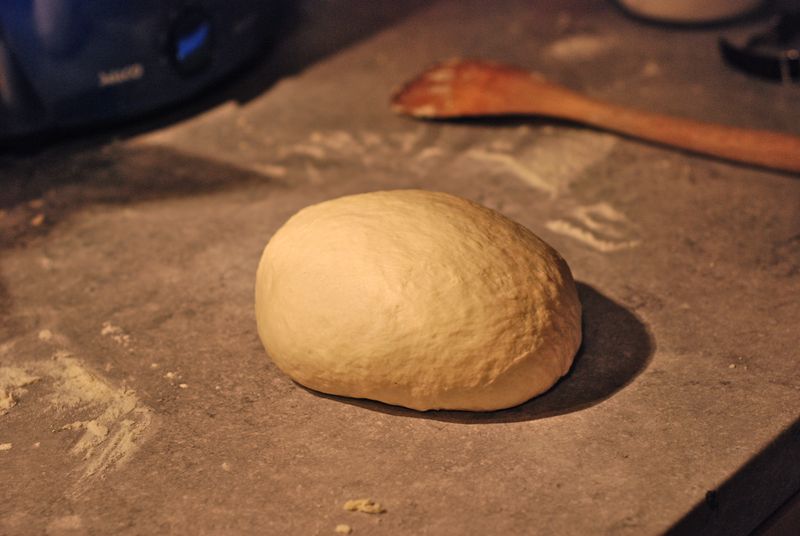
    You start out by making a rather shaggy mixture of flour, yeast, a bit of sugar, warm water, some olive oil and salt in a bowl. I stir this as best I can and then I give up, dumping the shaggy mess on the counter to knead it properly. Within a few minutes, I get a satiny-smooth, cool ball of dough. I let this rest while I quickly wash out the bowl, dry it and coat with a thin, thin film of olive oil.

    DSC_5899

    The ball of pizza dough goes into the bowl, I turn it lightly to coat it with the oil in the bowl and then I cover it with a cloth and slide it into my still-cold oven for one hour. That's it. Enough to finish up work, make a salad, shred a ball of mozzarella, and set the table.

    After an hour, I gently coax the dough – now puffed and fluffy – out of the bowl onto the floured counter. This may be one of my favorite things to do in the kitchen, handle freshly risen dough. It's so pure and expectant, somehow. And the texture of the dough is always so improbably light and bubbly. Plus, it smells like yeast and olive oil, which is a direct catapult to standing in the doorway of my favorite hole-in-the-wall pizza place in Urbino. At this point, I also turn on the oven as high as it will go.

    DSC_5907

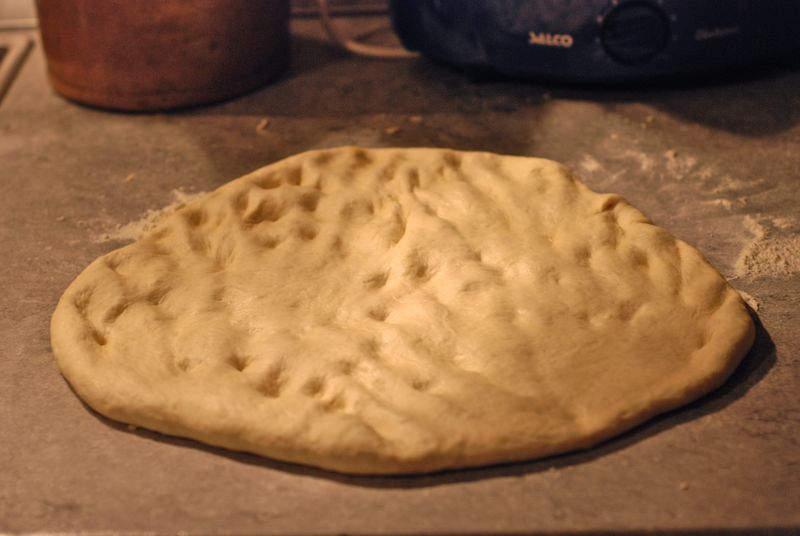
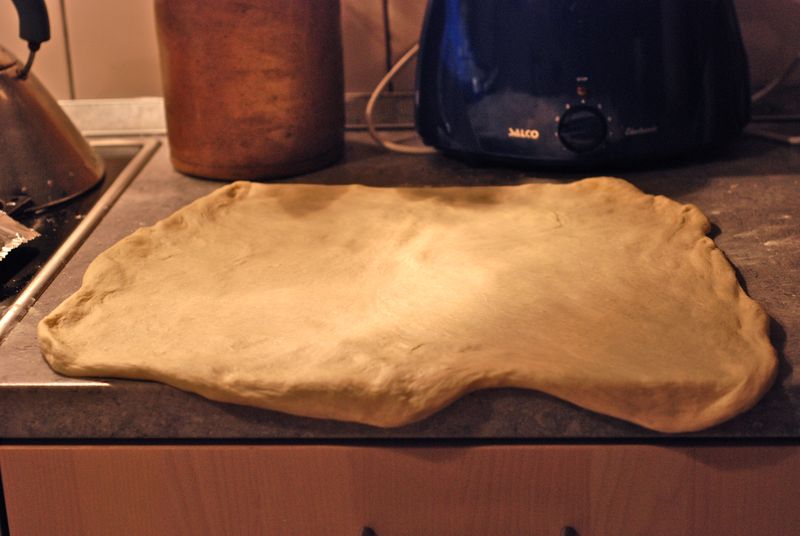
    I gently pat out the dough and it dimples agreeably under the pressure of my hands and then I gently, gently start to tug it into the shape I need for my sheet pan. I don't like to roll this dough – the light and puffy quality it has now will translate to a wonderfully blistered and airy crust in a few minutes – and besides, it is so easy to handle that it will flatten out with just a few judicious tugs and pats. If you like a thicker crust, pat the dough to fit your sheet pan (lined with oil-slicked aluminum foil). If you like a thinner crust, divide the dough in two and fit two sheet pans with it. You might find you'll need a rolling pin if you're aiming for a thin, thin crust. Or divide the dough into balls for individual pizzas.

    DSC_5911

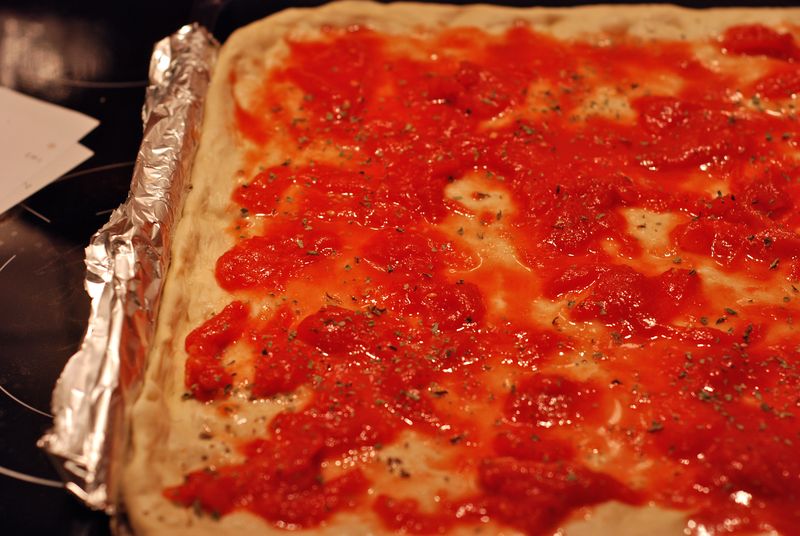
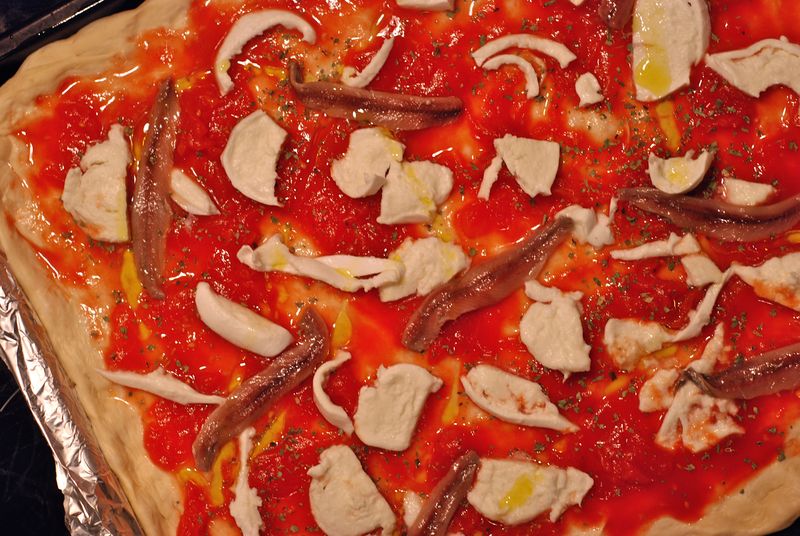
    For the topping, since we are purists and never stray from the classic trinity of tomato-mozzarella-anchovy, I open a can of peeled plum tomatoes, pour out half the juice (cook's snack!) and then, using my hands, shred and spread the tomatoes and remaining pulp and juice around on the dough evenly. I salt the tomato layer liberally and sprinkle with with dried oregano (make sure it's from Italy or Greece and it'll taste even better) and then strew the mozzarella I shredded earlier around evenly (don't use buffalo mozzarella as it's too wet and also a bit of a waste if not eaten whilst fresh and cool on your plate). I lay six to eight  anchovies in and around the cheese, give the pizza a quick drizzle of olive oil and then it's ready to go in the oven. My broiler is in my oven, not below it, so I put the pan in the top third of the oven and turn the broiler on. The uncooked tomatoes cook briefly while the flavor stays fresh and vibrant. (If you choose the thick pizza route and do this, you'll come uncommonly close to replicating my beloved pizza al taglio.) The cheese blisters and browns, the crust swells up, my stomach growls.

    And that, quite literally, is it.

    DSC_5915

    It always amazes me how quickly pizza can be made at home. Everything except the mozzarella is a pantry staple, really, and with just a few minutes of active work and ten minutes in the oven, you'll find yourself the proud producer of an ovenful of fresh, crusty pizza that's yeasty and salty and chewy and a total delight to eat.

    So now, tell me, lovelies: how do you top your pizzas?

    Pizza Dough
    Makes enough for one half-sheet pan (if you like a thicker-crusted pizza) or two half sheet pans if you like your pizza thin as can be)

    3 1/2 cups (1 lb) all-purpose flour (if you can find it, use Italian "00" flour)
    1 1/2 to 2 teaspoons fine sea salt (you might find you need more)
    1 packet (1/4 ounce) active dry yeast or 7 grams instant yeast (for those of you in Germany, this is one of those Trockenhefe packets)
    1 1/2 teaspoons raw or regular sugar
    2 tablespoons olive oil
    1 1/4 cups lukewarm water

    1. Put the flour into a large bowl and make a well in the middle. In a large measuring cup, mix the yeast, sugar and olive oil into the water and leave for a few minutes, then pour into the well. Using a fork, bring the flour in gradually from the sides and swirl it into the liquid. Sprinkle in the salt. Keep mixing, drawing larger amounts of flour in, and when it all starts to come together, work the rest of the flour in with your clean, flour-dusted hands. Knead until you have a smooth, springy dough.

    2. Wash out your bowl, dry it and oil it lightly. Place the ball of dough in the bowl and turn to coat it with oil. Cover the bowl with a damp cloth and place in a warm room or an oven (not turned on) for about an hour. The dough will have doubled in size.

    3. Now put the dough on a flour-dusted surface and gently deflate it with your hands – this is called punching down the dough. You can either use it immediately, or keep it, wrapped in plastic wrap, in the fridge (or freezer) until required. If using right away, simply pat out to the size of your half-sheet pan or divide in half and roll out to cover two pans. You can also divide the dough into little balls for individual  pizzas – this amount of dough is enough to make about three to four medium pizzas.

    4. Timing-wise, it's a good idea to roll the pizzas out about 15 to 20 minutes before you want to cook them. Then simply top them with your heart's desire and bake them in a very hot, preheated oven (turn your oven as high as it will go) for about 10 minutes for the thicker pizza and less for the thinner ones, until crisp and bubbling.

  • DSC_5728

    I had a dinner party a few months ago in which everything sort of felt wrong. Not in the way you'd think – my guests ate everything I cooked (two chickens! multiple pounds of vegetables! an entire cake! a whole liter of whipped cream! six poached quince!) and there were no leftovers. But – has this happened to you? – when I sat down to eat dinner with our guests I looked down at my plate and thought, "I don't want to eat any of this".

    It wasn't that the food didn't taste good, I guess. It's just that – and I'm having a hard time expressing just exactly what I mean, so bear with me here – it all felt so…strained, my relationship with what I'd cooked, I mean. I'd expended a lot of time and energy on planning the dinner and cooking the dinner and then once the food was in front of me it just felt so foreign, so far away from what I actually wanted to eat, from the things that make my mouth water. It was a sort of upsetting moment – to be surrounded by nine other people kindly devouring all that was laid before them and to feel so estranged from their experience and from the very food I'd spent all day working on.

    Does this sound totally trite? I actually wrote a whole long post about that evening, so long that I thought about turning it into a chapter for the book, but in the end I couldn't figure out just exactly how to work it in or how to express myself, really. I mean: I threw a dinner party! The guests loved it! I wished I could have had a peanut butter sandwich instead! What?

    For as long as I've been cooking in my own home, when time came to plan a dinner party, I'd spend days poring over cookbooks, trying to put together a menu that made sense (as old-fashioned as it may be, I adore cookbooks that include menu suggestions) and that would be a step up from the usual stuff I eat. But after that fatal dinner party I decided that I needed to approach menu planning differently. I needed to think about what I wanted to eat, first and foremost, when I had guests over. Does that sound like the most obvious thing ever? To me it wasn't.

    DSC_5719

    After the dinner party that made me lose my appetite, I decided that, actually, we eat pretty darn well around here when it's just the two of us. Why, when you get down to brass tacks, should we change that winning formula just because we have people coming over? In fact, wouldn't that be just the moment to stick with the greatest hits that make us happy, dinner guests or no dinner guests?

    And so, to celebrate my mother's birthday last week, along with several of her closest friends and my dad, we threw a dinner party with food so good, and so familiar, I wished I could have had thirds.

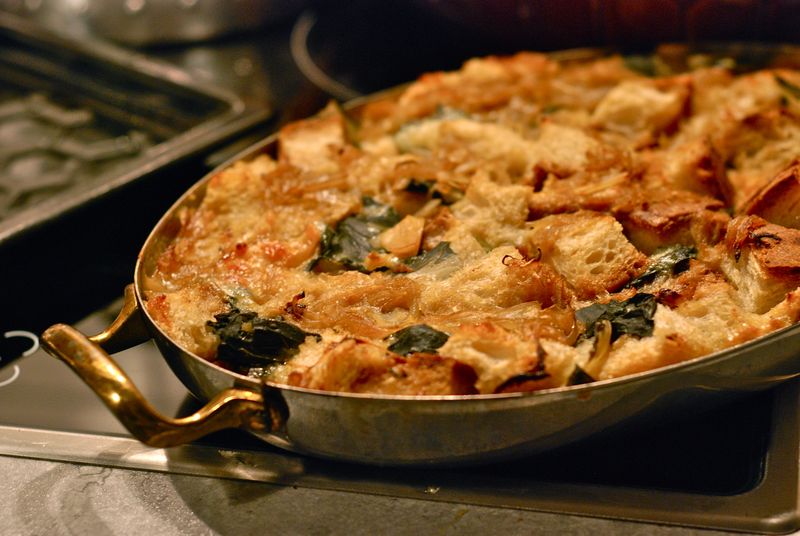
    Instead of wracking my brains to come up with a special menu, I decided to stay simple. I'd made Judy Rodgers's chard panade many times before just for the two of us and fell in love with it a little bit more each time. When I thought about my mother's birthday, I couldn't stop thinking about that panade. It felt like the perfect January meal – meatless yet still full of richness and flavor, shot through with dark greens for our mind, a little cheese for our soul. Simple yet celebratory.

    I decided to eschew an appetizer and serve a salad on its own, as a second course, so to speak. Soft butter lettuce and mâche were tossed with cubed avocados and slices of juicy oranges, bound together with a shallot vinaigrette from the Zuni Cafe cookbook, which is where the panade recipe is also from. We had a few good bottles of red wine to pass around and then, for dessert, a simple chocolate mousse from Dorie's new book.

    The dinner was a huge success. People took seconds, thirds, licked their plates, and – thrillingly – I joined in. It felt so easy, so effortless. And my mother, a tough critic, was still raving about the celebration days later.

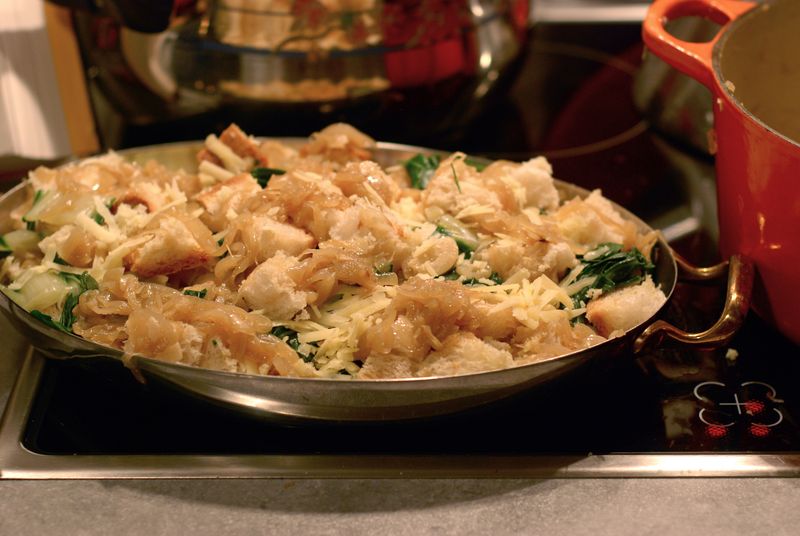
    If you haven't yet had the pleasure of knowing panade, it's a cross between a gratin and a bread pudding, but only sort of. You cook a whole mess of onions until meltingly soft and amber-hued. You cube stale peasant bread and toss it with salt and olive oil and a little bit of chicken stock. You sauté Swiss chard until barely limp and still vibrantly green. You grate a tiny mountain of fragrant Gruyère. And then you get to work, layering all four elements over and over until the baking dish is entirely filled. You soak the whole thing with good chicken stock (seriously, homemade stock pushes this dish into the sublime) and then bake it very slowly in the oven until it's plush and satiny, almost wobbling, the top crusted perfectly.

    Peasant food for the gods, if you will. And just the thing to make a hostess who, in truth, really does love throwing dinner parties, feel like a million dollars again.

    Chard and Onion Panade
    Serves 4 as a main course or 8 as a side dish

    1 1/2 pounds thinly sliced yellow onions
    Up to 1/2 cup mild-tasting olive oil
    6 cloves garlic, thinly sliced
    Salt
    1 pound Swiss chard (thick ribs removed), cut into 1-inch-wide ribbons
    10 ounces day-old chewy peasant-style bread cut into rough 1-inch cubes
    Up to 4 cups chicken stock
    6 ounces Gruyère, coarsely grated

    1. Place the onions in a deep 4-quart saucepan and drizzle and toss with oil to coat, about 1/4 cup. Set over medium-high heat and, shimmying the pan occasionally, cook until the bottom layer of onions is slightly golden around the edges, about 3 minutes. Stir and repeat.

    2. Once the second layer of onions has colored, reduce the heat to low and stir in the garlic and a few pinches of salt. Stew, stirring occasionally, until the onions are a pale amber color and tender but not mushy, another 20 minutes or so. If at any point the onions look as if they may dry out, cover them to trap some of the moisture in the pan. Taste for salt. You should get about 2 1/4 cups cooked onions.

    3. Preheat the oven to 325 degrees (or as low as 250 degrees, if it suits your schedule to stretch the cooking time from about 1 hour 45 minutes to 2 hours 45 minutes; the slower the bake, the more unctuous and mellow the results).

    4. Wilt prepared chard in batches: Place a few handfuls of leaves in a 3-quart saute pan or a 10-to 12-inch skillet with a drizzle of oil, a sprinkling of water (if you've just washed the chard, it may have enough on the leaves), and a few pinches of salt. Set the pan over medium heat until the water begins to steam, then reduce the heat and stir and fold leaves until they are just wilted, 3 to 4 minutes. Leaves should be uniformly bright green, the white veins pliable (the veins will blacken later if they are not heated through). Taste. The chard may be slightly metallic-tasting at this point, but make sure it's salted to your taste. Set aside.

    5. Toss and massage the cubed bread with a few tablespoons of olive oil, a generous 1/4 cup of the stock and a few pinches of salt, to taste.

    6. Choose a flameproof, 3-quart souffle dish or enameled cast-iron Dutch oven. Assemble the panade in layers, starting with a generous smear of onions, followed by a loose mosaic of bread cubes, a second layer of onions, a wrinkled blanket of chard, and a handful of the cheese. Repeat, starting with bread, the onions and so on, until the dish is brimming. Aim for 2 to 3 layers of each component, then make sure the top layer displays a little of everything. Irregularity in the layers makes the final product more interesting and lovely. Drizzle with any remaining olive oil.

    7. Bring the remaining 3 3/4 cups stock to a simmer and taste for salt. Add stock slowly, in doses, around the edge of the dish. For a very juicy, soft panade, best served on its own, like a soup or risotto, add stock nearly to the rim; for a firm but succulent panade, nice as a side dish, fill to about 1 inch below the rim. Wait a minute for stock to be absorbed, then add more to return to the desired depth. The panade may rise a little as the bread swells.

    8. Set panade over low heat and bring to a simmer; look for bubbles around the edges (heating it here saves at least 30 minutes of oven time; it also means every panade you bake starts at the same temperature, so you can better predict total cooking times). Cover the top of the panade with parchment paper, then very loosely wrap the top and sides with foil. Place a separate sheet of foil under the panade or on the rack below it, to catch drips.

    9. Bake until the panade is piping hot and bubbly. It will rise a little, lifting the foil with it. The top should be pale golden in the center and slightly darker on the edges. This usually takes about 1 1/2 hours, but varies according to shape and material of baking dish and oven. (You can hold the panade for another hour or so; just reduce the temperature to 275 degrees until 20 minutes before serving.)

    10. Uncover panade, raise temperature to 375 degrees, and leave until golden brown on top, 10 to 20 minutes. (If you aren't quite ready when your panade is, re-tent the surface with parchment and foil and reduce the heat to 275 degrees. You can hold it another half hour this way without it overbrowning or drying out.) Slide a knife down the side of the dish and check the consistency of the panade. Beneath the crust, it should be very satiny and it should ooze liquid as you press against it with the blade of the knife. If it seems dry, add a few tablespoons simmering chicken stock and bake for 10 minutes longer.

  • DSC_5677

    In winter, Berlin's vegetable offerings can be bleak, but cauliflower is one of the few things for sale at green markets and grocery stores that stands proud and tall, creamy white within its tightly furled green leaves. I like it steamed and served with a lemon vinaigrette or cloaked in a creamy mustard-dotted béchamel, roasted in the oven with capers and parsley or stewed on the stove-top with anchovies and mashed into a silky pasta sauce. But I'd never really thought of it for soup the way I do when I see a squash or a leek. Then a single spoonful of an ethereal cauliflower soup at a restaurant in Paris made it difficult for me to concentrate on anything else, so a few days after getting back from our holiday, I got to work.

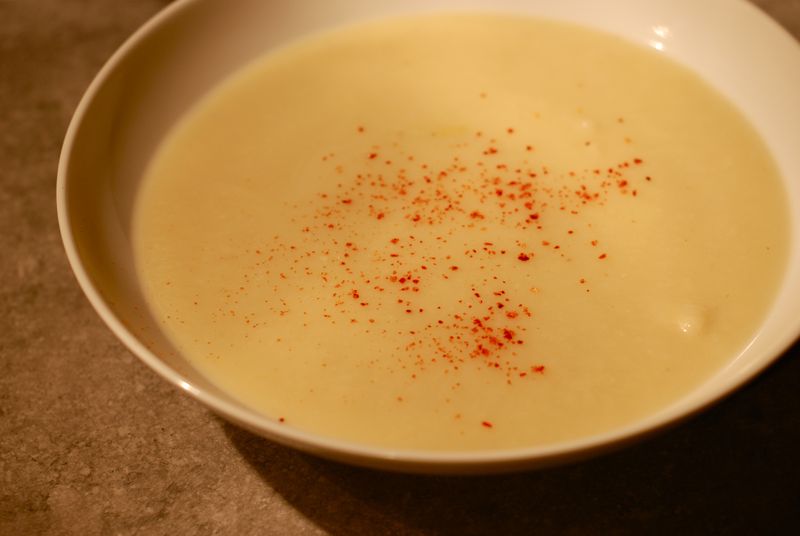
    Now, a word about appearances. Cauliflower soup will never win a beauty award. It will never enchant you with its looks. Unlike a glowing squash soup, for example, or a vivid spinach one, cauliflower soup is the quieter, younger cousin tending towards having bad posture. But that's kind of its appeal, too. It's quiet and unassuming, but deeply comforting and creamy (despite having nary of speck of dairy or animal fat in sight) and, actually, if dressed up in the right way – a sprinkling of Espelette pepper here, a pretty china plate there – it can be rather elegant.

    DSC_5694

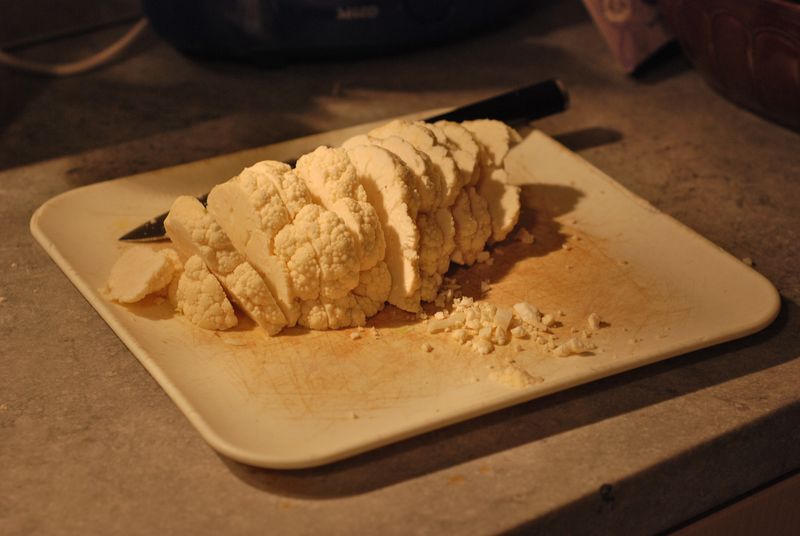
    Like all puréed vegetable soups, it barely requires a recipe. You stew a leek in olive oil until soft and translucent, though you could use an onion instead. You wash and slice your cauliflower roughly, tip the creamy florets into the pan for a little while, then add water and boil quietly until the cauliflower is soft and tender. What's important, I find, with cauliflower soup is that you must really lean on your immersion blender. You want the soup to be impossibly silky, free of the tiniest of lumps (unlike that little one lurking up there in the lower righthand corner). Purée until the soup takes on a gentle sheen and drips from the spoon like oil.

    Turn to your seasonings, which are nothing more than salt and half a lemon squeezed into the soup. For color, you can sprinkle piment d'Espelette on each serving, but it's hardly necessary. I like a few homemade croutons, chewy peasant bread that you've roasted with a little slick of olive oil and a sprinkling of salt in the oven for a while, floating on top. The crunch and toast are a nice contrast to that sweet, vegetal purée.

    Cauliflower Soup
    Serves 4 to 5

    1 leek or 1 onion
    3 tablespoons olive oil
    1 cauliflower, green leaves and trunk removed
    Water
    Salt
    1/2 lemon
    Piment d'Espelette, optional
    Homemade croutons, optional

    1. Peel and clean the leek and cut into thin slices, discarding the tough green tops. Warm olive oil in a heavy pot and gently sauté the leek in the olive oil until wilted, 5 to 7 minutes. In the meantime, wash the cauliflower and slice thickly. Add the cauliflower to the pot and stir to combine. After 2 to 3 minutes, add enough water to cover the vegetables.

    2. Bring the water to a boil, then lower the heat, cover the pot and simmer for 20 to 25 minutes. Remove from the heat and, using an immersion blender, purée until smooth and creamy. Add salt to taste and the juice of the 1/2 lemon.

    3. Serve dusted with piment d'Espelette or homemade croutons.

  • Shopping in Paris. Do you also have visions of impossibly chic little bags or dainty, bebowed shoes right now? A gossamer scarf or patent leather sandals? That used to be what I thought of when I thought about shopping in Paris. But then you start a food blog and write a book and spend most of your time at home in jeans or sweatpants, which makes shopping for clothes sort of lose its appeal at some point, and anyway, aren't French toast spreads and baking equipment so much more interesting than filmy blouses or St. Tropezian sandals? Aren't Monoprix, G. Detou and E.Dehillerin more thrilling than any Colette, Isabel Marant or Bon Marché? I thought you might agree.

    DSC_5632

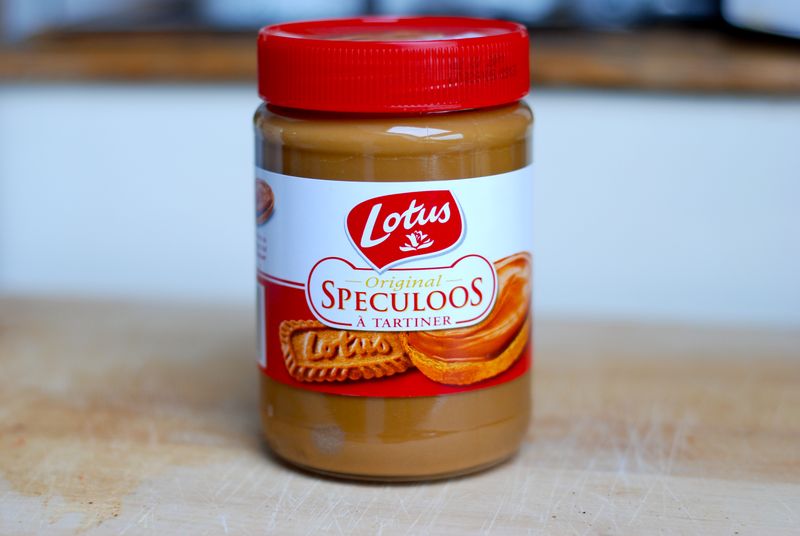
    I first heard about this spread that looks like peanut butter and tastes like molten Speculoos cookies from David and, to paraphrase him, holy cow, it is good. Buttery, toasty, not too sweet. Move over Nutella, indeed. You can find this at any chain grocery store for just a little over 2 euros. Expats in France! I have officially found your Christmas gift to all the members of your family and friends for the rest of your life.

    DSC_5636

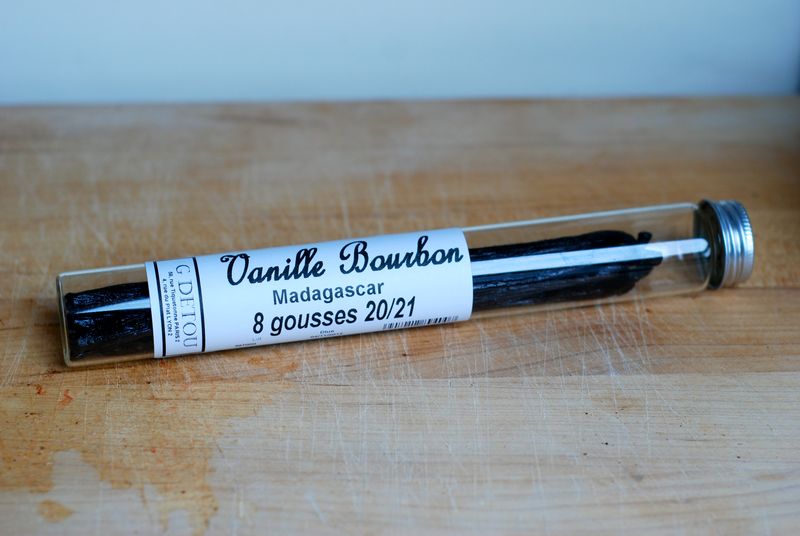
    G. Detou is one of those stores I had to move away from Paris to find out about – I think Chocolate & Zucchini was where I first read about this emporium for bakers, cooks and anyone in desperate need of industrial-sized packages of Valrhona chocolate. I bought a vial containing eight very plump, very fresh and moist vanilla beans for a whopping 6 euros and 40 cents, which – if you know your vanilla bean prices – is beyond a steal. They're practically giving them away! I'm going to use these for a fun project coming up soon that I can't wait to tell you about. One word: video.

    DSC_5642

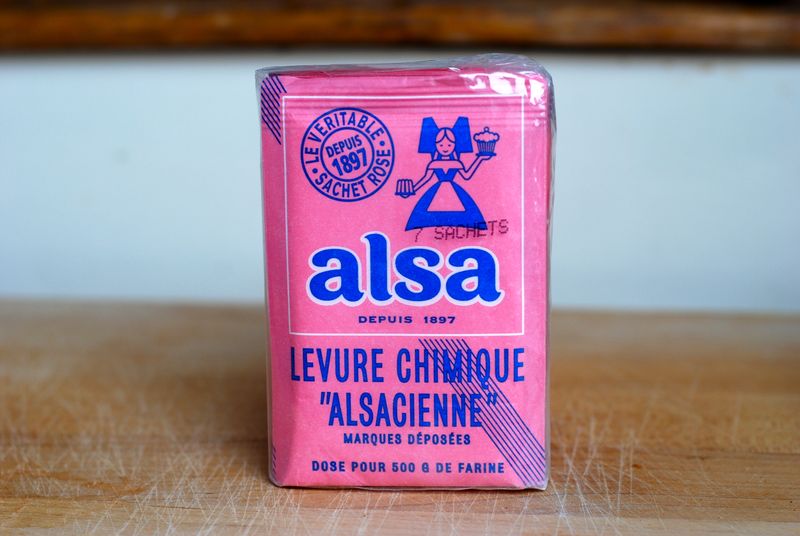
    I love weird packaging, I really do. This baking powder looks like it hasn't had a redesign since about 1951. And that pink! (Anyone know why the "Alsacienne" is in quotes? Is this levure meant only for Kugelhopf?)

    DSC_5640

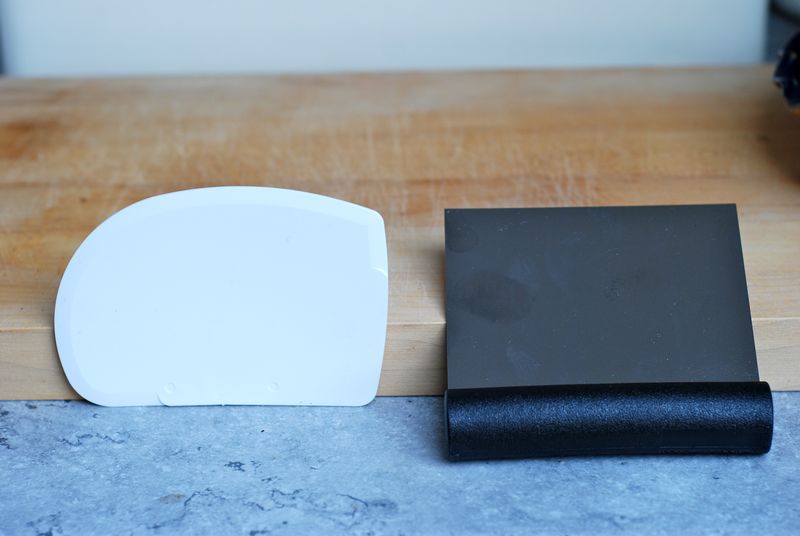
    At E.Dehillerin, I did an admirable job of performing restraint. Don't you think? I mean, I could have come out of there armed with more pastry rings than City Bakery could ever need, whisks for every size bowl I own, paring knives for an army, a vinegar vat, mustard crocks, not to even get started on the perfect copper bowls. Instead, I got a metal bench scraper and then, because Kim Boyce said so, a little plastic dough scraper. She uses them for scraping batter out of bowls or getting sticky dough off a counter and says she loves them more than fancy handbags or shoes. Isn't that sweet?

    DSC_5644

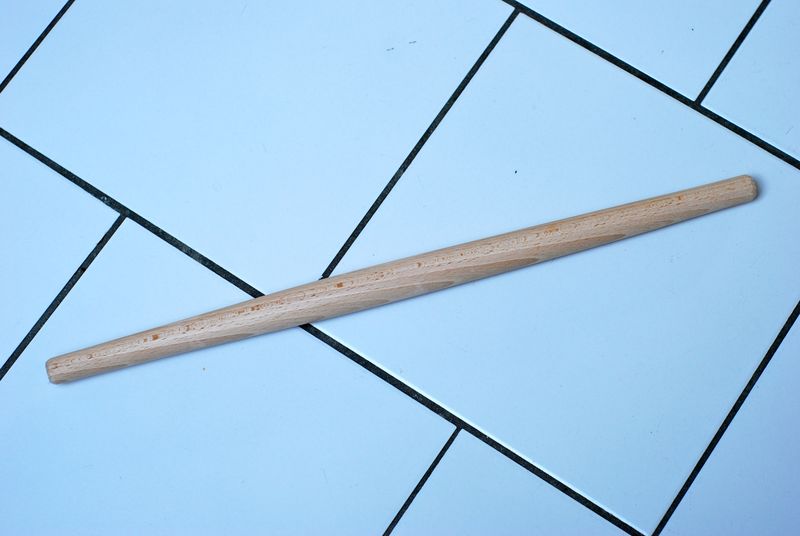
    And a tapered rolling pin. Because. It is beautiful. And smooth. And tapered. And beautiful. I was warned about the unfriendliness of the E.Dehillerin sales people and lo, they were indeed unpleasant. But a few minutes after leaving, beautiful rolling pin in hand, I'd mercifully forgotten all about them.

    DSC_5641

    At Fnac, where I could have spent hours poring over the cookbooks (Germany's cookbook sections in chain bookstores continue to be, for the most part, a demoralizing wasteland), I scored a cheap paperback copy of Christine Ferber's jam-making classic, Mes Confitures. There are so many recipes in this thing that I, quite possibly, may never need another jam book again. Shall we make a winter jam very soon? Yes? Yes.

    DSC_5656

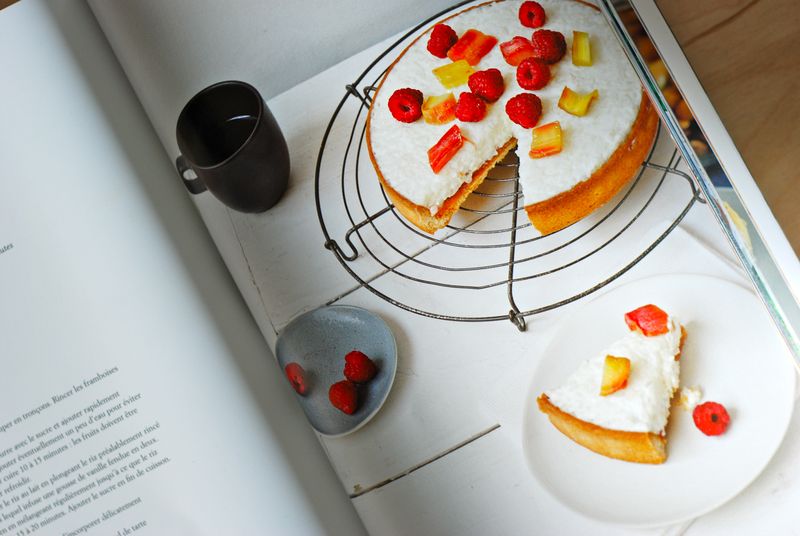
    And then, as I was leafing through Atelier Tartes by Catherine Kluger, my eye caught something wondrous: a rice pudding-rhubarb tart. Oh yes. Sweet tart pastry, fresh rhubarb filling, rice pudding on top. Rice pudding pie! Sold. It is killing me to have to wait until spring for rhubarb to try this. What do you say, is this an occasion to buy frozen rhubarb and give it a go? Yay or nay, folks? Are you as impatient as I am?

    Finally, because you cannot go to Paris and not buy tea, I braved Mariage Frères (insane, as usual) on an errand for my mother and spent a blissful hour at Le Palais des Thès (quiet, friendly, personable) browsing and sniffing teas to my heart's content. It's my favorite tea store, that place. Such a treat.

    DSC_5517

    There were only a few meals worth mentioning, in case you're going to Paris anytime soon. First of all, we had a very, very good lunch at Cafe des Musées on Rue de Turenne in the Marais. It's the kind of place where the waiter plonks a big crock of cornichons on the table for you to help yourself when you order the terrine to start. There was a gossamer cauliflower soup that made me want to go home and cook nothing else, and a French version of shepherd's pie (parmentier) made with delicious ground pheasant and topped with the most wonderful mashed potatoes.

    The ever-reliable Chez Shen on rue au Maire in the 3rd arrondissement is a good place to stop in for a bowl of Chinese soup and noodles for lunch if you're watching your budget and/or simply can't handle another rich meal. I have an emotional attachment to it since I used to come here all the time all those years ago. It's a little cleaner and brighter than it was ten years ago.

    If you happen to find yourself in the 19th arrondissement, near the Jaurès or Bolivar métro stations, Boris Portolan's bakery on Avenue Secrétan is worth a visit. His chausson aux pommes is a buttery wonder and it's filled with just the right amount of perfectly puckery applesauce.

    DSC_5535

    But, really, best of all is if you find yourself in Paris with a kitchen. Then you can go to the grocery store, buy a can of pale green flageolet beans and a can of peeled tomatoes and stew them together with some olive oil, garlic and salt for a while until you've got something savory and spoonable and perfect with that crusty baguette you bought just before dinner. Or you can make a whole meal out of a little salad you put together at the market and a bunch of cheese you bought from the affineur (St. Marcellin, I miss you!). You can buy a sack of incredibly flavorful, boiled crevettes rose from the fishmonger and make a mayonnaise at home for dipping. You can go to the market and buy great boiled beets, slipping out of their skins, to dice up and dress at home. You can buy a hot roast chicken from the boucherie and ask for a portion of the tiny football-shaped potatoes that have gone all brown and crusty below the rows of birds, soaking up several chickens' worth of juice and fat.

    Shopping for food in Paris is a treat far better than any restaurant, I find. It's hard to be disappointed by a green market or a grocery store in Paris, besides the fact that it keeps your budget down and allows you a wide variety of wonderful meals. And, nicest of all, it makes you feel, just for a little while at least, like you're a part of the glittering city, not just a tourist with a map in her pocket.

  • DSC_0814

    I'm not big on New Year's Eve. I mean, I'm happy to have an excuse to drink Champagne and it's fun to yell down the countdown to midnight together, but I've never really felt that you need to have a big party to transition from one year to the next or that if you find yourself in pyjamas in front of the television on December 31st, you've somehow failed as a human being. (Which was convenient last week in Paris since that is exactly where I found myself, throat swollen beyond comprehension, medicated with powerful French antibiotics and just barely able to sauté some of the most flavorful pink shrimp with tomatoes and garlic for a celebratory dinner while we watched a French talk show. Huh. Max valiantly drank the entire bottle of Champagne by himself as I looked on sipping a verbena infusion. Double huh. He got the better end of that deal.)

    It is no surprise, then, that my most magical New Year's Eve moment, exactly a year ago, didn't involve a party or a sequined dress, but played out in our car in the moments when 2009 passed into 2010. In Berlin, New Year's is a big deal. Fireworks aren't illegal and the whole city truly explodes at midnight (depending on what neighborhood you're in, this can be rather thrilling and fun, or a total terror trip: Kreuzberg, I'm looking at you). Incidentally, if you like celebration, come to Berlin for New Year's. Seriously. I always think the Berlin tourism board should feature it as one of the reasons to visit this city.

    So we were in our car, driving from one party to another, when we realized or, actually, admitted to each other that instead of being at yet another loud, anonymous party, we both fervently preferred to be at home. Were we brave enough to ditch our plans? We were! And just like that, with a gentle u-turn on snow-covered streets, we slowly drove home. It was 11:50, and then 11:55, and then suddenly, as we found ourself in the narrow, residential streets of leafy Wilmersdorf, it was midnight. The city, so dark and quiet and empty just moments before, exploded in light and sparkle. People flooded the sidewalks, setting up empty Champagne bottles to launch their fireworks, striking matches, preparing the show. As we drove, gliding almost, on the thick ice layer, our car barely made a sound. Street after street, we saw children's beaming faces, staring upward into the black night, fireworks gleaming in their eyes. We saw their parents and other adults dancing on the sidewalks, with the night sky lit up, the colorful explosions reflected in the snow. I sat in the passenger seat, mouth agape, looking out at sweet Berlin transformed into a pink! gold! silver! green! blue! movie set, watching in slow motion as 2009 – as painful and as joyous a year as I've ever known – ended and 2010 – so unknown then! so unfamiliar! – opened its first pages. It was a stunning couple of minutes. And I felt so… lucky to have had those minutes. They were like a gift, like someone drawing open a heavy velvet curtain on the secret machinery of humanity and letting me have a few minutes watching it all unfold. You know? Pretty darn special.

    DSC_0837

    I'm not quite sure how to sum up 2010 in words. I guess, at the root, it was a year full of learning experiences. Learning to live without New York. Learning to be a Berliner again. Learning to work at home full-time. Learning to make new friends. Learning to stay close to my friends far away. Learning to function outside of my comfort zone, learning to be my own boss, in so many more ways than just the one.

    But I also became a tourist in New York, walked along the canals in Venice, picked olives from my mother's trees, felt the sand of the Baltic sea under my feet. I wrote three chapters of my book, then six, then eight. Hated all of them, learned to like some of them. Wrote some more, had more sleepless nights than I can count, wrote more and more and more. I stood at the top of snow-topped mountains in Austria, walked familiar streets in Paris, met my girlfriends for a pedicure in London. Celebrated Christmas in a wood-oven-warmed living room in Bavaria, walked along the swollen Elbe in the dog days of August, picked wild plums where the Wall once stood. I made my own sauerkraut, roasted my first goose, canned my own applesauce. I started a new blog, wrote my first article for a national magazine, learned to call myself a writer. I was confronted, again and again, with the funny fact that life can be glorious and infuriating at the same time. It always is. It always will be.

    And, a few months ago, in this year full of firsts and second chances, we started planning our wedding. This summer, in the shadow of my favorite fig trees, we'll become a family. Though really, as Max said just the other day, we already are one.

    DSC_0842

    So, happy new year to you, dear readers. May 2011 be full of wonderful moments that make you happy to be alive, strength for the difficult times, bravery for the big steps, love to keep you going. I hope you have enough hot sauce to make your lips curl and the promise of drippy fresh peaches in summer to make you smile. Thank you for reading, for being my loyal audience, for your patience through the long silences I left here this year, for inspiring me every day (truly) to be a better writer, better cook, and better observer of all those little things that make life worth living. You continue to be the reason why starting this blog over five (!) years ago remains one of the best decisions of my entire life.

    Thank you!

  • DSC_4965

    It is a lot, I know, to expect you – in this mad December rush – to slow down and candy your own quince. Forgive me, will you? It's just that I believe in you! I know you can do it. I know you can find the time. And furthermore, I know it'll be worth it.

    Besides, candying quince isn't even all that hard. In fact, I think tracking down the quince is the hardest part (well, that and trying to core it, but never mind). You should also candy your own orange peel, if you can't find any at the grocery store (one of the charms of living in Germany: chopped candied orange peel at any old grocery store). But that's even easier than candying quince. Promise. Cross my heart!

    See, what we're making is panforte. Strong bread, if you want to know the literal translation. But what panforte really is is a deep, dark nut-and-fruit confection, warm with spice, the low, sweet chew of dried plums and candied quince, all wrapped up in a cocoa-tinged, citrus-peel-flecked, honeyed batter and baked until almost black.

    It's a lot of work, it's true. But what you get in return will sustain you, I promise. If the Benne Wafers were the instant gratification cookie of the holiday season, this panforte is the long, slow, steady burn.

    DSC_5070

    Panforte is a traditional Italian sweet meat, cut into thin little wedges (you'll need a very sharp, very heavy knife – it's dense) and served after dinner around Christmastime. It's chewy and crunchy, not too sweet and keeps for weeks, if well-wrapped. So the way I see it, it makes for pretty great presents, if you can bear to part with what you've made. All you need is willpower, parchment paper and a bit of butcher's twine for artful wrapping and bows, and you'll have yourself some very grateful friends.

    I love how panforte is both restrained and a little luxe. It's the kind of dessert that makes you feel virtuous, after all that roast goose, and elegant, with nut-studded blackish wedges lying insouciantly on little gold-rimmed plates.

    DSC_5072

    Pardon all the wonky light in these photos, but we've not had much sun in Berlin these past few weeks. In fact, it hasn't done much else but snow lately, giving everything in my kitchen a rather blueish hue. But the heavy gray lid over the city doesn't feel as oppressive as it will in a few months. Right now, it's kind of cozy. We gather indoors with friends, drink tea, crunch through homemade cookies, light candles, and prepare for the holidays. In a few months, the lack of light will feel interminable. Today, it feels just right.

    It's better for baking, anyway, when the sun isn't shining and you have every right to wile away the day in your kitchen.

    DSC_4927

    There's little that's complicated about making panforte. In fact, other than good ingredients, you just need to be able to work quickly at crucial moments and have a little bit of muscle in your upper arms, a little bit of elbow grease.

    Besides the candied quince and orange peel, you need a nice assortment of dried fruit. The original recipe, from the first Tartine cookbook, calls for dates, but says that you can use any type of dried fruit, just as long as the total amount is about 25 ounces. Since I have a burning love for prunes (and think their bright, juicy flavor works particularly well with cocoa and citrus zest), I used equal amounts of dates and prunes, plus a bunch of raisins instead of the original currants (one of the few dried fruits I really just don't dig, with their weird crunchy little selves).

    You also need a whole bunch of toasted nuts – pistachios, hazelnuts and almonds – which bump this firmly into luxury territory, but it's affordable luxury, I think. The kind I can get behind.
    DSC_4931

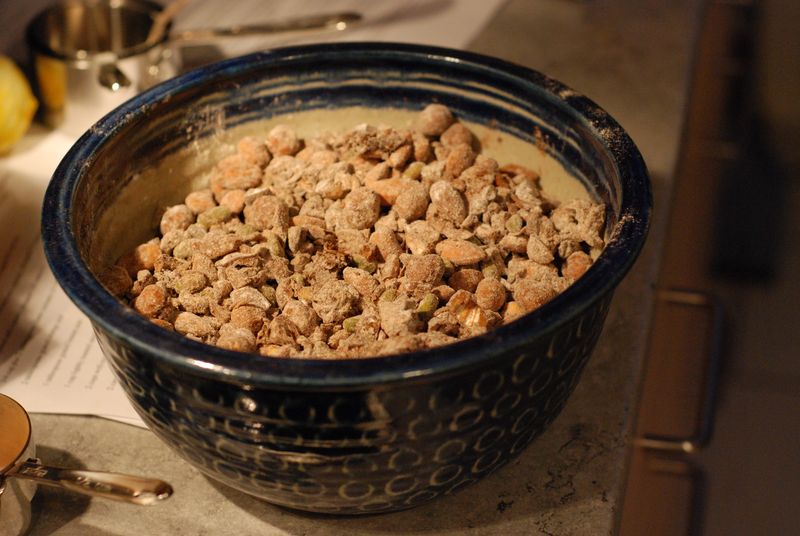
    After you toast the nuts and dice up all the fruit and zest the citrus, you toss this all with flour and cocoa and a whole mess of spices, including ground coriander, black pepper and what seems like an enormous amount of nutmeg.

    To make the syrup that will bind these dusty nuggets together, you melt together sugar and honey until they bubble and froth without boiling over. Here's a good look at how the syrup should look when you're ready to pull it off the stove. And this is where you need to work quickly. The syrup, boiling hot, will hit the nuts and fruit and then, in a heartbeat, turn to what feels like hot tar. Arm yourselves, therefore, either with plastic gloves or a very heavy-duty plastic spatula and move quickly. Mix the syrup into the fruit and nuts well, moistening every last bit and making sure that no powdery streak of flour remains. If you do this well, you can skip your weight-bearing exercises for the day! Up and at 'em, folks.

    DSC_4933

    Then scrape this mixture, fragrant and nubby and far too hot for dipping a finger in and tasting, into a parchment-lined springform pan and bake it in the oven until set. What's difficult at this point is not over-baking the panforte. Since the batter is so dark to begin with, it's hard to tell if it's starting to burn. Trust your nose, your oven thermometer and the kitchen timer.

    DSC_4946

    This brick-like confection will cool and settle and then you can unmold it from its baking pan and cover it with a snow-like dusting of confectioner's sugar before cutting it into wedges and parceling them up. You will find yourself sneaking little tastes here and there, little nibs and nobs of the panforte that get nicked under your knife, trying to track down each individual flavor but becoming overwhelmed by the goodness of the whole. You'll cut a wedge to keep for yourself and then, later, you'll curse yourself for not making it a bigger one. Your mouth will tingle with spice.

    As you can tell, I've fallen hard for this panforte. I'll be making it for many Christmases to come. Do you what to know just how hard I've fallen? So hard that I'm throwing in the towel on the cookie production for the year. Nothing's going to top this baby.

    So, like I said, get to finding that quince! Time's a-wasting.

    Panforte with Candied Quince
    Makes 32 half-inch slices
    Note: You can use any type of dried or candied fruit, in any combination, as a substitute for the fruits in the recipe as long as the total amount is about 4 1/2 cups (25 ounces).

    Candied orange zest
    3 large, unblemished oranges
    1 1/2 cups water
    1 1/2 cups sugar

    1. Remove the zest from the oranges: Run a zester from the top to bottom of the orange, cutting the zest into thin strips (avoid the pith). Repeat with the remaining fruit. Reserve fruit for another use.

    2. In a medium, heavy saucepan, cook the water and sugar over medium heat. Bring to a boil, stirring, until the sugar dissolves. Add the zest, lower the heat to medium-low, and cook at a gentle simmer until the zest strips become tender and semi-translucent, about 30 minutes.

    3. Remove from the heat and pour into a heat-proof container. Cool completely, then store the zest in the cooking syrup in an airtight container in the refrigerator for up to 1 month. You should have about one-half cup (3 ounces) of candied zest.

    Candied quince
    1 1/2 cups water
    1 1/2 cups sugar
    1 large quince

    1. Peel the quince, slice it in half, remove the core and cut the fruit crosswise into one-fourth-inch slices.
    2. In a medium, heavy saucepan, combine the water and sugar over medium heat, stirring with a spoon, until the sugar dissolves. Add the fruit, reduce the heat to medium-low, and cook at a gentle simmer until the fruit is semi-translucent, about 45 minutes.

    3. Remove from the heat and pour into a heat-proof container. Cool, then store the fruit in the cooking syrup in an airtight container in the refrigerator. You'll have about 1 cup (8 ounces) of fruit.

    Panforte
    1 recipe candied quince, strained and coarsely chopped (8 ounces)
    1 recipe candied orange zest, strained and coarsely chopped (3 ounces)
    1 cup dates, pitted and coarsely chopped (5 ounces)
    1 cup prunes, pitted and coarsely chopped (5 ounces)
    3/4 cup plus 2 tablespoons Zante currants (4 ounces)
    2 tablespoons grated orange zest
    1 tablespoon grated lemon zest
    1 cup lightly toasted unsalted pistachios
    2 cups well-toasted hazelnuts
    2 cups well-toasted almonds
    2/3 cup flour
    1/2 cup cocoa powder
    1 tablespoon ground cinnamon
    Freshly grated nutmeg from 1 1/2 nutmegs
    3/4 teaspoon ground coriander
    3/4 teaspoon freshly ground black pepper
    3/4 teaspoon ground cloves
    3/4 cup honey
    1 1/3 cups granulated sugar
    1/4 cup powdered sugar

    1. Heat the oven to 325 degrees. Butter a 10-inch springform pan with 2- or 3-inch sides, line with parchment paper, and butter the parchment, making sure to butter the sides of the pan well.

    2. In a large mixing bowl, combine the candied quince and orange zest, dates, currants, orange and lemon zest, and all of the nuts. Sift together the flour, cocoa powder, cinnamon, nutmeg, coriander, pepper and cloves over the fruits and nuts. Mix well. Set aside.

    3. In a deep, heavy saucepan, combine the honey and granulated sugar over medium-high heat. Stir gently with a wooden spoon from time to time to make sure that no sugar is sticking to the bottom of the pan. Bring to a boil and cook until the mixture registers 250 degrees on a thermometer, about 3 minutes. The mixture will be frothy and boiling rapidly.

    4. Remove from the heat and immediately pour over the fruit-and-flour mixture in the bowl. Stir with a wooden spoon to incorporate the syrup thoroughly with the other ingredients. The mixture may seem dry at first, but it will come together once it is well mixed. (If you have rubber gloves, it is easier to mix with your hands than with a spoon.) Work quickly at this point; the longer the mixture sits, the firmer it becomes.

    5. Transfer the mixture to the prepared springform pan and smooth the top with a rubber spatula dipped in water. Bake until the top is slightly puffed and looks like a brownie, about 1 hour. Cool in the pan on a wire rack for 30 minutes. Run a knife around the edge to loosen and turn out of the pan and cool completely.

    6. With a fine-mesh sieve, sift the powdered sugar over the top, bottom and sides of the panforte. Lightly tap it over the counter to shake off excess sugar. It will keep, well wrapped, in a cool, dry place for up to 2 weeks, or indefinitely in the refrigerator. To serve, slice into quarter- to half-inch slices.