• DSC_6931

    Artichokes. So delicious. Such a pain to clean. (And when I say "clean", you know I mean peel and whittle and acidulate and peel some more.) I used to think that as much as I loved eating artichokes, I was far, far too lazy to prepare and cook them myself. Whenever I saw artichokes at the market, I thought of my Sicilian uncle standing quietly in the kitchen for hours, whittling away at an enormous pile of them while the rest of us had a lazy breakfast in the other room, secure in the knowledge that because of his sacrifice, we would have a very fine lunch indeed.

    So I put artichokes on that list of things I loved to eat but contented myself to enjoy on the few rare occasions a year when someone else did the cooking (the list, in case you're wondering, includes sea snails, homemade corn tortillas, strudel dough and breadcrumb passatelli).

    Then, the other day, I was at my favorite green market that wraps all the way around a pretty square near my apartment and I came across a stand selling firm, little artichokes from Italy bundled up in bouquets of five apiece, so pretty that I could have displayed them in vases across my apartment instead of cooking them for dinner. I bought a bouquet, suckered in by their beauty.

    And wouldn't you know, cleaning them was actually sort of easy. I prepped a bowl of cold water and squeezed two lemon halves into it, then dropped the halves into the water. I got out a paring knife and my sharpest chef's knife. I used my instinct to peel away just the right amount of outer leaves and then let the pressure of the artichoke's flesh under the knife dictate what I cut and what I didn't. And it was just right.

    Isn't it funny how if you just try, sometimes, it turns out to be enough?

    DSC_6922

    Every week now, I buy a bouquet of artichokes and clean them (getting faster each time) and every week I attempt to make this one simple braised dish that my mother learned to cook from my grandmother and that I cannot seem to get the grip of so far. It's frustrating because my mother and my grandmother are not, in my family, known for their cooking skills. In fact, they are often the butt of jokes doled out by the side of the family that married into a Sicilian clan whose cooking is the stuff of legends (their patience and sacrifice, too, see above). But because my mother is my mother, I love what she cooks.

    The dish has you braise cubed potatoes and quartered artichokes in white wine and olive oil and salt, with parsley stirred in at the end, and when my mother makes it it tastes ambrosial, all creamy and complex and sweet-savory and comforting, and when I make it, it just kind of tastes like potatoes and artichokes. You know?

    I keep plugging away at it, keep going back to the market, buying those artichokes and getting to work, but it keeps sort of being only just okay. However I've decided that instead of being frustrated by this, I should feel grateful that I've suddenly gotten so good at cleaning artichokes, the very act I'd always allowed to keep me from eating artichokes with any regularity because I thought it was so hard.
    DSC_6932

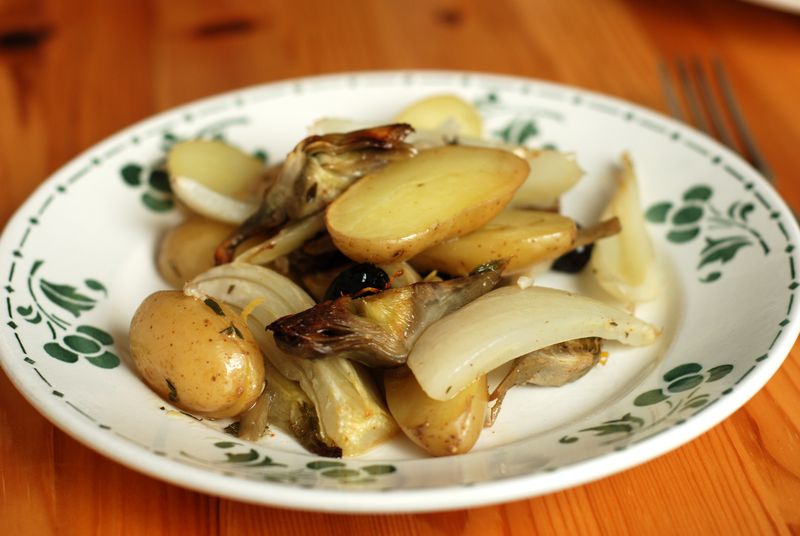
    I really wish I could give you the braised artichoke recipe today, but I want to get it right before I do, and something tells me that's going to take a while (I promise that when I do, I'll also show you how I clean artichokes). Russ Parsons, however, just wrote about a very fine spring vegetable dish and it should tide you over just fine. I made it for lunch today and it filled the apartment with the most wonderful smells, garlic and thyme and lemon peel all steam-roasting together in the oven along with delicate artichokes, creamy fingerlings and sugary fennel.

    This would be a lovely thing to serve alongside a roast chicken for dinner sometime or with a whole fish baked in salt. But we ate it for lunch, all by itself, and it was lovely. Just make to have plenty of flaky salt on hand – the dish needs salt to make it come alive.

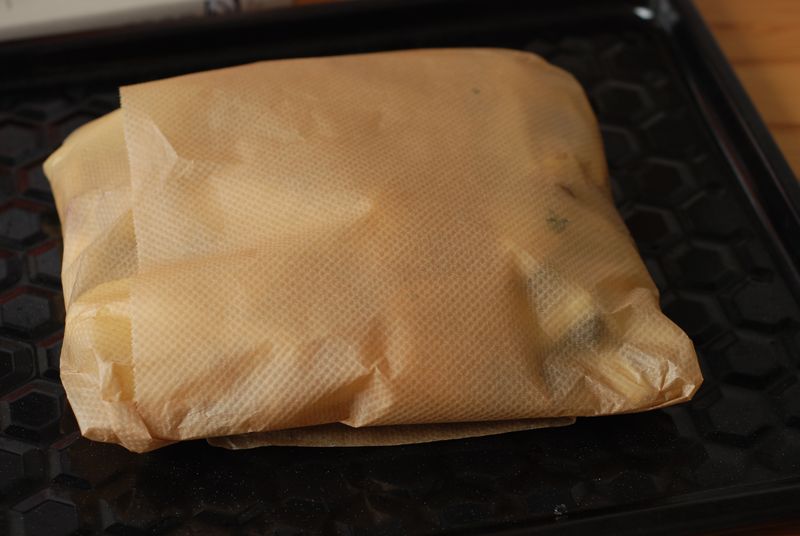
    You simply clean and quarter some artichokes, slice fennel into thinnish wedges, halve fingerlings and then season them with oil, salt, minced garlic, fresh thyme, lemon peel (Russ uses orange) and the faintest sprinkling of red pepper flakes. The vegetables get piled into a big piece of parchment or aluminum foil, pleated or folded together tightly, and baked in a hot oven for 45 minutes. The vegetables steam gently, keeping their shape and flavor integrity. The garlic and herbs and citrus peel infuse softly into the vegetables. Black olives popped on top sort of tie together the vaguely Provençal thing going on in the parchment.

    This is sort of the opposite of a big sheet pan full of gutsy roasted vegetables, edges blistering, flavors packed and concentrated. It's far more delicate and restrained, but no less delicious.
    DSC_6957

    In the meantime, you'll find me in my kitchen, alternating between peeling and braising artichokes and trying my best to get over my fears and my indolence, lest they keep me from other wonderful things in life. 

    Spring Vegetables Baked in Parchment
    Serves 4

    Juice of 1 lemon
    4 medium or 8 small artichokes (about 1½ pounds)
    2 bulbs fennel (about 1¾ pounds)
    1 pound fingerling potatoes
    4 cloves garlic, minced
    Pinch cracked red pepper flakes
    Zest of 1/2 lemon (about 1 teaspoon)
    Fresh thyme
    1 teaspoon salt
    1/4 cup olive oil
    2 ounces unpitted black olives

    1. Heat the oven to 375 degrees.

    2. To prepare the artichokes: Fill a bowl with cool water and add the juice of 1 lemon. Hold an artichoke in one hand with the stem facing toward you and the tip facing away. Slowly turn the artichoke against the sharp edge of a knife while making an abbreviated sawing motion. (It's easier to control if you use the base of the knife rather than the tip.) You will begin to cut through the tough outer leaves; when you can discern the natural cone shape of the artichoke, adjust the knife to follow it. Keep trimming until you've cut away enough of the tough leaves so you can see only light green at the bases. Cut away about the top half-inch of the artichoke tip and dip the artichoke into the lemon water so the cut surfaces don't get discolored.

    3. With a paring knife, trim away the very tip of the stem, then peel the stem and base of the artichoke, going from the tip to where the base meets the leaves. You'll have to do this at least five or six times to make it all the way around the artichoke. When you're done, there should be no dark green tough spots left, only pale green and ivory.

    4. Cut each artichoke into lengthwise quarters, and if there is a fuzzy choke inside, cut just below the choke to the very base of the leaves and the choke will pop off, leaving a clean heart below. Place the artichoke in the lemon water and go on to the next artichoke.

    5. To prepare the fennel, slice off the bottom of the bulb. Cut the bulb in quarters lengthwise and slice away most of the solid core at the center, leaving just enough to hold the bulb together. Cut each wedge in half again lengthwise to make 8 lengthwise wedges from each bulb.

    6. Slice the potatoes in half lengthwise.

    7. Transfer all of the vegetables into a mixing bowl. Add the minced garlic, cracked pepper flakes, lemon zest, the leaves of two to three sprigs of fresh thyme, the salt and olive oil and mix well with your hands to make sure the vegetables are all evenly covered with oil and flavorings.

    8. Spread a rectangular sheet of parchment paper or aluminum foil on a work surface. You'll need a sheet at least 2 feet long and 1 foot wide. You can also bake this in 4 individual-serving-size packets.

    9. Arrange the oiled vegetables in a low mound centered on half of the paper and top with the olives. Fold the other half of the paper over and fold and crumple the edges together to form a tight seal. Place the packet on a jellyroll pan and bake until the potatoes are tender, about 45 minutes.

    10. Remove from the oven. If you wish, serve the vegetables in their baking paper, cutting an "X" in the top at the table. Be careful, as there will be hot steam. Sprinkle lightly with coarse salt to taste and serve immediately.

  • DSC_6738

    Isn't this pup fantastic? I met her a few weekends ago outside a cake shop so popular it had a line out the door. She couldn't stop gazing longingly at her owner's rustic orange cake, and I couldn't stop taking about a million photos of her sweet face.

    Thank you for cheering me up, sweeties. The funk seems to have passed, largely, and I credit this to your comments, the fact that fresh rhubarb and white asparagus are finally at the market this week and the purchase of a ticket to New York in May. Problem solved! I plan on celebrating this and the full-fledged arrival of spring this weekend by wearing shoes without socks, stewing rhubarb and going to two dinner parties. Take that, funk.

    Elsewhere,

    Brandi Henderson makes making char siu bao look easy.

    How to season a wok (via Jane Lear).

    Once I learned to roast Brussels sprouts, I never looked back. For an ambrosial-sounding recipe involving roasted Brussels sprouts and Sriracha sauce (swoon!), go to page 19 of this online food magazine (via Food 52).

    The winter may be (almost) over, but Winnie's mail-order sources for interesting citrus fruits are fantastic. Bookmark them for this year's Christmas presents.

    I still remember a peanut stew I ate for lunch at Hale & Hearty back when I was a starving editorial assistant (I was obsessed with that place). Something tells me Melissa's Senegalese peanut stew is probably a whole lot more delicious.

    Do you need a few moments of soothing procrastination? Leaf through this virtual copy of the Seed Saver's Exchange and I guarantee bliss. Thereafter, also a mean lust for your own garden.

    Uh, sandwiches, scanned.

    And for all of our worried minds, the most peaceful Tumblr ever (via The Catskill Kiwi).

    Have a good weekend, everybody.

  • DSC_6646

    Hoo-ee, folks. I've had a rough couple of days. The mean reds or the deep blues, or whatever you want to call them, got me in their bony little claws and shook me around for a few days, making me feel useless and despairing and generally not fit to get up out of bed. (I did get out of bed, though. I even managed to get dressed, a minor success.)

    I hate it when that happens.

    I had a girlfriend in town from New York this weekend and when I saw her walk out of the gate at the airport, I swear she had New York City pixie dust floating around her, glittering in the early morning Berlin light. That pixie dust reached my nostrils and suddenly my weird mood was a full-fledged case of heartaching homesickness. 

    Story of my life. Literally.

    When that happens, I try to keep putting one foot in front of the other, reminding myself that this too shall pass, that it'll just be a few days before the fog dissipates and I can see my life again, this one that I chose, and everything will make sense again. But it's always easier said than done. Maybe you know what that's like? When you try to talk some sense into your self and your self just buries her head into her arms and sobs?

    Anyway.

    DSC_6598

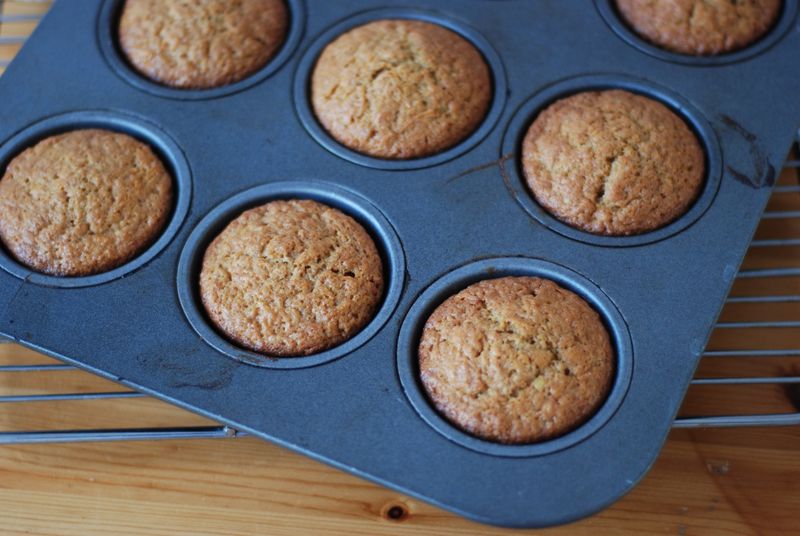
    Let's talk about cupcakes. Cupcakes always make people smile. Babies always make people smile, too, or at least this person. So I went to a co-ed baby shower a few weeks ago and brought a whole army of cupcakes along, chocolate, cream-filled ones and these spicy, carrot-flecked ones. A lot of Germans don't really know how to deal with cupcakes, so my little guys just stood rather forlornly (beautiful! but forlorn) in the corner of the table for a while, while the guests dug into their slices of homey, familiar, German apple cake instead. I felt sort of sad for my little cupcakes, so misunderstood, so alone. Then Max decided to break the ice.

    "These are really good", he said, or that's what I think he said, in any case. There might have been some mascarpone cream frosting obstructing the way. Yeah, yeah, I thought. You're just trying to make my ignored cakelets feel a little better about themselves. Sweet, but I see right through you. Then someone else came up to me, the grandmother-to-be, actually, with half a cream-filled cupcake in her hand and a wild look in her eyes. She seemed to agree with Max, but her mouth was full, too. After that, the cupcakes got a lot more popular.

    DSC_6600

    The recipe comes from Karen DeMasco's The Craft of Baking, which is also the home of my favorite cashew brittle of all time and other wonderful little things, like apple cider jellies, for example, or bittersweet chocolate meringues. The batter is easy thing to whip up, since it's oil-based with a touch of sour cream, no butter to cream in sight. Grating the carrots is a little bit harder. The batter, all folded together, looks almost pink in the right light. It's pretty.

    The cupcakes bake up into light little things with a gorgeous texture and a nice balance of spices. But what makes these really special is the frosting. Eschewing a more classic cream cheese frosting, Karen has you whip together mascarpone and heavy cream and crème fraîche, flavoring this loose, floppy mixture with vanilla and fresh lemon peel. It's sort of like a lemon fool, but instead of eating it out of a bowl like a louche 17th century English countess, you pile the cream on top of the cupcakes, the higher the better.

    Oh, who am I kidding, you will end up eating it out of the bowl like that countess. (Because no matter how high you pile, there will be leftovers, don't worry.)

    DSC_6639

    Mascarpone and whipped cream are a lot subtler than cream cheese and I wondered, as I licked the bowl, if the frosting would work with the cupcakes. But later on at the party, when I finally tried a cupcake myself, I realized how perfect the combination was. The lemon peel coaxes out the spices and the cloud of cool, slighly sour, sweet cream is the perfect foil to the tender little cakelet.

    Happy Monday, everyone. One foot in front of the other, nice and easy. Here's to a good week.

    Carrot Cupcakes with Mascarpone Frosting
    Makes 14 cupcakes

    Cupcakes:
    1 pound carrots (about 5), peeled
    1 1/2 cups unbleached all-purpose flour
    1 1/2 teaspoons ground cinnamon
    1/4 teaspoon freshly ground nutmeg
    1 teaspoon kosher salt
    1 teaspoon baking powder
    1/2 teaspoon baking soda
    1 cup Demerara sugar
    1/2 cup grapeseed oil
    1/2 cup sour cream
    1 teaspoon pure vanilla extract
    1 large egg
    1 large egg yolk

    Frosting:
    1 cup mascarpone
    1 cup heavy cream
    1/2 cup crème fraîche or sour cream
    2 tablespoons granulated sugar
    1/2 teaspoon kosher salt
    1/4 teaspoon pure vanilla extract
    Finely grated zest of 1 lemon

    1. Preheat the oven to 350 degrees Fahrenheit. Line a standard 12-cup muffin tin with paper liners, and line 2 more cups in a second muffin tin.

    2. Grate the carrots using a food processor fitted with the shredding blade, or the medium holes of a box grater. You will need a total of 2 1/2 cups.

    3. In a medium bowl, sift together the flour, cinnamon, nutmeg, salt, baking powder and baking soda.

    4. In a large bowl, whisk together the Demerara sugar, oil, sour cream, and vanilla. Add the egg and egg yolk and whisk to combine. Add the flour mixture and whisk until just combined. Using a spatula, fold the carrots into the batter. Divide the batter evenly among the muffin cups, filling them about three-quarters full.

    5. Bake, rotating the tins halfway through, until a cake tester inserted into the center of a cupcake comes out clean, 20 to 25 minutes. Invert the cupcakes onto a wire rack, turn them top side up and let them cool completely.

    6. To make the frosting, combine the mascarpone, cream, crème fraîche, sugar, salt, vanilla and lemon zest and beat on medium speed with an electric whisk or mixer until the mixture becomes thick, about 5 minutes. (The frosting can be kept in an airtight container in the fridge for up to a day. Let it come to room temperature and whisk together if necessary before using.) Using a metal spatula or a butter knife, spread 2 to 3 tablespoons of the frosting over the top of each cupcake.

    7. The cupcakes can be kept in an airtight container in the fridge for up to 3 days.

  • DSC_6700

    You know, most days I think I'm a pretty good catch. I have all my teeth, I earn my own keep, I speak four languages and I can cook (at least perfect spaghetti, a decent loaf of bread and poached eggs the old-fashioned way). Then along comes one man and cooks me a dinner made up of a few different root vegetables, for Pete's sake, and a simple roast chicken and I realize that I am a hack and a fraud and I might as well be serving cold cereal every night for dinner.

    I guess I should explain. Stephen Williams is no ordinary man, you see: he's a Michelin-starred gastropub chef and the friend of a friend of mine who very kindly invited me over to dinner the night that Stephen was in town and cooking for her.

    Now, I don't know if you know this about me, but I do truly believe that fancy food is sort of wasted on me. Give me a plate of spaghetti over a seven-course tasting menu any day. It's not that I don't appreciate the skill and artistry that go on behind that seven-course menu. It's just that I really kind of prefer, say, a plate of boiled vegetables and a good olive oil. Let's call it the Italian peasant in me.

    But.

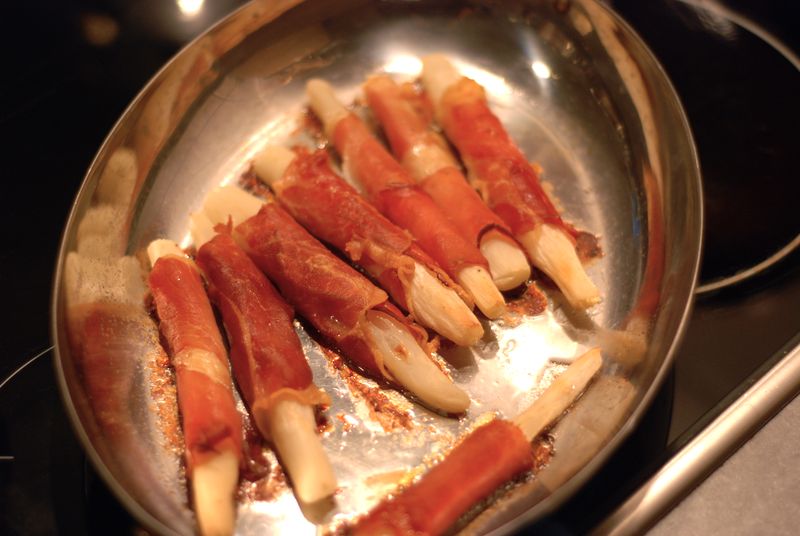
    I am not entirely a Philistine. Because as I sat at that dinner table, chewing on a stub of ham-wrapped salsify (oh, fine, five, no, seven of them), I distinctly felt the earth move.

    My goodness, it was good.

    DSC_6705

    And also slightly terrifying. If such glory was lurking behind a black-peeled root, what on earth else had I been missing my whole life? What other kind of magic was Stephen able to practice, if given a home kitchen and, say, a cabbage or a pound of carrots or celery root or a hulking rutabaga, for crying out loud?

    (Only a few of us will be able to find out – Stephen's leaving the Harwood Arms and traveling in Australia for a while before going to work at the Auberge de Chassignolles this summer. In other words, you must go to there.)

    It's too upsetting to comtemplate, really, so instead let's just get down to what actually matters: How to cook salsify yourself.

    First of all, find the salsify. Not such an easy task! You're looking for what basically look like black carrots. Black as night, with little white roots emerging from their spindly ends. Here's a visual aide, since I wasn't able to find any to photograph for you (the season is ending, even in Berlin, but remember this for next year!). Buy four or five or six salsify roots. Go to the butcher and get some real Black Forest ham, which should be the cured and smoked German kind, not the cooked American kind you see in sandwiches. You could also use prosciutto or jamòn Serrano, I suppose, though those are sweeter, unsmoked hams.

    At home, take out a pot with a lid and pour a couple of inches of water into it. Add a splash, just a splash, of white wine vinegar. Next, peel the salsify. This is a little unpleasant. The salsify, upon peeling, excrete the oddest sort of goo that makes your hands rather tacky and can be a little tough to wash off (though using the scrubber side of a sponge did the trick for me in a matter of seconds). The second you've finished peeling a salsify root, cut it in half and drop it in the pot of water. When you're finished, the salsify should be entirely submerged in the water.

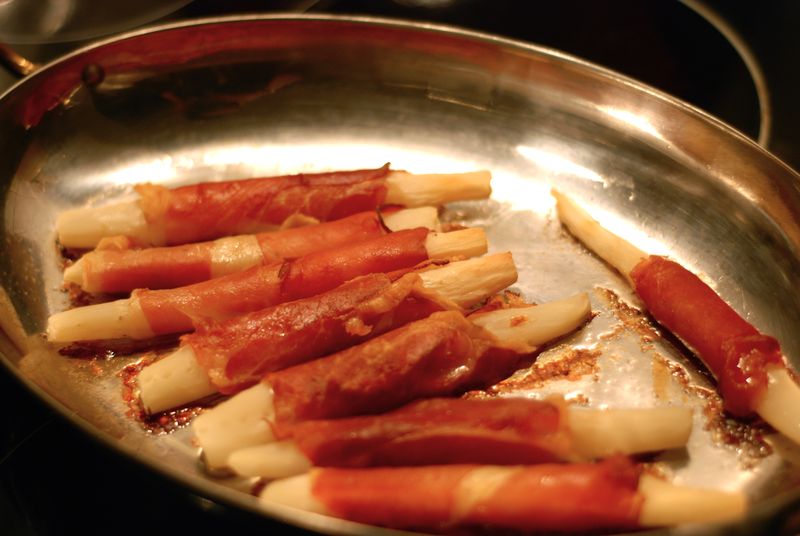
    You parboil the salsify, then wrap them in the Black Forest ham you've painstakingly sourced. (You won't regret it, I promise you!) These little packages are laid lovingly in an oil-smeared baking dish (does the oil actually do anything here? I'm not entirely sure) and then roasted for about 20 minutes, until the ham has crisped and the salsify is satiny-fudgy in texture.

    Good luck plating these: I guarantee at least three of them will not make it from the dish to the plate. Somewhere in mid-air, you will swoop in, your mouth agape. You will chew and taste sweetness and salt and the faintly mysterious flavor of the salsify, balanced somewhere between this world and the next. You will, quite unlike you, not offer anyone else the last one, but take it as your divine cook's right to finish it.

    And then you will give your inner Italian peasant a hard look and contemplate attending cooking school, if only to learn what Stephen knows.

    Salsify in Black Forest Ham
    Serves 2 as a side

    5 salsify roots
    1 glug of white wine vinegar
    5 slices real Black Forest ham
    1 teaspoon olive oil

    1. Preheat the oven to 350 degrees Fahrenheit. Fill a saucepan with a few inches of water and add the vinegar to the water. Peel the salsify quickly, cut each root in half after peeling and drop into the acidulated water.

    2. Bring the pot to a boil and simmer, covered, for 15 minutes. Drain the salsify. Oil a baking dish large enough to fit all the salsify in a single layer. Cut the ham slices in half lengthwise. Wrap each piece of salsify in a slice of ham and place, seam-side down, in the prepared pan.

    3. Roast for 20 minutes, or until the ham has crisped and the salsify are entirely tender. Serve immediately.
  • DSC_5778

    Oof, what a week. Mostly I'd just like to crawl into bed and stay there until Monday, burying my nose in a good book. Instead, I'm going to be on the hunt for the last of the winter's salsify, which I'll tell you about early next week. Holy cow, people, I have fallen for it in a big way.

    We also just got our wedding invitations, so I'm bracing myself for a few days of hand-lettering envelopes, and we have to finalize our registry tomorrow at a department store where they still write out the list by hand and then take photographs of all the items we'd like in the in-house studio before putting everything online. Quaint? Insane? Discuss.

    Also, if you had to pick one thing to put on your registry, what would it be?

    Elsewhere:

    Have you ever heard of an upside-down cheesecake? With rhubarb compote and a crumbled gingersnap topping, no less.

    Jane Lear's ode to her favorite Le Creuset pot (that also includes links to her favorite whisks and steamers) comes just at the right time.

    Mark Bittman brings potted shrimp (don't you want to just want to cuddle that recipe title?) into the 21st century with pimentón and garlic. I need to throw a party!

    Canal House Cooking's sixth volume, all about cooking from the grocery store, is ready for pre-order. Have a look here.

    xo breakfast, a sweet little blog all about breakfast, tells us how to make Jim Lahey's Pizza Bianca without a pizza stone, with some seriously irresistible photos.

    Molly gave me a jar of these hot pickled peppers in oil for Christmas and I'm now rationing them out in order to make them last longer. (In other words, I am currently hiding them in the fridge to keep a certain someone from gobbling them all up. Shh.) They are a revelation.

    Speaking of which, have you heard about Molly and Brandon's new venture, The Pantry at Delancey? Classes on meat-curing and misunderstood vegetables, private dinners, a kid's cooking camp plus frozen pizza and cookie dough to bake at home – Oh, to be a Seattle-ite!

    A massive Bay Area bake sale, with proceeds going to the Japanese relief effort, will be taking place on April 2; here's hoping it spreads across the country.

    And, to completely change the subject, in my next life I'd like to come back as a florist. Sarah Ryhanen is my idol.

    Stay safe, lovelies, and have a good one.

  • DSC_6473

    When I am feeling strange and out-of-sorts, I like to bake. Who doesn't, you ask? I don't know. To me, baking is one of the best ways to soothe an uneasy heart and a jumpy mind. There's the gathering of the ingredients: the smooth, cool eggs, the stodgy packets of flour, the slab of butter, the pouring of thick buttermilk, perhaps, or milk. Maybe you're chopping up chocolate, focusing on the cutting board, taking care with the sharp knife, watching the shards of chocolate spray out. Or you're putting together your mixer, beaters sliding into their grooves with a satisfying snap. Out come the bowls, one – two – three, the clean measuring spoons, so full of shiny promise. You stop thinking about the end of the world or your ragged cuticles or your looming taxes or human misery. You can only focus on what's in front of you: the recipe, the equipment, the counter.

    And the results are almost beside the point.

    It's not the cake I crave, or the cookies, or the loaf of bread. It's the rhythm and the music of busying myself in the kitchen, of scraping batter into a prepared pan and washing a sink of dishes while whatever's in the oven starts to smell very good. It's the warmth of a hot oven and sitting in the living room reading while the apartment tightens around me, holding me safe in its cocoon. It's the feeling of having accomplished something, even if it's as small as a little loaf cake. Something other than worrying and fidgeting and generally allowing unease, like poison, into my mind.

    So it's rather inconvenient when the cake I start to bake with every intention of either giving away or just ignoring turns out to be so delicious that I can't stop myself from slicing off a sliver every time I pass it. Silly cake, I think to myself. Your creation was supposed to be enough! And now it's got me contemplating cake for breakfast, which – if you know me – is rather out-of-character indeed.

    DSC_6376

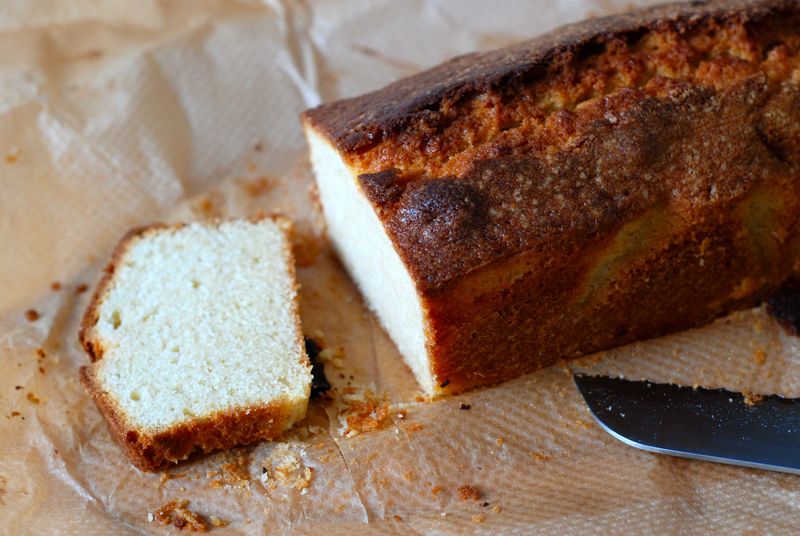
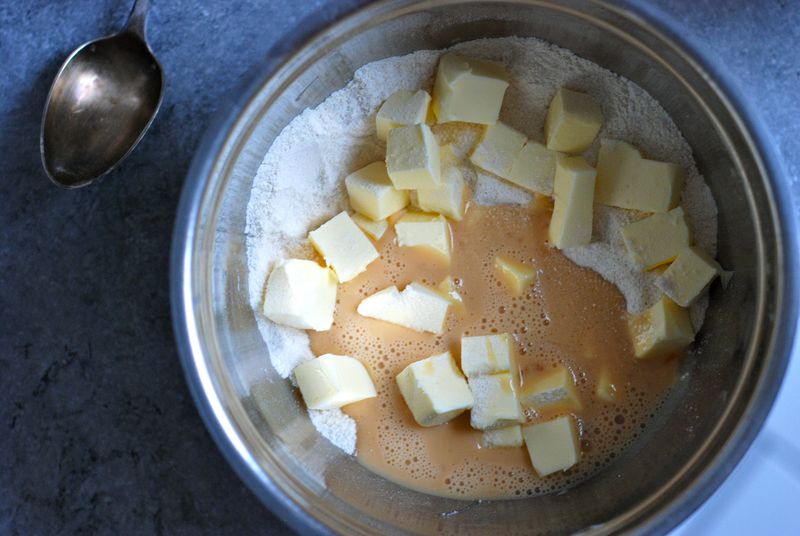
    The cake in question, as slim and simple as a shift dress, is a pound cake from Alice Medrich's Pure Dessert. (Has that woman ever written a bad recipe?) But it's a pound cake with a sly little twist: a measure of golden, rich Kamut flour poured in alongside the regular flour, which produces an exceptionally buttery pound cake that almost glows. Most intriguing, however, is Medrich's pound cake method: Instead of tediously creaming together butter and sugar, and then moving forward with the rest, it has you fill a bowl with dry ingredients and then dump in the cubed butter and half of the liquid ingredients at once. This you beat for exactly 60 seconds. Then you add a quarter of the remaining liquid and beat for exactly 20 seconds. You finish with the addition of the final bit of liquid and another 20-second beating, which leaves you with a silken batter ready to put poured into a tin and baked.

    Boom.

    Fastest pound cake ever.

    It's actually a little disconcerting, especially if you planned on being leisurely in the kitchen. Well, that, and realizing just how easily you could be whipping up Kamut pound cakes at a moment's notice whenever your little aching heart desired.

    DSC_6404

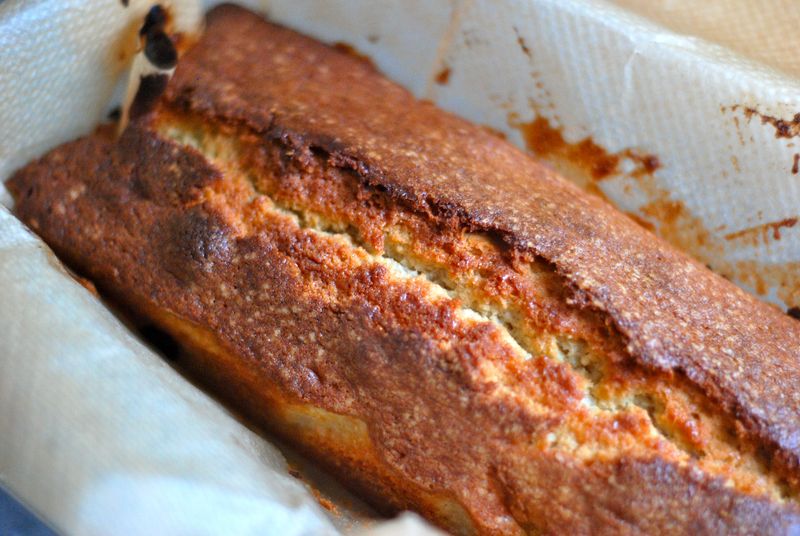
    And as is that wasn't enough, this pound cake bakes up into the most beautiful golden loaf. It's a work of art if you're into rustic, homey desserts (give me a slab of this over foam any day!) and would be a killer gift if you had a housewarming to go to or a dinner party. It keeps well for several days – we had it out on our counter loosely draped with parchment paper for two days and it was fine, even improving with the rest – and if wrapped tightly in plastic would stay fresh for longer.

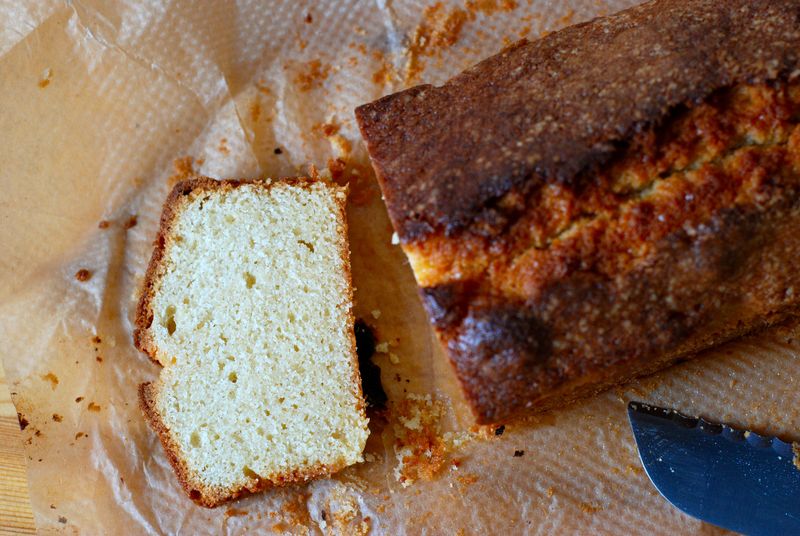
    Right after cooling, a slab sliced off the loaf is gorgeously damp and very rich. Almost too much so. But if you leave it out overnight, the loaf sort of sturdies up and reabsorbs the butter (or something) and what you get the next day are absolutely perfect slices of pound cake, sturdy but still light, fragrant but not too sweet, just as perfect eaten out of hand over the kitchen counter as they would be plated and topped with sugared berries for a pretty dessert. The crumb is super-velvety but if you pay very close attention while you let each bite melt in your mouth, you'll possibly taste the faintest shimmer of texture, almost graininess. It's lovely. Bewitching. I'm obsessed.

    DSC_6474

    In fact, after I kept finding myself sneaking back into the kitchen and cutting off slice after slice, I forced myself to wrap the cake up and put her in the freezer. There was much protestation from the other member of this household who happens to have the metabolism of a 14-year old boy. Lucky him! This lady has a wedding dress to fit into this summer.

    All of this to say, really, that I'm going to have look somewhere else for a long, meditative baking recipe to distract me from the rest of the world. But in the meantime, I discovered my holy grail pound cake and that was an unexpected gift.

    Kamut Pound Cake
    Makes 1 loaf serving 8 to 10

    3 tablespoons whole milk, at room temperature
    3 large eggs, at room temperature
    1½ teaspoons pure vanilla extract
    1 cup (3.5 ounces) sifted (before measuring) cake flour
    1/3 cup plus 1 tablespoon (1.75 ounces) whole-grain kamut flour 
    ¾ cup sugar
    ¾ teaspoon baking powder
    ¼ teaspoon salt
    13 tablespoons (6.5 ounces) unsalted butter, softened

    1. Position a rack in the lower third of the oven and preheat the oven to 350º F. Line the loaf pan with parchment paper.

    2. In a medium bowl, whisk the milk, eggs and vanilla to combine.

    3. Sift the flours, sugar, baking powder, and salt into a large bowl; if any bran is left in the sifter, add it to the mixture. Cut the butter into chunks and add it the flour mixture, then pour in half of the egg mixture. Beat on low speed with a hand-held mixer just until the dry ingredients are moistened. Increase the speed to high and beat for 1 minute only. Scrape the sides of the bowl.

    4. Add half of the remaining egg mixture and beat for 20 seconds. Scrape the bowl. Add the rest of the egg mixture and beat for 20 seconds.

    5. Scrape the batter into the pan and smooth the surface. Bake until a wooden skewer or toothpick inserted in the center of the cakes comes out clean. 55 to 65 minutes. (If the cake is browning too quickly, cover the loaf loosely with foil after 30 minutes.) Cool the cake in the pan on a rack for about 10 minutes, then remove loaf from the pan and cool completely on the rack.

  • DSC_6577

    It is confounding to sit halfway across the world, safe in my warm little office, with food in the fridge, my beloved books in their shelves, my loved ones wanting for nothing, and contemplate the havoc and terror wreaked on Japan. It leaves me speechless. All I can do is read the reports and look at the photos and grasp my head in disbelief. I cannot believe my eyes. The violent water coursing through streets, hurling boats aside as if they were made of feathers; entire villages obliterated; the newspaper saying that "one bright moment" was a man rescued on the roof of his house carried nine miles out to sea while his wife was washed away.

    I look at that white plate with two baked endives sitting up there and I see so much more. A hungry, black tide swallowing up everything in its path. An old man walking along a cleared path through utter devastation, weeping. Two parents kneeling in front of the muck-slicked car that held the body of their daughter at the wheel. Nuclear reactors on the precipice. And everywhere desperately frightened people, bereft of everything. How on earth, I wonder, do you make sense of that? I can't.

    And writing about anything else, about lunch or cupcakes or Paula Deen's artichoke-spinach dip, feels deeply weird. What I'd really like to do is bake a plate of ham-wrapped endives for every Japanese in need. But they wouldn't be just any old baked endives. They'd be magic endives, you see, that upon consumption would bring back the people washed out to sea. Would rebuild the houses in the blink of an eye, mop up the streets, repair the broken windows, straighten the downed power lines, make the nuclear nightmare simply disappear. And heal all the broken hearts, with just a few bites.

    DSC_6544

    But I can't. These baked endives taste good, but they can't do any of the above. They can distract you while you cook, I guess, from the neverending loop of unbelievably bad news coming from the web, the radio, the television. But they can't make things right again, not even close. Stupid endives.

    I don't really know what the right thing is to do at this moment. Besides donating money (please give, please). So I read about the small acts of kindness in Japan that show just what kind of a country it is, even when everything falls apart. I think about that woman washed away to sea and hope that I'll never forget her. I feed the one I love and bless the safe, flat country I live in, and give thanks for the strong walls of my apartment and the faraway ocean. I cook lunch and dinner and breakfast, over and over again, in gratitude for all that I have. That is, to paraphrase Ruth Reichl, my own moral responsibility.

    DSC_6567

    And still, I wonder about devastation and tragedy, why some of us are spared, why so many aren't. In a way, it makes me marvel at humanity. How we keep going in the face of the kind of news – from all parts of the globe – that makes your knees buckle and your heart break, over and over again.

    Baked Endives with Ham
    Serves 2
    Adapted from this recipe.

    4 Belgian endives, halved vertically
    Juice of a lemon
    Salt and pepper
    2 tablespoons unsalted butter
    2 tablespoons flour
    1 1/2 cups milk, room temperature
    4 slices Black Forest ham or cooked ham, up to you, halved
    2 ounces grated Gruyère cheese

    1. Heat oven to 400 degrees. Remove the outer layers of the endive, trim the bottoms and cut out the cores. Put the endives, cut-side down, in a large skillet. Season with salt and pepper and sprinkle with lemon juice. Add 2 cups of water to the pan, cover and bring to a boil. Simmer for 15 to 20 minutes, until tender. Drain.

    2. Melt butter in a saucepan. Whisk in flour and cook, stirring constantly, over low heat for 5 minutes. Slowly whisk in the milk, whisking all the time, in increments. Cook for about 10 minutes, until the sauce is thick and smooth. Season with salt and pepper.

    3. Lightly butter a baking dish big enough to hold the endives in a single layer. Wrap each endive in a piece of ham and place, seam down, in the baking dish. Spoon the béchamel over the endives. Sprinkle with the cheese. Bake the endives for 15 to 20 minutes, until the sauce is bubbling and the cheese has browned. Serve hot.

  • DSC_6158

    So, dear readers, what are you up to this weekend? I've been tasked with providing the cupcakes for a co-ed baby shower on Sunday, and as a result I've got visions of ganache-capped devil's food cakelets and cream-cheese-topped carrot cupcakes swirling in my head. No pink and blue buttercream here!

    Also, we've started a new tradition of making pancakes on weekend mornings. I introduced Max to buckwheat pancakes two weeks ago (he liked them, sort of), last week we had buttermilk ones studded with blueberries that I picked last summer and froze, and tomorrow we're going to try whole wheat. Do you have a favorite pancake recipe?

    Here's what I'm reading, cooking and craving this week:

    Francis Lam waxes rhapsodic about Gabriel Kreuther's turnip sauerkraut.

    I can't tear my eyes away from the soft, glowing pinks, creams, yellows and greens in these photographs of baby root vegetables.

    Scaccia Ragusana looks like a cross between a jelly roll and a pizza, but in the best possible way.

    Do any of you grind your own flour? Old-fashioned grain grinders are a dime a dozen here, so I'm tempted to give it a try.

    Marisa's vanilla-flecked orange Creamsicle Jelly looks dreamy and I love the idea of stirring it into plain yogurt for the full Creamsicle effect.

    Don't miss Sara Dickerman's little mustard overview in the Wall Street Journal and her blink-and-you'll-miss-it tip to swirl a spoonful of mustard into lentil soup before serving. Brilliant.

    Might soy-pickled mushrooms be my gateway to cooking like a Momofukan?

    And finally, I've been in an Edna Lewis state of mind lately, can't stop thinking about her, really. I've been re-reading her books and poring over her recipes. Then I found this short documentary about her life, which includes some stunning photographs of her as a young woman, regal as always, footage of her cooking, and some bittersweet memories from her friend and companion (and so much more) Scott Peacock. Oh, what I wouldn't give to go back in time, sit down for a roast chicken dinner at Café Nicholson with a slice of caramel cake for dessert, and see her peeking out of the kitchen now and then to gaze at her guests (Williams, Faulkner, Capote, Magnani!)

    Have a nice weekend, folks. I don't really know what to say about what's happening in Japan right now. I keep writing something, deleting it, writing something else, deleting that, too. The footage is terrifying to watch; I can only imagine, though I don't want to, what it's like to experience it. I hope those of you who are in Japan are safe, and your loved ones are, too.

  • DSC_5984

    Hey, so, I kind of need you to do me a favor. It's no big deal, really. Just a little favor. Leetle.

    What are you doing Sunday morning? Want to come over for breakfast? Please?

    See, the thing is, I just figured out how to make bagels. I spent my whole life convinced that they were complicated and difficult to make at home, that there was no point in even trying, that bagels were just one of those things best left to the experts. My whole life! And now I'm trying to make up for lost time. Thirty-three years' worth, to be exact.

    Because – because! – it turns out that making bagels is about as difficult as tying a shoelace. Or washing your hair. Or licking a stamp. I'm only exaggerating a tiny bit, I promise.

    All you really need is Peter Reinhart's recipe. Oh, sure, it says you have to use fancy bread flour, but I made this with the plain, old all-purpose in my pantry, and the bagels were perfection: chewy on the inside, crisp on the outside. It also asks for barley malt syrup, but I was far too lazy to go out hunting for that when I had honey in the pantry (which Baker Reinhart says is an acceptable replacement) and the bagels were delicious as can be. You can even do it all by hand, needing no stand-mixer or food processor or anything of the like.

    Easy. So easy! I can't get over it.

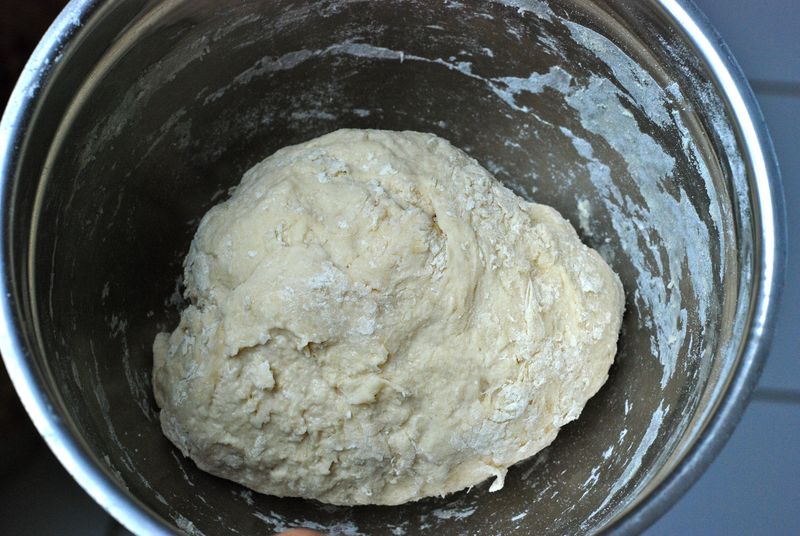
    Here's what happens. You make a stiff little dough just by mixing together the flour, water, yeast, honey and salt. It'll look a little coarse when you get it all together, kind of like this:

    DSC_5923

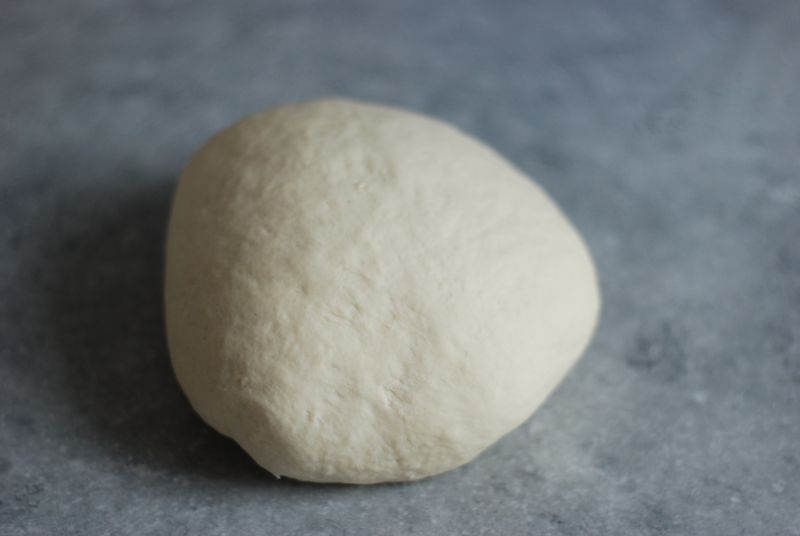
    You let that sit for a few minutes, just to relax. Then comes the fun part: kneading! Don't worry, it's just for a little bit, two, three minutes, tops. A few slip slap, slip slaps and you've got this:

    DSC_5925

    I don't know about you, but to me a gorgeous ball of bread dough, luminous and glowing in the late-winter light, is a thing of beauty. I could sit and gaze at it for hours, so full of promise and possibility. And the way it feels! Satiny smooth, like the underside of my grandma's arms. Some people have Apple products, others have automated vehicles; me, I've got dough to moon over.

    Once you've finished gazing at your ball of dough adoringly, you pop it in an oiled bowl and refrigerate it for a while. For example, if you wanted fresh bagels for Sunday morning breakfast, you could make the dough on Saturday around lunchtime, pop it in the fridge until just before bedtime and then shape the bagels and refrigerate them before going to sleep.

    Let's say you're doing it that way and it's now Saturday evening and the dough's been in the fridge since lunch. You take the dough out of the fridge and gently remove the now-puffed dough from the bowl. Divide it into six or eight pieces. (I made eight bagels out of this batch and I loved the modest size of them, but my mother complained that her bagel wasn't big enough. So if you like puffier bagels, just make six.) This next bit is really the most complicated part of the whole deal:

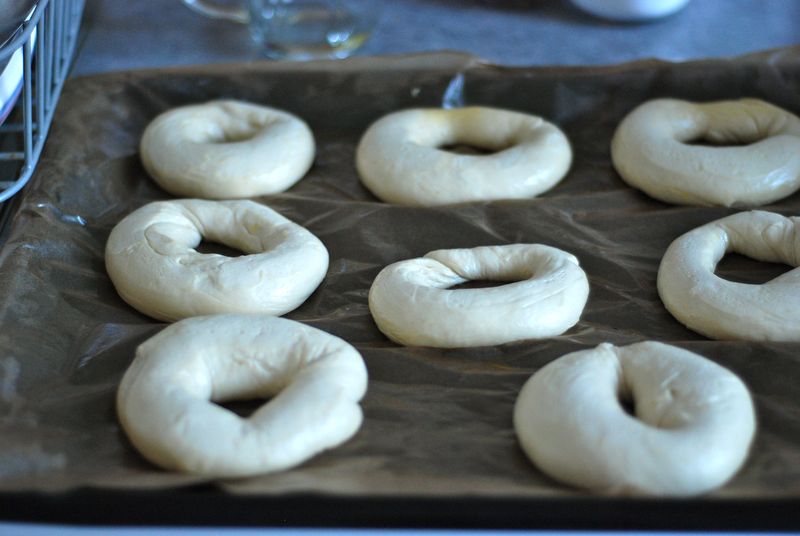
    Take each piece of dough and roll it out into a snake. Form the snake into a ring, pressing and working the ends of the dough into each other so that the ring doesn't come apart. This takes more pressure than I expected and I kept thinking, as I squeeeezed, that I was hurting the bagel dough or something like that. (Maybe I should spend less time gazing lovingly at dough balls and more time telling myself that anthropomorphizing dough isn't the best use of my critical faculties.) You'll get the hang of it. Luckily, bread dough is pretty forgiving. Plop your pretty little rings on an oiled piece of parchment paper, cover them with plastic wrap, stick them in the fridge and go do something fun with the rest of your evening.

    DSC_5959

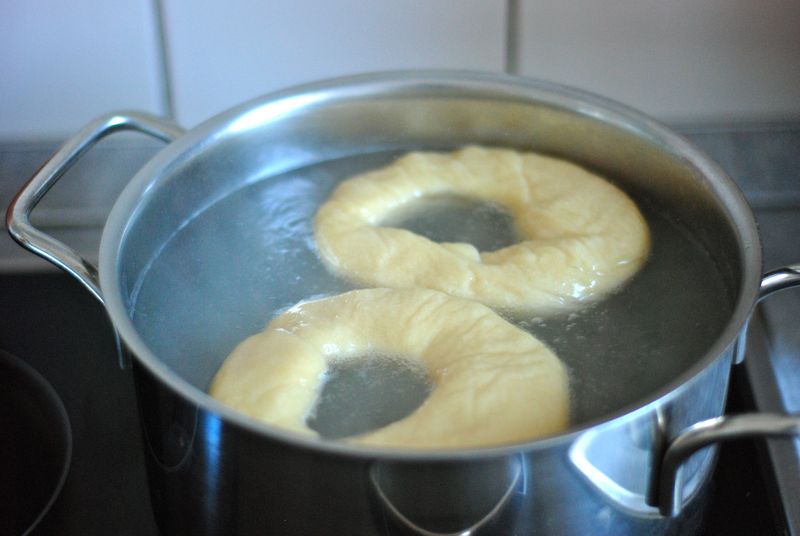
    The next morning, get up a little earlier than everyone else. Take the dough out of the fridge and let it warm up to room temperature. The best part is right around the corner, I'm so excited for you! Boil some water and add baking soda and salt to the water. Then gently slide the bagels, all puffed and wondrous under your fingertips, into the water (just a few at a time, unless you're working with a cauldron). In the water, the bagels expand a little and develop a bit of a skin. You turn them around, letting the other side have a go as well, and then you take them out and put them back on the baking sheet.

    DSC_5966

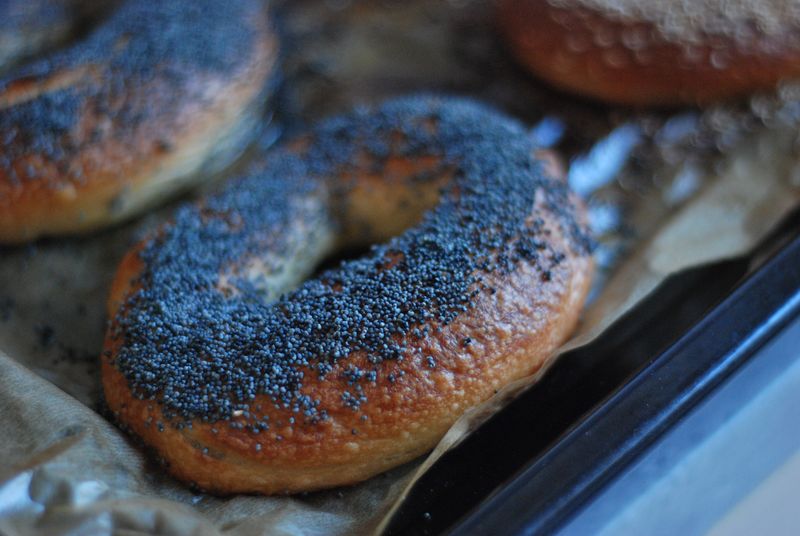
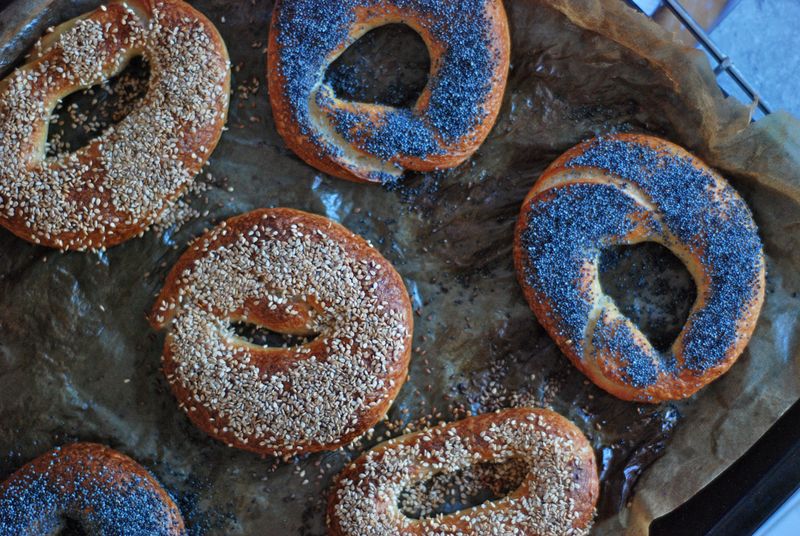
    I happen to think poppy seeds were put on this earth to be paired with bagels, but you can do whatever you like with the bagels at this point. Sesame seeds, poppy seeds, nothing at all, this is up to you. (Only the cinnamon sugar route should be done after baking – check the original recipe for more on this.)

    DSC_5970

    Just looking at these photographs is flooding me with warm, fuzzy feelings. I want to hug Peter Reinhart! I want to festoon myself with bagels! And I want to have you all over for Sunday breakfast so I can make a triple batch of these again!

    Once the boiled bagels are adorned with their cap of seeds, slide the baking sheet into a hot oven and get the breakfast table ready. Lox! Cream cheese! Butter! I hope you are prepared. Rouse those sleepy heads who have no idea just how good they've got it, or not yet, in any case.

    DSC_5988

    Because just about 15 minutes later, you're going to have a tray of gorgeously brown and crisp-skinned bagels in your kitchen, making your house smell like H&H (I used to live across the street from their 80th Street outpost – I know that smell like I know my own mother's). It will seem barbaric, completely inhumane, but you have to force yourself to wait about thirty minutes before slicing open a bagel and eating it for breakfast. Busy yourself with other things, like buying stock in a flour company.

    Excruciatingly, the minutes will somehow tick by and then, finally, you can throw yourself at your table and have yourself a bagel so good you will not believe your mouth. They're chewy in all the right places, their crust is speckled with the tinest, prettiest blisters, they have little pockets just waiting to be filled with a smear of cream cheese. And you made them. From scratch. Unbelievable.

    I swear to all that is holey (har) that these bagels are so good you won't even need H&H anymore. No, not even you, New Yorkers! I know you might not believe me. But that's what brings me around to my original question. What are you doing on Sunday morning?

    Bagels
    Makes 6 to 8 bagels

    3 1/2 cups (1 pound) unbleached flour (bread or all-purpose)
    3 teaspoons salt, divided
    3/4 teaspoon instant yeast
    1 tablespoon honey or barley malt syrup, if you've got it
    1 cup plus 2 tablespoons water
    1 teaspoon baking soda
    Poppy or sesame seeds

    1. By hand, mix the flour, 2 teaspoons salt, the yeast, honey and the water until the ingredients form a stiff, coarse ball of dough (about 3 minutes). If necessary, add a little more water. Let the dough rest 5 minutes.

    2. Knead the dough on a lightly floured surface until the dough feels stiff yet supple, with a satiny, slightly tacky feel, 2 to 3 minutes. If the dough seems too soft or too tacky, sprinkle over just enough flour as needed.

    3. Place the dough in a lightly oiled bowl, cover tightly with plastic wrap, and place it in the refrigerator for at least 1 hour and up to several hours. Keep in mind that the bagels must be shaped before proofing overnight.

    4. When ready to shape the bagels, line a baking sheet with lightly greased parchment paper or a silicone baking mat.

    5. Remove the dough from the refrigerator and divide it into 6 to 8 equal pieces. Form each piece into a loose, round ball by rolling it on a clean, dry work surface with a cupped hand; do not use any flour on the surface. If the dough slides around and won't ball up, wipe the work surface with a damp paper towel and try again – the slight amount of moisture will provide enough "bite" for the dough to form a ball. When each piece has been formed into a ball, you are ready to shape the bagels.

    6. Using your hands and a fair amount of pressure, roll each dough ball into a "rope" 8 to 10 inches long. (Moisten the work surface with a damp paper towel, if necessary, to get the necessary bite or friction). Slightly taper the rope at the ends so that they are thinner than the middle. Place one end of the dough between your thumb and forefinger and wrap it around your hand until the ends overlap in your palm; they should overlap by about 2 inches. Squeeze the overlapping ends together and then press the joined ends into the work surface, rolling them back and forth a few times until they are completely sealed.

    7. Remove the dough from your hand and squeeze as necessary to even out the thickness so that there is a 2-inch hole in the center. Place the bagel on the prepared sheet pan. Repeat with the other pieces. Lightly wipe the bagels with oil, cover with plastic wrap and place in the refrigerator overnight.

    8. Remove the bagels from the refrigerator 90 minutes before you plan to bake them. Fill a large stockpot with 3 quarts of water (be sure the water is at least 4 inches deep), cover with a lid, and slowly bring the water to a boil. When it comes to a boil, add the remaining teaspoon of salt and 1 teaspoon of baking soda, reduce the heat and simmer with the lid on.

    9. Thirty minutes before baking, heat the oven to 500 degrees.

    10. Test the bagels by placing one in a bowl of cold water. If it sinks and doesn't float to the surface, return it to the sheet, wait 15 minutes and then test it again. When one bagel passes the float test, they are ready for the pot.

    11. Gently lift each bagel and drop it into the simmering water. Add as many as will comfortably fit in the pot. After 1 minute, use a slotted spoon to flip each bagel over. Poach for an extra 30 seconds. Using the slotted spoon, remove each bagel and return it to the lined baking sheet. Continue until all the bagels have been poached. Generously sprinkle each bagel with a topping.

    12. Place the baking sheet in the oven and reduce the heat to 450 degrees. Bake for 8 minutes and then rotate the sheet (if using two sheets, also switch their positions). Check the underside of the bagels. If they are getting too dark, place another sheet under the baking sheet. Bake until the bagels are golden brown, an additional 8 to 12 minutes. Remove from the oven and transfer the bagels to a rack for at least 30 minutes before serving.  

  • DSC_6265

    The first time I went to Spain was ten days after 9/11. I worked in Rockefeller Center that year, as an assistant at Simon & Schuster. When I got to the office that morning, oblivious to all that had already happened while I was at the gym, in the shower, on the subway, a girlfriend of mine in the marketing department, whose father was a firefighter, was standing next to the elevator bank in the lobby and sobbing. She was the one who told me about the first airplane. I remember thinking that none of it made any sense. Don't worry, I tried to soothe her. I'm sure it was just an accident. As I rode up to the 14th floor, I thought that maybe a window washer, hanging outside on the face of the building, had startled the pilot of a small prop plane and the accident had ensued from there. I suppose your mind goes in absurd directions when it's forced to take in the incomprehensible.

    Up on my floor, half the office was missing, stranded in Brooklyn while the subways ground to a halt across the city, the island sealing itself off. The people who had made it in stood in my boss's office, the only one with a television set, and we watched the coverage together, staring in disbelief, some people making terrible noises, as the towers crumpled and fell in real time before our eyes. One man left and made a beeline for his office, closing the door behind him. His wife worked part-time on the 96th floor, I found out later. That Tuesday had been one of her days in the office. They had three small boys at home, beautiful children who sometimes stopped by the office and smiled shyly at me. She never did come home that day. Months later, they found her remains.

    I had a secret boyfriend at the office those days. We tried to be discreet about our relationship, not wanting to be water-cooler gossip, but I think we fooled only a few. We'd long had plans to take a trip in September together, settling on a 10-day journey from Madrid, for a friend's wedding, to Seville, Cordoba and Granada in the south of Spain. In those horrifying, paralytic days after the 9/11 attacks, when I could barely bring myself to get on a subway, much less an airplane, we had to decide whether to cancel our trip or whether to go. Maybe it was peer pressure, maybe it was all that idiotic "don't let the terrorists win" mentality, but we decided to fly. I was half-mad with fear on the way over the Atlantic. I remember my boyfriend telling me, trembling before takeoff, that it wasn't too late to get off the airplane and go home. But I forced myself to be brave.

    In Spain we were treated like war heros. Everywhere we went, when people found out we were New Yorkers, there were free glasses of sherry, long, sympathetic looks, even a mortifying standing ovation at the wedding we attended. We watched footage from New York on the Spanish news, saw Giuliani's grainy image here, there and everywhere. I looked away when the airplanes flew into the towers again and again.

    It's surprising, in retrospect, that I remember anything about the food. But three things I do remember. Unwieldy chunks of chorizo in red wine at a tapas bar near the train station, salty and sour. A leg of jamon behind a bar, with plump, fat-lined slices on a plate in front of us, next to our water-beaded glasses filled with pale yellow sherry. And pan con tomate for breakfast, salted and drizzled with olive oil. In another frame of mind, I would have loved that breakfast, so foreign to me, so new. But heartbroken and angry is really no way to go out into the world. I resented the stale bread, the mealy tomatoes, the pockets of oil first thing in the morning. All I wanted was a nice bowl of American cereal with milk for breakfast and to be home again, back in New York, with my people and my grief and that gaping wound at the south of the city.

    DSC_6217

    Back in New York, my boyfriend and I didn't last long. That was the thing about 9/11, it threw a lot of things into relief. You had to make decisions about what you wanted if today was going to be your last day, or tomorrow. That was one of the last trips I took with a film camera and after I got the rolls developed, I packed the photos away without even looking at them. It would be years before I unpacked them and had a look. I'm still a little baby-faced, standing in a tiled room in the Alhambra. Sitting by the banks of the Guadalquivir in a mini-skirt and flip flops. Smiling gamely in front of the grand Cordoba mosque.

    I didn't eat any ham for a long while after that trip. Couldn't face potatoes or eggs or any of the other things we ate ad nauseam whilst in Spain. It would be years before I went back to a tapas bar in New York. In the meantime, though, through cooking I discovered smoked paprika and Marcona almonds, I fell in love with Manchego cheese and quivering slices of membrillo and the sour little boquerones that Zabar's carried. I made paella and golden potato soup and eventually went back to Spain, under much happier circumstances.

    But the truth remains that I can't really eat Spanish food without thinking of our September vacation. And I can't think of that trip without thinking of that Tuesday and all that we lost. As improbable as it is, the two are forever linked in my head. Just like the rest of life, really. The sweet and the salty, joy and despair.

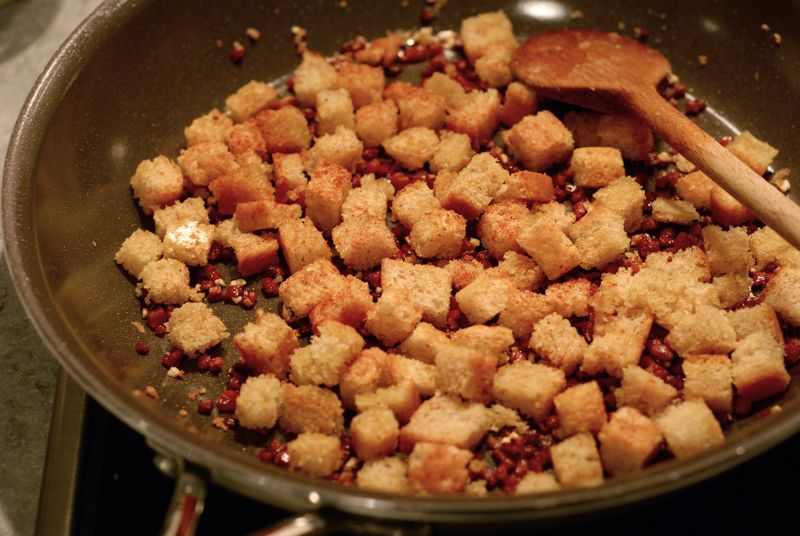
    Janet Mendel's LA Times piece on the importance of chickpeas in the Spanish diet included this little purée garnished with shreds of toasted, garlicky bread and salty, chewy bits of bacon or jamòn. It's the kind of soup you can make with your eyes closed, really, just a simple weeknight soup made a little bit special with a crunchy, savory topping of fried bread and ham. I like how the crusty bits of bread fight back against the hot, smooth soup, nicking the insides of your mouth. You're supposed to use dried chickpeas, but I used canned ones and it was still very nice.

    And I liked how, as I cooked, the aroma of the food on the stove made me think back to everything that happened all those years ago and how lucky I am to get to call all this the fabric of my life, sometimes vibrant, sometimes wrenching, but always, always worth living.

    Chickpea Soup with Crisp Croutons (Crema de garbanzos con pan frito)
    Serves 6
    Note: 1 cup dry chickpeas makes 2¾ cups cooked. Soak the dried chickpeas in water for 8 hours. Put them to cook in hot water and simmer until tender, about 3 hours.

    2 tablespoons plus 1½ tablespoons olive oil, divided
    1/4 cup diced pancetta or jamòn
    1 cup sliced carrot
    1 cup chopped onion
    1 clove garlic, chopped
    1 boiling potato (8 ounces), peeled and cut in pieces
    2 3/4 cups cooked chickpeas (I used a 28-oz can)
    1/4 cup tomato puree or sauce (not paste)
    2 quarts water, broth or chickpea cooking liquid
    Pinch of cayenne
    Salt
    Freshly ground black pepper
    Pinch of dried thyme
    1 bay leaf
    1 cup diced bread, cut into ½-inch pieces
    1/2 teaspoon coarsely chopped garlic
    1/4 teaspoon smoked hot pimentón

    1. Heat 2 tablespoons of oil in a soup pot over medium-high heat. Fry the pancetta or jamòn until the fat is rendered and the pork is crisp, about 2 minutes. Remove the pot from heat and tip the pot so fat drains to one side. Skim out the pork bits and reserve.

    2. Return the pot to the heat and add the carrot, onion and garlic. Sauté over medium heat until softened, about 4 minutes. Add the potato and cook 1 minute. Add the chickpeas, tomato puree and water. Season with cayenne, salt, pepper, thyme and bay leaf. Bring the mixture to a boil, cover, then reduce the heat and gently simmer until potatoes and carrots are tender, about 20 minutes. Discard the bay leaf.

    3. Purée the soup in batches in a blender. If desired, sieve the purée. Sieving the soup after it is puréed eliminates the chickpea hulls and makes for a smoother soup. I didn't bother.

    4. Shortly before serving, reheat the soup. In a small skillet, heat the remaining 1½ tablespoons of oil. Toss the diced bread in the oil until lightly toasted, 2 minutes. Add the chopped garlic and the reserved pancetta or jamòn and sprinkle with the pimentòn. Fry briefly to crisp.

    5. Serve the soup in shallow bowls. Scatter the croutons, garlic and pancetta over the soup and serve.